Ideas for Valentine's Day February 14 (photo, video)
We decorate the apartment on February 14th. Decor ideas for Valentine's Day (55 photos)
Below are some ideas for lovers and loved ones on Valentine's Day February 14 - Valentine's Day
How to decorate an apartment, how to make postcards with your own hands, gift ideas, how to decorate a festive table and how to make a surprise gift “100 reasons why I love you”, design ideas with photos and videos
Even in Russia, February 14 - Valentine's Day - is a popular holiday that all lovers celebrate in the name of their tender feelings for each other. Surely every couple wants to turn this day into a special and unforgettable love adventure. An ideal date that would be completely saturated with a romantic atmosphere and home comfort is what deepens in our memory for a long time. But how to create a real temple of love from an ordinary household environment? We are happy to share with you how to decorate the interior of the apartment on Valentine's Day.

Mysterious interior with hidden overtones
On Valentine's Day on February 14, the apartment can be decorated with special details that would carry a romantic message. For example, a calendar on clothespins with wishes or declarations of love for every day of the week.
In this case, the walls can be dotted with bright posters, on which touching lines from poems will be written. The atmosphere of mystery will give the right lighting.

Another rather extraordinary detail of the decor of the apartment on February 14 on Valentine's Day can be a decorated jar with the inscription: "100 reasons why I love you." This element will certainly cause pleasant feelings in your soulmate.

Bank: 100 reasons why I love you. We do it ourselves
Garland of hearts
Hearts for a garland
LOVE inscription
Flask with confessions
Homemade decor
Decor for Valentine's Day
Pillow with heart
sweet tree
simple decor
Heart of roses
Give the interior a pink innocence
Pink color symbolizes sincerity, tenderness and feeling of love. This shade is very successful in decorating a romantic-themed apartment. Other colors may also be present in the interior: white, as a symbol of purity, innocence, and red, which symbolizes passion.

In this color scheme can be used from cute figurines to all sorts of bows, ribbons and balloons from which you can build festive garland. You can hang such a miracle over the doors or just on the walls. Having shown at least a little imagination on February 14 for Valentine's Day, even with the help of balloons in the shape of a heart, you can decorate an apartment in a very extraordinary way.

Decorate the walls with flags with hearts for Valentine's Day
Knitted hearts
Volumetric letters LOVE
Bengal fire Heart
Valentine Arrows
Decor of ordinary things
Pompom wreath
Draw hearts on mirrors
We sew hearts for home decor
We decorate the walls
We decorate a romantic table for February 14
A romantic dinner is another step towards creating the perfect Valentine's Day date, so you need to pay a lot of attention to its design. The table can be decorated with a festive tablecloth embroidered with gold threads and shimmering sequins. It is ideally complemented by a composition of fresh flowers.

Decorate the table for Valentine's Day
To give the atmosphere a romantic touch, the area around the table can be strewn with rose petals.
Ideas for Valentine's Day. Table setting and decoration
Table setting and decoration for February 14 - getting ready for Valentine's Day (30 photos)
We decorate the table by February 14
Dinner at a beautifully laid table is a mandatory attribute of any celebration. St. Valentine's Day, the celebration of which is becoming increasingly popular among both families and couples who are just starting to meet, is no exception. Table setting, corresponding to the holiday of lovers, creates the necessary atmosphere of comfort and romance in the house for such an occasion.

The table for a festive dinner can be decorated using a wide variety of accessories. Traditionally, Valentine's Day decor uses white, pink and red. Ribbons, flowers, hearts from a wide variety of materials are indispensable elements festive serving. For romantic dinner it is good to place paired elements on the table. You can emphasize the spirit of the holiday by using the most ordinary things - tablecloths, napkins, vases, cutlery, table lamps.

Pink and white table setting for Valentine's Day

Romantic table setting for Valentine's Day photo
Textiles for the festive table on February 14
Usually festive tables are covered with a tablecloth. If you show imagination, it is very easy to make an ordinary white tablecloth, which is available for special occasions in every home, an excellent background against which the rest of the attributes of Valentine's Day will play. For example, you can sew a red or red satin ribbon at a short distance from its edge. Pink colour. The corners of the tablecloth can be decorated with bows or flowers from the same ribbon.


An addition to a table decorated with such a tablecloth will be napkins trimmed with satin ribbons or flowers from folded ribbons. Ribbon roses can decorate a candy bowl filled with "hearts" made of chocolate or cookies. You can also roll the napkins in the traditional way and tie with ribbons. A small ribbon attached to a napkin looks very romantic. living rose. You can fold the napkins into a heart shape.


Paper decoration: napkins for February 14
Perfect for table decoration paper napkins. It is worth stocking up with ready-made multilayer napkins with holiday symbols. You can serve a dish decorated using decoupage technique and napkins in the appropriate style.

Pink napkins in the decor of the table for Valentine's Day

Another simple but effective way to decorate a festive table is to cut out heart-shaped openwork substrates for cutlery and all other items on the table from plain paper or non-woven napkins.


Table decoration with flowers and plants
Traditionally, for most holidays, the table is decorated with flowers. Usually a low bouquet is placed in the center of the table. In the case of decorating the table by February 14, you can beat the vase or the space around it in the spirit of the holiday. A vase corresponding to the holiday can be bought or hand-painted with acrylic paints. Then such paints are easily removed if in the future the vase will be used for other events.

Food with hearts and flowers on the table for Valentine's day


By February 14, the tree of love is sometimes dressed up. The "tree" itself is made from flowering branches of various trees. Apple branches are good for this purpose. 2-3 weeks before the holiday, they must be cut and put in water. By the solemn event, the buds will open and leaves will appear, and possibly flowers. You can also decorate the usual winter branches of the shape you like with ribbons, various symbols of love - hearts, paired figures of swans, doves. An interesting option love tree decor - place photos of the couple on it. On the table, the tree of love should stand, so as not to cover those present.


Decorate the table for Valentine's Day photo
Table decoration for February 14 with lighting
Candles are often used to create a romantic mood. If the table space allows, you can lay out an image of a heart from low candles. Floating candles will look great in a low wide vase. Scented candles should be used with care to decorate a festive dinner. They are used only if it is known that the smell is pleasant to everyone present, and that it does not interrupt the aroma of festive dishes. The use of candles requires caution, since an open fire is always a danger of setting something on fire, especially cloth and paper nearby.

Candles for table decor for Valentine's Day
However, on the festive table, the table lamp familiar to us, decorated with our own hands, will also look good. So that its light is not too bright, the lampshade should be wrapped with a cloth. It can be a pink or red shawl or scarf. Check to see if the fabric is too close to the lamp. You can attach paper garlands of hearts, various figures or photographs to the fabric. It is also good to decorate the lamp with the ribbon flowers mentioned above.

Candles in closed candlesticks for Valentine's Day

Food for lovers on February 14
On Valentine's Day, you can not only beautifully set the table, but also cook some romantic food. The easiest option is food in the form of hearts. And no matter what it will be - toast and scrambled eggs for breakfast, watermelon hearts, sweets and cakes or meat steaks in the form of a heart, the main thing is to show your love for the one for whom you decorated your table.


Watermelon hearts for Valentine's Day

Romantic food for Valentine's Day

There are many options for decorating the table for Valentine's Day. But when serving for the holiday, we must remember that this is a celebration for two and take into account the aesthetic preferences of the partner. Then the celebration will bring joy and strengthen relationships.

Table decoration for Valentine's Day


Cutlery in the form of hearts

pink hearts
Bottle decor
Cookies with hearts
Heart shaped food
Festive box of beer
Candles are indispensable accessories for Valentine's Day
Candles will be the best to talk about the sincerity and seriousness of feelings on February 14th. They are able to give any room a romantic atmosphere. In their gentle shimmer, everything looks more mysterious, but at the same time alluring.

Over the past five years, candles have become very popular. Their diversity today knows no bounds. Wall, floor, bronze, copper, gilded - this is not the whole list of decorations offered. On Valentine's Day, it is advisable to place candles in the corners of the room, or hang them on the walls.

In order to give the interior more mystery and passion for the holiday of February 14, it is best to use a large number of small candles. For a romantic dinner, small scented candles (for example, scented with flowers or strawberries) can be placed directly on the floor, so they create an atmosphere of warmth and tenderness. A very interesting result is obtained when using candles in the form of hearts, angels, doves and cupids in the interior. They will be a kind of pendulum for the second half.

Candles look fabulously beautiful on February 14, the reflection of which can be seen in the clouds with champagne. You can use the idea with a vase filled with water, after which small candles should be placed in it (they will play the role of a kind of floating islands) and, of course, rose petals.

Bath decor with candles for Valentine's Day
floating candles
Candles for Valentine's Day
Making your own candlestick
Candles in rose petals
Candlestick decor
Heart candle
Cookie candles
Candle decor with hearts
Candles for Valentine's Day
We decorate with candles
We hope that these tips will help you create an unforgettable romantic atmosphere!
Do-it-yourself jar, box, book "100 reasons why I love you" for February 14
It's time to prepare for February 14th and think about what to give your boyfriend. What do you expect from your loved ones on Valentine's Day? Of course, love confessions, and a jar, box or book "100 Reasons Why I Love You", which I will tell you how to make today, will be an ideal gift. It is made simply, it is not expensive, but any person will definitely like such a gift, because everyone wants to be loved and everyone needs attention. So, we will learn how to make a jar of declarations of love with our own hands. How and from what can it be made?

Jar "100 reasons why I love you!"
Bank with declarations of love
The most popular idea is the "100 Reasons Why I Love You" jar. In fact, there may be fewer or more reasons, depending on your imagination and the size of the jar you have chosen for a gift. It is clear that the more reasons, the longer your guy will read them, and the more pleasant he will be. Choose somehow a beautiful number of reasons - and for work.


How to make a 10 Reasons Why I Love You Jar
We will need:
Glass jar with lid (sold at any home improvement store - for bulk products)
- Paper for confessions
- Satin ribbons
- Fabric, lace, colored paper, jewelry
Instruction:

How to make a jar of love confessions for Valentine's Day
We search the Internet for 100 reasons why I love you or we come up with them ourselves - especially for your loved one. Then you can simply print them on paper and cut them into thin strips, this is faster than writing by hand (in the second case, we cut the paper into strips in advance).

We print reasons for love on paper and cut into strips

We tie confessions with ribbons
We decorate our jar with lace, fabric, ribbons, bows, hearts, glue the inscription "100 reasons why I love you", put confessions in a jar and close the lid. the gift is ready, it remains to wait for February 14 and hand it over. Here's what we'll get:

Ready jar with photo confessions
More ideas on how to decorate a jar of "100 reasons why I love you":

Box of confessions on paper
Similar idea, but stacking our love confessions we will no longer be in a jar, but in a box, which can also be beautifully decorated or made from scratch with your own hands. You can take ready-made beautiful boxes, for example, from Raffaello sweets, and glue them with red paper, you can simply glue a cardboard box for confessions. Here is what you should get:

50 reasons why I love you box - how to make
Notebook or book "reasons why I love you"

Simple notepad with love confessions
Another idea is to arrange your declarations of love in the form of a book or a small notebook. Again, here you can use a ready-made notebook from the store and only decorate its cover and write a title, or make it from scratch - a cover, confession sheets, and then sew them together. Here's what you can get:

Beautiful book "why I love you" with your own hands
love cards

Cards - 52 reasons why I love you
It's a fun idea to write your love declarations on cards and then invite your boyfriend to play them. Such cards can also be made from scratch from thick cardboard or thin white plastic, or you can use a regular 52 deck. playing cards and make a surprise - confessions inside. Here's what you get:

Declarations of love on a deck of cards

How to make cards with confessions inside a photo
How else to arrange 100 reasons for love
If those ideas for 100 Reasons to Love are not enough for you and you want to do something more unusual, then here are a few more options for how you can arrange your confessions for February 14 as a gift to a young man.
Poster or card with love confessions

Postcard "100 reasons why I love you"
If you know how to work with computer graphics, you can draw a beautiful postcard in Photoshop with a hundred reasons for love, as in the picture above, decorating it with photographs or some other beautiful pictures. If not, you can simply buy a sheet of drawing paper and arm yourself with colored pencils or felt-tip pens, and draw a large poster with handwritten confessions.

DIY poster "100 reasons why I love you"
Paper balls inside
A beautiful idea is to use bright balloons for your gift. Inside, before you think of your balloon - put one confession at a time, and give the balloons. The bonus is that the guy will feel sorry for reading your notes right away, so he will burn with impatience for some time, not knowing what is inside.

Balloons with declarations of love
Gift bag
If you are preparing a gift for February 14 almost on the last day, and did not have time to decorate a jar or box, then your love confessions that you print, cut into strips and tie with ribbons very quickly, then you can simply fold them into a beautiful gift bag or use other ready-made holiday packaging.

Declarations of love with a gift bag
For sweet tooth
If your loved one has a sweet tooth, you can put some candy in the 100 Reasons Why You Love Box, or just use a store-bought candy box to put your confessions in.

For the sweet tooth - confessions in a box of sweets
Love letter in an envelope
You can also simply write your reasons on pieces of paper and put them in a beautiful envelope. By the way, such a love letter can be sent by mail if your loved one lives in another city.

100 reasons why I love you in an envelope
Wall stickers
AND last idea, how you can arrange 100 reasons for love - these are bright stickers on which you need to write these confessions and stick them in your loved one's apartment.

"100 reasons why I love you" wall stickers
And here are 100 reasons for love that you can write on pieces of paper and put in a jar or box. I understand that it can be difficult to come up with them yourself, but you can find some ideas in the video below:
14 master classes: how to make a postcard for February 14 with your own hands
February 14, also known as Valentine's Day and Valentine's Day, is the time when we are all waiting for love and want to give love to everyone around us. You can show your sympathy in different ways, because the most important thing is attention, and if you want to give your boyfriend a gift, you can make it yourself. Let it be just a handmade postcard, but it can be more valuable than the most expensive gift, because it’s not in vain that they say that we put our soul, and therefore our love, into what you do. And today we will look at 14 step-by-step master classes for making postcards for loved ones on February 14th.

We will need colored paper and cardboard for making a postcard, glue, scissors, as well as a pencil, on which we will wind strips of paper, making this postcard:

The quilling technique is simple - cut colored paper into thin strips, and wind them around a pencil. Next, stick heart-shaped postcards on the cardboard (you can draw it with a simple pencil). From blue or white, make a border for the received heart - stick it on the side. We fold hearts from colored paper and glue them around the heart on a postcard. Here step-by-step instruction in photos:
What do we need
Strips for edging
Heart strips
twist on a pencil
Glue on a postcard
Making hearts
If you want to do some intricate postcard quilling by February 14th, here are four more ideas for you:
Beautiful quilling
Postcard quilling
Quilling heart
2. Postcard with butterfly hearts and memorable date

Greeting card with hearts-butterflies and memorable date
A very beautiful card with hearts that look like a butterfly and a memorable date - it can be either February 14, the holiday for which you are making this card, or the date of your acquaintance or wedding. Calendar on desired month you can print it in a beautiful font, buy a frame for a postcard in a store or do without it, and cut out hearts from paper.

Commemorative date on a postcard
It is made no less simple. We print the calendar and draw stripes on top with a thin pencil where we will glue the hearts. We smear them with glue. We fold the hearts themselves in half, and put them in the right place with tweezers. For such smooth transition colors like here - use appropriate paper colors. Do not forget to stick one of the hearts on the date you need in the calendar, and insert the card into the frame. If something is still not clear, look at the photo instructions:
Choosing paper
Cut out hearts
Printing a calendar
Glue hearts with tweezers
Making a heart
Postcard is ready
3. Postcard from coffee on February 14

Card from coffee beans for Valentine's Day
Surely your man loves coffee and one of the ideas is to give him a jar of his any coffee for Valentine's Day, and so that it is not so banal - in addition, a hand-made coffee postcard. Coffee can be as simple decorative element- a few beans randomly, and you can also make a heart out of coffee beans. Here are some more coffee card ideas:
coffee and leaves
Coffee Valentines
Coffee in the decor
coffee heart
Heart of grains
Grains on a postcard
coffee postcard
Coffee and lettering
4. Valentine's Day Cards with Overlay Elements
If you like gentle, light, snow-white postcards, but lack some interesting idea, you can use overlay elements. It also works great in combination with corrugated or embossed paper. The elements themselves - these can be hearts, houses, animals or something abstract, are cut out of paper and glued to the card in layers. You can also use cutouts and backgrounds, or add ribbons and some bright elements to decorate the card. Step by step wizard a class is not required here, but here are some ideas that will help you:
Pulse on a postcard
Fairytale castle
Satin ribbon
Postcard with heart
On corrugated paper
scarlet heart

Slits and background
clouds and plane
5. Round postcard with stamp for Valentine's Day

Round card with stamp for Valentine's day
To make this beautiful Valentine's Day card, we need red sparkles and something similar small and loose, as well as some kind of stamp or seal with a heart. If you have something suitable, you can do it, if not, check out other postcard master classes. This postcard is easy to make. Blanks are cut out (see photo instructions). Spread the stamp with glue and put a stamp on the workpiece. Sprinkle with glitter when the glue dries, just shake off the excess - you will get a heart. Next, just glue the blanks on top of each other and add a satin ribbon - the card is ready.
What you need
Cut out blanks
We put the seal
Paste the circle
We glue the tape
We collect the finished postcard
6. Volumetric postcard for February 14 master class

Volumetric postcard for February 14 master class
Simple but very cute voluminous postcard for February 14, for which we only need paper, a colored background with flowers or hearts (can be cut from an old magazine) and threads. We cut out the blanks, paste the background inside the postcard and part of it on the cover. We make an inscription from letters on a thread and glue it on a postcard. It remains to make the legs-stand and the card is ready.

Cut out blanks

Cutting through the heart

Paste the background

The inscription on the thread

Folding the stand

Glue on a postcard
7. Postcard from buttons for Valentine's Day
If you liked the idea of using coffee beans for a February 14 card, then you might also like to use buttons in the decor. Here you can choose red, pink, white and other buttons in bright or pastel shades. Of these, you can put a heart on a postcard or just add a few buttons to its design. The only difference from postcards with coffee is that buttons need to be sewn on, not glued.
Decor with buttons
I love buttons
Heart and button
Button heart
Balls and buttons
Buttons on a postcard
Fabric heart with button
8. Card with voluminous hearts inside
Card with voluminous hearts inside for Valentine's Day
Would you like to make such a card with voluminous hearts inside? It is not difficult. Photo instructions, as well as the templates that you will need for it and the assembly diagram - in the photo below. All you have to do is print the templates, stick them on the postcard, make cuts and match the two parts of the postcard.
9. Postcard "Happy Valentine's Day" do-it-yourself scrapbooking
Postcard Happy Valentine's Day do it yourself
If you want to make such a postcard, find beautiful paper or cardboard - often sold in ready-made scrapbooking kits. In the same way as before, we cut out the blanks and glue them together. We close the seam with a satin ribbon, and we order it with a button.
How to make a postcard for February 14
We cut out the form for the inscription on the postcard, if you have bad handwriting- the inscription itself can be printed on a printer, and then circled with a felt-tip pen or left as is. We decorate a cloud with an inscription with rhinestones and glue it on our postcard. The gift is ready.
Adding the inscription Happy Valentine's Day
10. simple valentine paper and lace
Simple valentine with lace
For a loved one, you can spend an hour making some kind of complex and chic postcard. But if you want to make a lot of valentines for friends with your own hands, then you need some simpler master class, for example, this one. We make a small postcard from pink or red paper, cut out a heart, paste a beautiful background (from a magazine, for example) and attach lace to the glue or double-sided tape at the bottom - the valentine is ready, and it will take you very little time to make it.


11. Patchwork card for Valentine's Day
How to make a postcard from scraps for February 14
The eleventh postcard is again simple. For her, we need paper, scissors, glue and shreds - from fabric or paper for even more simple option. Draw a heart and cut it out. We glue the shreds on the substrate, glue the substrate on the inside of the card - the valentine for February 14 is ready.
Draw a heart
Cut out
Cooking shreds
Glue on the substrate
12. Chic card with roses for Valentine's Day
Postcard with roses on February 14 - how to make
If you are bored simple postcards and you want to do something complicated, here's an idea for a chic card with voluminous heart-shaped roses. Making it is not as difficult as it seems. For roses, we need pink and green corrugated paper. First, we fold the blanks for the roses. Then we fold the green paper and cut out the leaves, as in the photo below. We collect our rose and give it a more natural shape with our fingers. Corrugated paper wrinkles easily and holds its shape well, so you can make roses more alive and leaves more natural. We just have to make the right number of roses and stick them on a heart-shaped card. Here is a photo of the master class:
Making a postcard
Form for roses
Making roses
Folding green paper
Cut out the leaves
We fold the rose

Shaping
Making roses
Glue them on a postcard
13. Video tutorial for making a Valentine's Day card
Postcard from paper and satin ribbon for Valentine's Day master class
How to make this postcard will tell you and show on the video its author. Enjoy watching.
14. Do-it-yourself different ideas for postcards for February 14
Want to more ideas for cards you could make for Valentine's Day? Here are 40 more photos beautiful postcards handmade, and you can also get some ideas for your own gift for this holiday.
Hearts on a string
With sweets
With lace
colored balls
With recognition
With your photos
Flowers - hearts

cute postcard
love in an envelope
For the musician
Bike
Hearts and Ribbon
White postcard
With flowers
Hearts and flowers

Balloon
Volumetric letters
For Twitter lovers
Clothespin heart
By bike
Heart quilling
With love
Key to the heart
simple postcard
in the shape of a heart
Typewriter
hearts on clothespins
Heart balloons
pink postcard
Postcard idea
lovers
With lace
Postcard with ribbon
quilling
Hearts in a box
The card often comes with a gift, and if you want to give your loved ones something else this holiday too, here are 5 gift ideas for February 14th that you can also make yourself.
5 do-it-yourself gift ideas for February 14: give love to loved ones!
Every year on February 14, the most romantic day of the year comes - this is St. Valentine's Day, when lovers try to express their feelings with deeds, gentle words, confessions and gifts. It is especially pleasant when they are made with your own hands, because a piece of soul, love and warmth is invested in their manufacture. Such gifts are the most expensive and unforgettable, and in addition, they carry an immense charge of positive and tenderness. Surprises can be made completely different, decorate the interior thematically or present something completely personal. It's up to you to choose, we'll just give you a few ideas.
1. Volumetric letters of the name of a loved one
They can be made from solid cardboard or plywood of any size. It can be not only a name, but also any words of recognition. To decorate the letters, yarn of any color is taken, but delicate shades are better. Glue is applied to the base, and the yarn is wound in even rows. You should not rush to cut the ends of the threads, you must wait until the glue is completely dry.
When the letters are completely ready, you can start decorating them. For this, any decorations are suitable - flowers that can be made from felt or take ready-made ones, bows, rhinestones, and more.
It is believed that this holiday was named after one of the two martyrs - Valentine of Interamne and Valentine of Rome.

On this day, people give their loved ones flowers, sweets, postcards (valentines) with poems and declarations of love, as well as many other gifts that symbolize love.
But a handmade gift will make no less impression than a purchased gift.
Here are some DIY gifts for Valentine's Day:
DIY candy and confetti crackers for Valentine's Day
You will need:
Cylinders from paper towels or toilet paper
Wrapping
Confetti
Scissors
Candy or other small gifts.

1. Cut the cardboard cylinder in half.

2. Fill each half with candies and confetti.

3. Fold the halves back and secure them together with tape.
4. Cut the sheet wrapping paper, wrap it around the connected halves of the cylinders and secure with tape.

5. Tie two pieces of ribbon to both ends of the cylinder. Scissors can curl ribbons.
To get the contents, you need to break the craft in the center (where the halves of the cylinders are connected).

DIY vase with hearts and roses for Valentine's Day (master class)

You will need:
jar
strong thread
Red felt
Glue and tape .

1. Cut out small hearts from felt.
2. Pass the needle and thread through the hearts. Leave about 5-7 cm between the hearts.

3. Tie a knot on both sides of the thread.

4. Glue or tape one end of the thread to the jar and start wrapping the jar with a thread with hearts.
The vase is ready, it remains to pour water into it and put flowers.
DIY Valentine's Day (photo): a bouquet of pompons

You will need:
Scissors
Green felt
Twine
Multicolored threads
White acrylic or spray paint
Hot glue.

Making a pompom
1. Wind the thread around your fingers 50 to 75 times. For a large pom-pom, you need to wrap around 4 fingers, and for a small pom-pom around 2. Cut off the thread.
2. Cut another piece of thread 15-20 cm long and wrap it around the lump that you wrapped around your fingers. Tie a knot.

3. Carefully remove the thread from the fingers and cut the loops on the right and left with scissors.
4. Make a more fluffy pompom by adjusting the threads. It is also worth trimming the thread a little with scissors to make the pompom more even.

Preparing flower stems and connecting parts
1. Take the branches and paint them white. Let the paint dry.
2. Using hot glue, attach the pom pom to the branch.

3. Cut out leaves of any shape from green felt and glue them to the branches.
4. Make some flowers to make a bouquet.
5. Wrap the flower bouquet with ribbon and twine. You can add a note of congratulations to the bouquet.

Crafts for Valentine's Day with your own hands: puzzle cube with hearts

You will need:
4 wooden cubes
Acrylic paints and brushes
PVA glue
sequins different colors
Heart template
Pencil.
1. Place 4 cubes on a flat surface as shown in the image.
2. Put a heart template on the cubes and circle it with a simple pencil.


3. Start applying PVA glue to the cubes with a brush, namely to the places indicated with a pencil.
4. Gently sprinkle glitter of the same color onto the glue. Remove excess with a brush. To make the glitter fit tightly, you can apply a layer of glue on top. Let the glue dry.


5. Turn the cubes and repeat steps 1-4 to make another cardio, only this time use a different color of glitter.
6. Cover all sides of the cubes with heart details.
You can put all the cubes in a fabric bag, which can also be decorated with a heart.

DIY Valentine's Day Gifts: 52 Reasons Why I Love You.


You will need:
A deck of cards (36 or 52 pieces)
Binding rings
colored cardboard
Double-sided tape
Hole puncher
Pen.

1. Make two holes in each card with a hole punch.
2. Place all cards in a pile and thread through the binding ring holes.
3. Cut out several small rectangles from cardboard, the size of one should not exceed the size of the card.
4. Using double-sided tape, stick the rectangles onto the cards.

5. On each rectangle, write one reason why you love your significant other. You can write something with humor for a change.

Do-it-yourself gift for a guy on February 14: a picture of kisses

You will need:
white cardboard
Scissors
Frame for a picture or photo
1. Cut out a piece of cardboard a little larger than your frame.
2. Apply a few "kisses" on white cardboard.

3. Insert the cardboard into the frame and write on reverse side personal message.

Do-it-yourself gift for February 14: a heart made of cones

You'll need:
Red thick paper(in this example, 7 sheets of 30x30 cm are used)
Scissors
Hot glue or PVA glue
Strong thread.
1. Cut out several (in this example 14 pieces) squares of 7x7 cm from red paper for the inside of the heart, and 10x10 cm (in this example 47 pieces) for the outer part.
2. Cut out a heart from cardboard. In this example, the widest part of the heart is 40 cm.
3. Make cones out of all the squares.

4. Start gluing the cones to the cardboard heart. Large cones on the outside and small on the inside.


Here's another option:

Gifts for Valentine's Day: a heart embroidered on an envelope or postcard

You will need:
colored thread for knitting
Thick paper envelope or colored cardboard
Needle (large enough for thread)
Pencil
Rubber
Scissors.
1. Draw a heart on the cardboard or envelope.
2. Use a needle to make several holes along the line of the drawn heart.

3. Start threading through the holes in different directions. Tie a knot at the end.


DIY gift ideas for February 14: hearts with confetti and an arrow

You will need:
paper tracing paper
Colored cardboard (white, red, pink)
Confetti (you can buy ready-made or cut from colored paper)
black marker
red thread
PVA glue or hot glue
Scissors.

1. Making a heart template. Draw a heart on cardboard and cut it out. To make it symmetrical, you can fold the cardboard in half and draw half a heart and cut it out, and then straighten the paper.

2. Lay the heart template on the tracing paper and circle in two places to cut out two identical hearts.

3. We make arrow feathers.

3.1. Fold the red cardboard in half and draw half of the feathers for the arrow (see image) and cut them along the line with scissors.
3.2. Straighten the paper feathers and cut them along the fold line. On each half, stepping back from the edge by 0.25 cm, make a fold.
Repeat the same with the pink cardboard so you end up with 4 pieces for the arrow.
4. We make the tip of the arrow.

4.1. Cut off about 6 cm from the skewer with scissors.
4.2. From red and pink cardboard, cut two identical triangles.
4.3. Glue the triangles to each other so that they cover the tip of the skewer.
5. We collect a heart.
5.1. With a black marker on one of the tracing paper hearts, write something nice for your soulmate.
5.2. Fasten both hearts with a red thread and a needle. Leave some space to fill the inside with confetti.

6. Fill the heart with confetti.
You will need:
colored cardboard
Scissors
Stationery knife
Ruler
PVA glue
paperclips
corrugated paper
Prints (optional)
Jewelry to taste.

1. Cut a strip of colored cardboard. Its size is 28x4 cm.
2. Fold the strip in half.
3. Bend the ends of the strip towards each other so that the outer sides of the ends touch.
4. Glue the ends of the paper tape together and secure with two paper clips.
5. Cut out a square from cardboard, the size of which exceeds the size of a paper heart.
6. Apply some glue to the edges of the heart and stick it to the square.
7. Use scissors to cut the square along the outline of the paper heart. You have a small box.
8. Place a piece of corrugated paper on top of the box and cut out a heart slightly larger than the heart cardboard paper. Cut the fringe with scissors.
9. Fill the box with sweets or notes, apply a little glue on its edges and glue a corrugated paper heart. You can stick another corrugated paper heart on top (for strength).
10. Decorate the box with ribbon, hearts, feathers, etc. You can add the inscription "Don't break my heart."
How to make a gift for February 14: a pom-pom heart

You will need:
Ready-made pom-poms or red knitting thread to make them
Scissors
Pillow
Thread and needle
Glue for fabric (if necessary).
In this example, 22 pom-poms were used. The size of the pillow is 40 x 40 cm. The size of the resulting heart is 20 x 20 cm. One pompom has a diameter of 5 cm.
Our winters are so long and cold, but we long for warmth. Therefore, Valentine's Day, which is celebrated on February 14, has become so popular. This warm holiday is filled with love and attention from loved ones. And on this day, it is customary to decorate the house and exchange valentines.
Making crafts for Valentine's Day with your own hands is a pleasure. Website "Mom can do anything!" collected original ideas to make handmade gifts. With them, the holiday will be especially warm, cozy and filled with love.
On such a day, it is customary to give flowers and sweets to loved ones, and a hand-made gift will be especially cute, it will decorate a shelf or bedside table of a loved one. Such gifts carry the warmth with which they were nourished during manufacture.
Content
Paper and cardboard valentines
Of course, our stores are literally littered with various bright postcards, but a handmade valentine will be especially expensive. It will reflect your personality.
What is Valentine's Day without hearts and roses. We offer to combine them into one and make a heart of paper roses.

Gentle kisses and hearts must be present on this day.

This valentine speaks for itself. The proposal of the hand and heart will definitely end with a quick wedding.

Such a valentine looks original and beautiful, not only a wish is placed in it, but you can also put a small gift.

Valentine's card with a voluminous heart.

And such a cute valentine will tell about endless love.  This Valentine's card is very easy to make, but look how beautiful it looks!

Volumetric valentine with a heart

Just glue hearts on thick white paper, and draw stems from below, a simple and cute valentine is ready! Add details to it: satin ribbons, rounded corners, backing, it will look especially beautiful if hearts are cut out of felt.

Another version of the postcard


You will understand how to make such a Valentine from this master class with a photo. Cut out two hearts from paper and cut them in a spiral. Then connect the inner hearts as shown in photo 3. Bend the thick paper in half. Now from the inside, glue one large heart from the beginning, then the second (steps 6-7). The postcard is ready.


Here is such an interesting and voluminous valentine you can make for your loved ones.
Craft Ideas for Home Decoration
To create a special festive atmosphere needed in the house special decorations. Of course, now they are easy to find on store shelves, but it is much more pleasant and interesting to make them yourself. Here are some craft ideas for decorating your home for Valentine's Day.
Garlands are one of the simplest and spectacular ways home decorations. On holiday consecrated love It is customary to make them in the shape of hearts from paper of different shades of pink. Check out these options for making garlands:


This option is easy to do if you know how to sew on a typewriter: cut out hearts from colored paper (it is better to take printer paper) different forms and then machine stitch them one by one. You can hang them as shown in the picture, or you can hang them from wall to wall - in this case, the line should go across the heart.
In this way, in childhood, chain garlands were made for the new year, but we propose to make them simpler and in the shape of hearts. You will need:
- colored paper;
- scissors;
- stapler.
Cut the paper into strips 10-15 cm long and 1-2 cm wide. Bend each in half, now take a stapler and use it to connect the ends of the strips, bending them slightly inward. Get a heart. Then insert another strip and connect in the same way. This way you will make a long and beautiful garland. 

A beautiful craft for the house on February 14 will be a wreath. It is hung both on the front door and indoors on the walls. Of course, such wreaths are made in the shape of hearts.


This version of the wreath is very simple and does not require any expensive materials, as well as skill. Just take thick cardboard and cut a ring out of it. Then take sheets of red and pink paper and cut out many hearts from them. Bend each heart in half to make the wreath voluminous. Now glue them with a glue stick on the ring.

This heart is made in a similar way.

From cardboard and thread, you can make an excellent craft and decorate the interior with it. Cut out a heart from cardboard as shown in the photo. Take a thick thread or red yarn and fasten its end to the heart. Start wrapping. Gradually you will get voluminous heart. It will look even more interesting if you take threads of two shades of red.

And such a wreath of sweets will be very popular with children. 
How do you like this wreath of hearts?

On Valentine's Day, the house is decorated with all kinds of hearts, and in the form of a heart, it will most likely live in your house for more than one day. 

Volumetric hearts for home decoration:

Such hearts will look great for decorating a room if they are made large, small options can be pasted into valentines. 
Hearts made of colored threads and wire. 
Another production option

Cutouts for windows
Hearts on sticks 
Beautiful decoration for the house from newspaper strips.
- Cut the newspaper into strips, roll each of them into a tube.
- Roll one of them into a heart shape.
- Inflate a small balloon so that it fits inside the heart.
- Now wrap the heart and balloon with paper tubes, as shown in the photo, securing the structure with glue.
- Let the product dry.
- Paint with paint.
Decorate the finished hearts with paper flowers and use them to decorate your home.

Children's crafts for the holiday of Valentine's Day
The holiday is a good occasion to make crafts with children. We are offering to you different kinds applications from paper hearts that can be timed to coincide with this day. 


Funny caterpillar made of hearts  And these are children's paper crafts that also contain hearts - a symbol of this holiday.


Perhaps the most romantic and sweetest holiday is Valentine's Day. On this day, it is customary to declare one's love, give valentine cards in the form of hearts, give flowers and other gifts to loved ones and people dear to the heart. In a word, circle them and wear them (sometimes literally) in your arms. And as you probably already guessed, in this article we will tell you not only about this wonderful date, but also reveal the secret of making gifts with your own hands. However, today we will not consider the traditional ways of creating hearts from cardboard or colored paper. This time we tried to pick up the most interesting and fresh ideas for the holiday. And most importantly, some crafts can not only be tasted, but also tasted. Ready for the masterclass? Then go ahead.
Miracles on paper
If you can draw, then you can depict a boy and a girl in love(you can draw with a simple pencil or pen). So, at one end of the paper sheet (on the left) we depict a boy reaching for a kiss, and at the other end (on the right) - a girl. In the middle we write the word "Distance" or English. Distance option and fold the sheet in half. Then we open it and fold the page from the side of the depicted boy and girl. Press firmly with your fingers, and then open. Our boy and girl, as we see, are separated by a distance. But if a sheet of paper is bent along the lines that we made next to both pictures, we will see how the lovers kiss.
A postcard with a surprise will also look original. In this case, you may not even cut out the body of the postcard yourself. You can always find ready template. You can make it yourself using colored cardboard, paints, glue and images of hearts.
We used a regular sheet of thick paper on which we printed the phrase: "What awaits you today?" and drew four identical hearts. Then in each of them we write, for example, "Coffee in Bed", "Passionate Kiss", "Rough Night", "I Love You" etc. We make a special paint composition. For its preparation you will need building acrylic white color, pink gouache and hygienic lipstick. 
First you need to apply a layer of lipstick on the inscription, and then cover with acrylic paint on top. In this case, the inscription made earlier will be hidden under a layer of paint. The postcard is ready. Now your loved one, in order to read the prediction in the heart, you just need to erase the acrylic coating with an ordinary coin, like in a lottery.
Valentine's card from fresh flowers
It may be unoriginal to give flowers on Valentine's Day, but if you use a creative approach, then this is how beautiful it can turn out.

In order to make such a Valentine, you will need a special floral oasis (the sponge should be green), ordinary lettuce leaves or fresh rose leaves, pins, stealth or toothpicks, garden pruners, red ribbon, wire and strawberries.
Step one
First you need to moisten our oasis sponge with plenty of water (this will extend the life of the roses and keep the leaves fresh).

Then we take 14 roses (or less) and with the help of secateurs we cut their stems until they become very small (approximately 3-4 cm).

Cut roses are carefully inserted into the oasis (they should be located close to each other).

We take the leaves and with the help of pins fasten them to each other along the chain. We move along the extreme walls of the heart, creating a kind of fence for flowers and berries.

We attach the leaves to the oasis, lay them on the opposite side of the flowers and prepare a place for strawberries.

We take the remaining parts of the stems of roses and cut off several sticks of about 3-4 cm each.


With the help of the remaining piece of wire, we attach our ligaments to the leaves.

We collect strawberries in our hands and fix each berry on our soft heart with toothpicks.

And after you put the last strawberry on the heart, the valentine will be ready.
A bouquet of sweets will also look original. To create it, you will need to prepare in advance: corrugated paper, scissors, wide and narrow ribbon, gerbera wire, teip tape, barbecue sticks, wire cutters, artificial greenery, a gift bow and a decorative flower net.

Step one
We take 7-8 pieces of wire and cut them into four equal parts. We cut a thin pink ribbon into 9-10 parts (about 25-28 cm each).


We put a candy on each of the squares and wrap it.

We wrap the sweets in a tube, covering them on all sides with paper.

Then we take the resulting bud, wire and teip tape. We wrap the wire with tape and attach it to the bud (at the same time, the candy itself should not be damaged by the wire).

Almost in the middle we fasten our bud with a pink ribbon. You should get seven identical buds.

We straighten each bud and get such flowers.

We take barbecue skewers and attach each flower to them, fixing them with teip tape. We decorate the flowers with small curls of artificial greenery.

We spread the finished branch with flowers on a decorative grid and wrap it, after decorating it with a gift bow and ribbons.

Unusual valentine light bulb
Men can please their ladies with an extraordinary gift in the form of a valentine light bulb.

To prepare such a valentine you will need a light bulb, a piece of red wire, small piece paper, a pen or a red marker, two pins with red heads and a pink decorative block.
Step one
Carefully remove the inside of the lamp with pliers or round nose pliers.

We take the wire, bend it and make a figure in the form of a small heart.

Then we write with a pen or marker any congratulatory phrase, for example: "The most beloved and beloved". We cling this note with two pins to a bar and put our heart inside the lamp. The gift is ready. You can give it with the words: "You are the light in my heart" and so on.
Soft fabric valentines
If you want to surprise your loved one or loved one, give them fabric valentines.

To do this, take a red cloth, thread, scissors, a needle, cotton wool, a heart-shaped cardboard blank and barbecue sticks.

Step one
We take two scraps of fabric, a pre-prepared stencil in the form of a heart and circle it on the fabric.

We cut out hearts from the fabric and make them curly ends with small scissors.

We take a thread (suitable for color) and a needle. Making short and rare stitches, we sew the two halves.

We take cotton and a barbecue skewer and fill the cavity of the heart with cotton.

We take out the stick from the product and sew it up completely. The heart is ready.

A valentine made from ties will look original. To do this, you will need two multi-colored ties, threads, scissors and double-sided tape.

Step one
We take two ties, cut off a piece from each (from one of them you need to cut off a piece a little more).
We take a thread with a needle and sew the ends of the ties (in the place where we cut the fabric).
Then we sculpt tape from the wrong side of the tie and attach the second piece of the tie.
papier mache valentine
For this voluminous valentine you will need: newspapers, PVA glue, a brush, a stationery knife, a glue stick, a printed sheet with ready-made text, a bird and a clock cut out of postcards, as well as a glue gun, satin ribbons, artificial flowers, pearl beads, white gouache, a heart-shaped candy box, a small piece of fabric and a piece from a milk bag.

Step one
Cut the newspaper into small squares.

We take a brush, PVA glue and paste over both halves of the candy box with pieces of newspaper. We repeat the same steps five times. After each layer, leave the product for 1 hour (during this time it will have time to dry).

After all five layers of the newspaper have dried, you need to carefully remove them, separating them from the candy cardboard box.

We turn over the two halves of the heart and paint them from the inside with white paint.

After the paint dries, glue the image of the clock on one of the hearts and randomly lay out the pearls.

On the other half of the heart, draw a window and cut it out with a knife.

We also paint the resulting window with white gouache and let it dry.

We connect both halves of the heart, glue the seams with a glue stick, mask with pieces of newspapers and leave for a few minutes (until the product dries completely).

We cut the text printed on paper into small pieces and stick it randomly on the heart.

We take a small piece of openwork fabric and artificial twigs. Glue on the bottom of the window.

Step Eleven
We take a fishing line, a butterfly and cut out a piece from the milk package (from the inside and outside). We glue the pearls on the fishing line, the butterfly at an equal distance from each other and fasten our impromptu loop to the window.

We glue a bird to the window, tie a ribbon bow on the flowers, tie an impromptu loop on top of the heart - and the craft is ready.

Great gift for a girl. You will need 162 balloons, pump and coil of dense wire.
Step one
We inflate the balloons and fasten them with two tails.

We measure approximately 3.0-3.1 m of wire using a centimeter.

We bend our wire in half and give the shape of a heart.

We fix the balls, starting from the middle of the heart.

We continue to attach the balls to each part of the heart.

We connect the ends of the heart, clamp the wire with pliers and wrap it with tape.

Add extra balls at the bottom and top (to hide the wire).

You can also use two colors of balloons or play around with different colors like red and white.
Original key holder
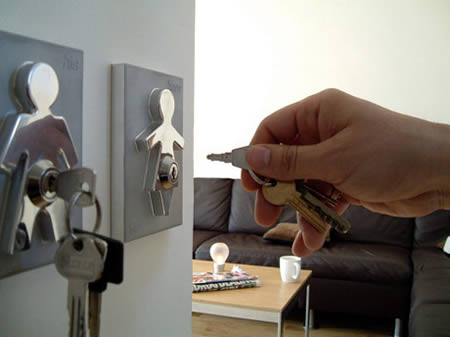 For this non-standard gift, you will need two or one lock (not its entire surface, but only the outer part along with the key hole), a drill or hammer and nails. Near the entrance on one of the walls, using improvised means, mount the lock. And with the words: “This is for you, so that you always know (know) where your keys are” - defiantly insert the keys to the apartment into the keyhole.
Such a gift can be made with your own hands. Both men and women can cook. If neither he nor she can do this, then you can always turn to professionals in a confectionery or a private master. Alternatively, buy ready-made biscuit cakes and cut them into a heart shape with a knife. Next, cover them with a mixture of sugar syrup, cognac and orange juice. You can soak the cakes with sour cream and butter cream or cover with sweet condensed milk and sprinkle with finely chopped nuts, powdered sugar, decorate with fruits. And, of course, if such a cake is beautifully presented, then no lady or gentleman can resist.
If you want to surprise your man or woman, then you can always make such a culinary masterpiece:

Step one
We take foil. We put it on the table. On top put soaked in cold water paper towels.

Bend the edges of the foil and secure with pins.

We heat the oven to 175 degrees. We break three eggs. Separate the whites from the yolks. We take a container, coconut milk, vanilla. Mix the egg whites with the above ingredients and beat with a whisk until foamy.

In a metal container, mix 400 grams of flour, a glass of sugar, a package of baking powder for dough, half a teaspoon of salt, half a pack of butter, 1 glass of coconut milk and beat the mixture with a mixer for 30 seconds.
Then add the egg-milk mixture to the milk-sugar mixture and mix with a mixer for 30 seconds. Pour the resulting composition into a baking dish, previously greased with oil.

We bake a biscuit for 30-40 minutes until fully cooked.

Let the cake cool and take it out of the mold. Then put in the refrigerator for 3-4 hours. We take out. We cut into several parts and grease the cakes with butter cream.

We take a knife and begin to shape the cake.

The resulting heart is set on a figured cardboard and lubricated with oil cream.

We take the scraps from the cake, add a little cream to them and knead in a food processor. Coat the heart with the resulting composition on all sides.

Step eleventh
We put the cake in the refrigerator for a couple of hours. Then we prepare white grease and cover the cake with it, smoothing out all the bumps.

step d 12th
We insert rice paper into the food printer and print butterflies. Then we cut them out.

Step thirteenth
We cover the cake with special food glitter and artificial edible snow. And put it back in the fridge for 2-3 hours.

Step fourteenth
We take out the cake from the refrigerator and decorate with edible decor. The cake is ready to eat.
Original clay mug
If your chosen one does not dare to propose to you for a long time, then Valentine's Day is a great way to push him to this difficult step. To do this, give him an original clay mug, instead of a handle on which a real ring will be installed. Moreover, you can do such a craft not only with your own hands, but also carry out your plans without specialized equipment and special pottery tools and a furnace. To create a cup, you will need real clay (you can buy it in online stores), some water, a special colorful glaze, or acrylic paint and a ring (vaguely similar to an engagement ring, but larger).
 First, the clay must be poured with water and mixed thoroughly. After a couple of hours, it is necessary to drain the excess water and knead the clay, like shortbread dough. The result should be a plastic and pliable material, similar to plasticine. Roll it into a large ball and press it inward with your own fingers. Next, carefully begin to level the resulting hole and diligently thin the walls of the future mug. And here you can play with the walls, making them higher or lower (depending on the size of the mug).
Then put a makeshift ring in the place where the pen should be and carefully attach it with loose pieces of clay. Place the item in the oven. A muffle furnace is ideal for this, but if one is not available, then a regular one, which is able to work on wood and coal, is also suitable. In very extreme cases, even a fire is suitable for firing. Put your product in the very center of the flame and wait. The mug will be ready when it turns red. Supplement original craft can be a colorful pattern or a romantic inscription. So you will give a gift, and unambiguously hint at a more serious relationship.
Show your imagination and surprise your loved one. The main thing is that you can always make a gift yourself. Moreover, you can create it, as you have already seen, from any available means. We, in turn, wish you success in all your creative endeavors!
When you think about homemade gifts, it's not about saving at all, because to make something with your own hands, you have to buy different components. So for such a gift, it can take as much money as for a regular, purchased one, and certainly more of your time. Why then work?
First, only homemade gift will have individual features, contain a message for only one person, and this is very nice.
Secondly, as they often say, the main thing is not a gift, but attention. Now compare the amount of attention when a person just went to the store and chose a thing and when he bought all the components, thought through the concept and did something with his own hands.
Here are 10 sliders with step by step guide. Use ideas and your own imagination.
1. Money rose
If you decide to donate money, you can give it not just like that, but in the form beautiful rose. Double joy is guaranteed - you give both money and attention.
For a rose, you will need 5-7 banknotes with any denomination, wire, green ribbon, artificial leaves, glue. Leaves and ribbon can be bought in the florist section.

Fold the banknote in half, bend the edges in different directions. From this banknote we will later make a rosebud.

We fold the rest of the banknotes, as shown in the figure, bending the edges to one side. We will make petals from them later.

We put the banknote on the wire, twist the end of the wire so that the banknote does not fall.

When you twist the bud, insert your finger inside the banknote and form petals around it, then it will turn out to be voluminous.

Similarly, put banknotes-petals on the wire and twist it. Make them different in shape, then the rose will look natural.

Fold the petals around the bud and wrap the wire with ribbon to keep all the stems together.

Glue artificial leaves to the ribbon to make the rose look like a real one.

2. Personalized mug
Here, letters are drawn on the mug, but using the same technology, you can draw anything you like: write a name, make a heart, or translate a funny picture.

For a homemade mug with a picture, you will need:
white porcelain mug, scissors, porcelain marker, carbon paper (carbon paper), pencil or pen, adhesive tape, a picture printed or drawn on paper that you will transfer to a mug.

Cut out from paper the picture that you want to see on the mug, and the same size piece of carbon paper. Put the carbon paper on the mug with the dark side, on top - the picture, and fix it with tape.

Trace around the picture with a pencil or pen so that the image is imprinted on the mug.

With the help of a carbon paper, the outline of the picture will be printed on the mug. After that, you circle the picture with a porcelain marker. If you are making a name mug, you can fill in the outline of the letters with oblique strokes. Looks cool.

Once your image is ready, let the marker dry for 24 hours and then bake it in an oven at 160°C for 1.5 hours. After that, the mug can be washed even in the dishwasher, and the inscription will not be erased.

3. Notepad
This gift is quite simple to make, and you can decorate it however you like. Instead of a pink owl, the cover can be a photo of you together, hearts, wishes, or something like that.

You will need: a stack of printer paper (you can use paper of different colors for a more original notebook or print a pale copy of your favorite photo on each sheet), scissors, a stapler, glue, design paper for the cover, a cardboard box. 
Fold the stack of paper in half.

Put future notebook leaves on the box and circle with a marker. Keep in mind that the cover should be a couple of centimeters larger than the sheets, so leave a few centimeters on each edge.

Wrap the cover cut out of cardboard in designer paper (you can use beautiful gift paper), glue the paper to the cardboard.

Attach the pages of the notebook with a stapler to the cover in several places.

4. Love message from the keyboard
Original declaration of love from a computer keyboard. You will need: a frame with glass, an old keyboard, light or dark paint, a stencil and a marker or black nail polish.

You take out the required number of keys, paint them with white paint or varnish and let dry. Make a stencil with the desired letters (you can download the desired font on the Internet and print it, then cut out the middle with a blade and use it as a stencil). Apply a stencil to the dried keys and write the desired letters with a marker or black paint or nail polish. 
Glue the finished keys inside the frame behind the glass. You can buy a frame in the art department or in a photo salon. 
5. Wire ring
Such a ring can be given as an addition to the main gift or as a small pleasant surprise.

You will need: wire cutters, pliers, a coil of red wire, a round object the size of a finger. 
To begin with, using a round object, we make a part that will wrap around the finger. 
Now, with the help of pliers, we bend the wire, as shown in the pictures. 


We hook one edge of the heart and remove the excess wire with wire cutters. 
We hook the rest of the heart. 
6. Phone charging wallet

For this wallet, you will need thick felt, scissors or a sharp clerical knife, fabric with hearts or other ornaments.

First you need to measure the size of the phone and its charger. The phone should fit freely in the wallet, and the square window at the top should pass through the charger.  A very functional gift: now the charging phone will not be accidentally pushed to the floor, and if the charger cord is short, the phone will not hang on it a centimeter from the floor.
7. Pieces of love
This is a cool bag with a homemade puzzle from your joint photography. Very cute and original.

You will need: ink or black paste from a pen, a stencil (you can make it yourself), a brush or cotton swab, a white rag bag (you can also sew it yourself, adding a drawstring to the top). 
We put a stencil on the bag, fix it with tape and carefully apply the letters. 
For the puzzle, you will need your favorite photo, some popsicle sticks, glue, and a sharp utility knife. 
We smear the back side of the photo with glue and evenly lay out the ice cream sticks, closely next to each other. 
When all the sticks are laid out, we write some warm words of congratulations on the back. 
When the glue has dried, turn over and carefully cut the puzzle with a clerical knife. 
It remains only to put the finished puzzle in a bag and give pieces of love to your other half. 
8. Lamp recognition
An interesting souvenir with a meaning. On the pedestal of the lamp is written: "The light of my life."

Carefully remove all the "insides" from the bulb. ![]()
We twist the hearts from the red wire with the help of pliers. By the way, if the wire remains, you can make a heart ring. 
9. Book of your love
A small book of your favorites joint photo with descriptions and confessions. 
Select and print your favorite photos on photo paper in one format so that there is free space on the left for inscriptions.

On each photo, you can write wishes, a declaration of love, or some moments from the history of your relationship, maybe general jokes or something else. 
10. Beer for a beloved man
This gift is for the most creative girls whose boyfriends are crazy about beer.

You will need bottles of his favorite beer, preferably with different varieties. Determine the quantity yourself.

Labels are removed from the bottles, and for decoration you will need: thick paper, paints, markers, heart stickers, glue, scissors and a lot of imagination.

Lettering ideas: riddles hinting at the type of beer, but at the same time including something like “for the man you love”; your general jokes related to beer;
inscriptions with the meaning "Especially for you", with his name, affectionate nicknames etc. 


