Such a project is often asked at school: to complete the layout of our galaxy. ? Exactly! Try to make it from simple materials at hand, for example, from cardboard. The fascinating process not only improves labor skills, but also introduces the child to the basics of astronomy. He should pay attention to find out the planets and place them in the right places. The Star World set will help to understand this question.
It will be interesting to create a dynamic model - it simultaneously illustrates the location of astronomical bodies and demonstrates their movement. As in reality, cardboard planets rotate in orbits around the Sun and around its axis. Use this manual as a visual material for a school or kindergarten - the original craft is of great interest to children!
How to make the solar system with your own hands: a master class with a photo
What you need to cook for crafts:
- corrugated cardboard
- scissors and office knife
- decorative tape
- pVA glue
- clove needles
In addition, you will need paints. To make the planets look more realistic, print a template on a color printer.
STEP 1. Cut out from a cardboard 9 circles of different diameters and color each of them. Use the saturated colors that are associated with space - black, dark blue, purple.
STEP 2. After the paint has dried, lay the circles on top of each other and fasten in the center. We used a piece of chopsticks for sushi; a toothpick or any other shaft is also suitable for this.
STEP 3. From decorative tape or colored paper, cut the stars and stick them on the base. Experiment with sizes and shapes!
STEP 4. Cut the printed images of the planets and stick them on cardboard circles of the appropriate size.
STEP 5. Fasten them to the base with studs. A hat is stuck at the base of the circle, and a planet is planted on the needle. Stick the rings of Saturn on thin cardboard and connect them with their needles with needles.
Maria Didenko
NOD lesson in the do-it-yourself group for the school around the world
goal: teach children to do complex things do it yourselfusing knowledge about the world around.
Tasks:
1. Educational: promote the manifestation of necessary school preparation qualities: arbitrary behavior, associative-figurative and logical thinking, imagination, cognitive activity.
2. Developing: improve hand-eye coordination; develop fine motor skills of hands in a variety of activities.
3. Educational: Raise interest in finding solutions to problems facing children.
4. Health saving: consolidate the ability to properly use various objects, monitor the landing of children at their desks.
Methods and techniques: conversation, consideration of materials, statement of the problem, physical education, experimental activity, summing up.
Previous work: study of materials and their properties.
Materials and equipment: cards depicting materials and their properties, a toy Professor Donut, glass 10 * 15 in size, aluminum foil, cardboard, colored tape in two colors, origami schemes, sheets of white and colored paper, scissors.
GCD progress:
W .: Good morning, children!
D: Hello!
W .: Today, our professor Donut has an important the task: a girl Katya and her brother Sasha sent a letter to him. That's what they wrote in a letter:
“Hello, Professor Donut! Soon our dad has a holiday - Defender of the Fatherland Day, and our dad is a military man! We know that our dad loves unusual sculptures and has long dreamed of hanging a mirror in the living room ... And dad loves when we give him gifts made do it yourself. Professor, please help us with such unusual gifts! Your friends Katya and Sasha. "
V .: Guys, together with professor donut, try to find the right materials for such gifts?
V .: What do you think, where to start?
D: Answer options for children.
W .: Yes! First, we need to select materials from which it will be possible to make gifts do it yourself. To do this, let's remember what exactly do we need to do?
D .: Sculpture and mirror.
IN. (hangs a sculpture image on the board): Guys, and remember, what should be the sculpture?
D: unusual.
B. Writes next to an image. sculpture a question mark and the second row hangs a mirror image.
V .: I have objects on the table, what are these objects and what are they made of?
D. are suited one at a time, take the item you like, and tell the children what this item is made of? What is the name of the material?
V .: Well, we have studied the properties of all these materials, and today we will repeat it.
Task 1. Take any object you like and the material from which it is made and describe his: its properties and qualities, as well as to think and tell what objects can be made from this material.
According to this scheme, children describe 5 materials: metal, plastic, glass, wood.
In the course of the story of the children, the teacher puts on the board images:
1. Metal - sinking, silver or gray, durable - dishes, construction tools, appliances, machines, jewelry.
2. Plastic - does not sink, is not transparent (of different colors, not very durable, not quite fragile - toys, containers, flower pots.
3. glass - sinking, transparent, fragile - a vase, plate, window, mirror.
4. Wood - does not sink, beige, but there are other shades, durable - dishes, furniture, music. tools, paper.
Q. Guys, are there materials in our list of materials from which our gifts can be made?
D: Yes! Mirror.
V .: well done, what observant you are! There are interesting and safe ways to make a mirror. do it yourself! I will talk about this later. Is there material for sculpture?
D. offer, the teacher leads the children to the fact that we do not have the opportunity to melt a sculpture from metal or plastic or glass. And it is also unsafe for children to cut it out of wood.
W .: Guys, Professor Donut wants to give us hint: among our materials there is one from which other important material is obtained, guess riddle:
Glue the ship, soldier,
Steam engine, car, sword.
And help you guys
Multi-colored.
Children: Paper
Q .: What material do paper get from?
D: Of wood!
V .: So you answered the question correctly. Children, what can be made of paper?
B. Listens to children's responses.
V .: you all said correctly, but forgot to name something, listen poem:
A simple piece of paper
But in experienced hands
He can turn around
Firebird in the clouds.
He can become a little animal
A fancy flower
Funny toy
The Mustachioed Moth ...
W .: Guys, you can make origami out of paper! This is an ancient art of folding various paper figures. What do you think can be called such a paper figure - paper sculpture?
W .: can I make it do it yourself?
V .: That is, such a gift is suitable for dad Katya and Sasha?
Physminute: We have to rest,
Reach out and breathe. (Deep breath in and out.)
Twisted his head,
And all the fatigue down!
One, two, three, four, five,
The neck needs to be kneaded. (Rotations of the head in one direction and the other.)
We got up exactly. Bent over.
One - forward, and two - back.
They reached out. Straightened up.
We repeat everything in a row. (Tilts back and forth.)
And then we squat.
This is important, we ourselves know.
We kneel,
We exercise our legs. (Squats.)
V .: So, let's talk one more time. What is our goal?
D: Help the children make a mirror and paper sculpture as a present.
W .: Yes! What materials will we make them from?
D: Glass mirror, paper origami.
W .: So, our little inquisitive minds, I suggest you split into two teams: one team tries to make a mirror, the second - origami - paper sculpture.
D. They are divided into two teams, they may not be equal if everyone wants to make a mirror, downloaded everything together make a mirror, then origami.
W .: If your main material is glass, then come up with a name with this word. The second team, what is your material? (Paper). Come up with a name with this word.
Experiment 1.
V .: in the manufacture of silver mirrors, on an industrial scale, a silver solution is used, on which a protective layer of copper or special bonding chemicals is then applied, and only then two layers of a protective paint coating. But at home, we will try to use a solid base - cardboard, what gives reflection - foil, and glass for a greater reflection effect and to protect fragile foil.
B. Guides the children to the table, they become a semicircle so that the other team can see everything.
W .: Which of these items are more dangerous?
D: glass.
W .: yes, so we don’t touch it yet. We need to take cardboard and glue the foil on it with the smoothest and brightest side.
B. Says, and the children help in turn. Every child takes part.
W .: Done, now from above we impose neatly glass. How do we fix it?
D: Glue.
V .: Then traces of glue will be visible, and not our reflection. Let's make a frame. Take color scotch: we have it in two colors, choose any, you can mix it and gently stick it on the strip.
D. perform under the supervision of a teacher, c. Corrects all actions.
V .: our mirror is ready! Looks like a mirror? Let's after classes we will each look at it. Command «….» Sit down, you did a good job.
Physminute: The sea is worried - time! (We walk on the spot.)
The sea is worried - two! (Torso left and right.)
The sea is worried - three! (Torso turns left and right.)
Sea figure, freeze! (Sit down.)
Experiment 2.
W .: Second team «….» come out. What will we make origami from?
D: from paper.
W .: Yes! Since the father of Katya and Sasha is a military man, I suggest he create a paper sculpture - a fighter. Do you agree?
B. Shows the scheme, children take turns working with the paper according to the scheme, the teacher corrects each step.
V .: look what we got! I think it's great. Do you want to learn how to do such fighters?
W .: After classes once again we will all consider the scheme and make origami. Guys, let's summarize.
D. all go to the teacher.
V .: What was our task today? How did we start to carry it out (how did we find the necessary materials? What materials did we remember today? What other materials did we use when working on gifts, list them? We fulfilled the request of Katya and Sasha? I liked how you worked together today, were not afraid difficult task, even remembered a saying appropriate, you know which?
D: patience and work - all will grind.
W .: That's right. Thanks for the great work.
Objective of the project: get acquainted with the principle of creating a collective project, involve each participant in an active cognitive and creative process.
The formation of a creative personality is one of the important tasks of pedagogical theory and practice at the present stage. The most effective means is the design activities of children.
It is no secret that preschool children are researchers by nature. An insatiable thirst for new impressions, curiosity, a constant desire to experiment, to independently seek new information about the world are traditionally considered as the most important features of children's behavior. Research, search activity is a child’s natural state, he is tuned to the knowledge of the world. To explore, to discover, to study means to take a step into the unknown and the unknown.
“Looking at the beautiful and listening about the beautiful, a person improves,” - said the ancient Greeks. Therefore, we must surround the child with beauty - everything beautiful that we can! Nature can give us everything necessary for raising children. How many wonderful sensations and impressions can be obtained from communication with nature! How many colors, shapes, sounds, transformations in it you can see and hear!
The theme of the developed project was selected taking into account the age characteristics of young children and the amount of information that can be perceived by them. This is a children's research project focused on children gaining experience of their own experimental and research activities, awareness of their interests by children, the formation of their skills to realize them, and the acquisition and application by children of new knowledge in life.
The project “Outside the world with your own hands” consists of mini-projects dedicated to the seasons: “Golden Autumn”, “Oh, winter-winter ...”, “Spring is red”, “Summer is red”.
We began work on this project with an excursion to the Winter Garden.
While walking with children, we watched nature: examined plants, compared the leaves of different trees. An indispensable assistant in our walks was a magnifying glass, in which we examined everything in a row, from a blade of grass to an ant. Of course, they collected natural material: leaves, sticks, branches. We dried and prepared colored leaves for the Autumn Golden Autumn project. The children, together with their parents, participated in excursions and prepared materials based on the results of these excursions, participated in the manufacture of joint crafts for creative exhibitions.

At art classes, they learned to work with scissors. The children cut a plastic bag, from which we then formed a lake.

Wild animals “settled” in our autumn forest, mushrooms “grew”, which the children dazzled themselves, “tits” and sparrows “flew in”, also made by themselves, “flew”. A mother made her snow-white swan with her daughter.

We used the finished project “Golden Autumn” in classes around the world.
As soon as the first snow fell, work began on the next mini-project “Oh, winter-winter ...”.

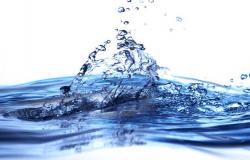
I decided to conduct an experiment. They took a glass, filled with snow with the children and put it on the window and began to wait. After some time, the snow in the glass began to fill with water (melt!). What was the surprise of the children when they suddenly discovered that the snow was “made” of water and therefore could melt. And besides, the water is still dirty. So you can’t eat snow!

This simple experiment aroused such curiosity in children that they actively began to be interested in the nature of things. After a long and heated discussion about the properties of snow, they decided: to make snowdrifts from cotton wool, and loose snow from polystyrene foam. The foam was crushed and branches were covered with it. The result was trees covered with snow. From plasticine, snowmen, hares, huts were blinded. The result was a winter landscape.


Parents have become active participants in the educational process. Interaction with the family made it possible to achieve the greatest results in working with preschoolers.

The mini-project “Summer Red” was depicted in the form of a village courtyard where pets live. We compared domestic animals to wild ones: where they live, what they eat, how they prepare for winter, what role they play in people's lives.

During the year we considered all the seasons: characteristic features, features. Children watched nature and embodied their knowledge gained in projects.
In the process of working on this project, children were engaged in productive activities aimed at developing coherent speech, based on the means of developing fine motor skills: modeling, application, drawing. And the children experienced a variety of feelings: they rejoiced at the beautiful image that they created themselves, were upset if something did not work out. But the most important thing; creating a collective project, children acquired various knowledge; clarified and deepened ideas about the world. In the process, they began to understand the properties of objects, to remember their characteristic features and details.
In the course of work, children acquired knowledge and skills that facilitate the assimilation of specific information about plants, animals, and natural phenomena by children, and they allow them to instill environmental skills and respect for the environment and the natural world. In children, the skills of research activity were formed, cognitive activity, independence, creativity, communicativeness developed.
All this contributes not only to the knowledge of the beautiful in nature, but also to oneself, the affirmation of human dignity, kindness, empathy for all living things, interest in the world around, natural phenomena; understanding the uniqueness of the living, the practical skills of humane treatment of them.
Using the project method in working with preschoolers helps to increase the child’s self-esteem. Participating in the project, the child feels significant in the group of peers, sees his contribution to the common cause, enjoys his success.
The project was carried out in a playful way involving children in various types of creative and practically significant activities, in direct contact with various objects of the surrounding society (excursions, games on objects of the social environment, practically useful things). In the future, work on this project will be complicated and continued.
During this time, we all explored the world, made discoveries, were surprised, disappointed, made mistakes, corrected them, gained communication experience. But each of us followed the path of discoveries of an unfamiliar, previously unknown, and together we did one thing: we studied and taught each other. Despite my pedagogical experience, every time I am convinced that repetition is impossible. Each child is unique, and what we do as teachers, we cannot and will not be able to carry out what we have already done with previous children. Only experience and knowledge remain. Why repeat it? A new fairy tale, a new game, a new discovery of the wonderful world in bright, vibrant colors will come to open the way to the heart of a little inquisitive, tireless explorer.
To form children's ideas about the phenomena and objects of the world, about their relationship in nature
Continue to build children's knowledge and perceptions of the seasons; about seasonal changes in nature.
To teach children to acquire new information through experimentation.
To form children's skills to draw conclusions and conclusions, and then, on the basis of accumulated experience, to realize them in independent creative activity.
Enrich the vocabulary of children.
(Slide No. 5) Development.
Develop cognitive processes (memory, attention, imagination).
To develop the ability to reflect your observations, knowledge in creative activity.
To develop fine motor skills of hands during the implementation of creative ideas.
To develop labor and independent skills of children, a sense of teamwork and responsibility for the work performed.
(Slide No. 6) Parenting.
To foster activity, a desire to participate in the process of the entire project.
To foster interest in the world around us, the desire to learn something new.
To educate a humane, respectful attitude to the world.
(Slide No. 7) Project participants: educators and children of the second younger group, parents.
(Slide No. 8) Duration of the project: long-term (one year)
Stages of the project:
(Slide No. 9) Problem.
During walks with children on the site, children examined plants, observed the life of insects. The magnifying glass brought once by one of the children became an indispensable assistant in our walks. They examined everything in it, from a blade of grass to an ant. In the evening, leaving home, the children vied with each other to tell their parents about their impressions. And in order to preserve these vivid childhood impressions of what is happening around us, we decided at a parent meeting with our parents to develop the project “The World around us with our own hands”.
I stage. Preparatory.
1. Development of a long-term plan for each mini-project.
2. A selection of the necessary methodological and fiction.
II stage. Project implementation.
(Slide No. 10) One morning in the group a fairy-tale character of the Mouse appeared - Surprised who immediately became friends with the children. He told them about the wonderful world of nature and offered to make a piece of this amazing beauty in his group with his own hands. Children willingly agreed, they settled him in a corner of nature and experimentation. Our hero participated in all the conversations and experiments, he brought the children tasks and amazing stories, listened carefully to the children's stories about their impressions of excursions with their parents, from walks and observations. This hero to the guys became not just a toy, but a real friend with whom one could consult, ask him to share the joy of new discoveries.
Realizing the mini-project “Autumn Golden”, during conversations and reading fiction: stories, poems, children learned about the first autumn changes in nature, about changes in the lives of people, animals and birds, insects at this time of the year, made various observations, during which they got acquainted with the new names of plants and garden flowers. (Slide No. 11). They also collected natural material: leaves, sticks, branches, dried colorful leaves for crafts. (Slide No. 12; 13). In the classes on drawing and applications, they tried to depict an autumn tree using straws, carcasses and dry leaves using an unconventional method. All kinds of caterpillars, turtles, and humans were made from natural material (Slide No. 14). Children together with their parents participated in excursions and prepared materials based on the results of these excursions, in the form of small crafts, from which we designed the exhibition “Autumn golden came to us” (Slide No. 15). The final event was a small presentation of these works, where the children, together with their parents, shared their impressions and the joy of working together.
(Slide No. 16). As soon as the first snow fell, work began on the next mini-project “Crystal Crystal”. Throughout the winter, they observed natural phenomena: how snow falls, frosty patterns on glass, hoarfrost on trees; for the behavior of birds arriving at the kindergarten plots, they tried to feed them, and hung feeders with their parents in their own plots. (Slide No. 17). During the experimental activity, various experiments were carried out with water and snow: they took glasses, filled with snow with the children and put them on the window, waited. After some time, the snow in the glass began to fill with water (melt!). What was the surprise of the children when they suddenly discovered that the snow was “made” of water and therefore could melt. And besides, the water is still dirty. So - you can’t eat snow! This simple experiment aroused such curiosity in children that they actively began to be interested in the nature of things: they painted snow in different colors, made colored ice, and then various shapes and patterns were laid out from them. After a long and heated discussion about the properties of snow, they decided to mold snowmen and a hedgehog together with their parents during a walk (Slide No. 18). In the classroom of artistic activity did several works on a winter theme (Slide No. 19). At home, the children with their parents completed several work - models of winter plots, and then talked about what they did. The final event was a literary evening of poems and riddles on the theme: "Ah, this winter is winter ..."
(Slide No. 20). We started work on the project “Spring Motives” in early March. They brought branches into the group, put them in the water and began to watch them. Gradually, the buds on the branches began to swell, and the children learned that with the onset of spring the buds swell on the trees and leaves emerge from them. The sun is already starting to warm, the snow is melting, icicles appear on the roofs of houses. During the walk, we watched with pleasure the first flowers of sea buckthorn and lilacs that blossomed, learned about the medicinal plants on our site: we felt and sniffed mint, examined our mother and stepmother, watched the first birds returning home and settled in the birdhouse on the site. The children told their parents and their friend Mouse - Surprised about their impressions of the observations. In the classroom of artistic activity, these impressions embodied these impressions in their works “First Leaflets”, “Bouquet for Mom”, “Flower Glade”, “Spring in the Forest”. (Slide No. 21). They decided to complete the project with a competition of joint work between children and parents on the topic: "Spring motives." (Slide No. 22) From plasticine, children and parents completed their landscapes, and the jury determined the best child-parent work. The competition ended with a friendly and cheerful tea party, where parents expressed great gratitude to the organizers of this project, as they began to communicate more with their children, understand them, learn about their interests, skills and creative work.
Before embarking on the implementation of the summer mini-project, we thought for a long time that the children would be interested in what they could be carried away. Then one of the children asked the question “How does a cucumber turn out?”. We had to tell for a long time how and what this cucumber is made of. In order for the children to understand all this, we decided that they should be convinced of this on their personal experience, growing their crops. (Slide No. 23). Calling our mini-project “What the summer brought us ...”, having developed a plan for its implementation, we set to work. At the site of the kindergarten, a garden was planted together with parents, where they planted seedlings of vegetables. (Slide No. 24). All summer, children raised them, cared for, watched them grow. And how much joy there was when the first little fruits appeared from the flowers. Children enthusiastically examined them and waited for these crumbs to turn into real fruits. After harvesting, we decided to revive our cucumbers and tomatoes, zucchini and pumpkins. (Slide No. 25) Exhibition of creative crafts "What the summer brought us ...." became the final event of this mini - project.
(Slide No. 26). Expected results.
In the course of the work, children acquired knowledge and skills that facilitate the assimilation by children of specific information about plants, animals, natural phenomena, and enable them to instill environmental skills and respect for the environment and the natural world. Children have developed skills in research activities, cognitive activity, independence, creativity, communication. Parents have become active participants in the educational process. Interaction with the family made it possible to achieve the greatest results in working with preschoolers.
Assessment of the effectiveness of the project.
During the year we considered all the seasons: characteristic features, features. Children watched nature and embodied their knowledge gained in projects. In the process of working on this project, children were engaged in productive activities aimed at developing coherent speech, based on the means of developing fine motor skills: modeling, application, drawing. And the children experienced a variety of feelings: they rejoiced at the beautiful image that they created themselves, were upset if something did not work out. But the most important thing; creating a collective project, children acquired various knowledge; clarified and deepened ideas about the world. In the process, they began to understand the properties of objects, to remember their characteristic features and details. Using the project method in working with preschoolers helps to increase the child’s self-esteem. Participating in the project, the child feels significant in the group of peers, sees his contribution to the common cause, enjoys his success. During this time, we all explored the world, made discoveries, were surprised, disappointed, made mistakes, corrected them, gained communication experience. But each of us followed the path of discoveries of an unfamiliar, previously unknown, and together we did one thing: we studied and taught each other. Working with children, every time I am convinced that repetition is impossible. Each child is unique, and what we do as teachers, we cannot and will not be able to carry out what we have already done with previous children. Only experience and knowledge remain. Why repeat it? A new fairy tale, a new game, a new discovery of the wonderful world in bright, vibrant colors will come to open the way to the heart of a little inquisitive, tireless explorer.
(Slide No. 27). Prospects for the implementation of the project. The project can be used by educators, methodologists of preschool education, implementing the education and development of children under the program "Childhood".
Nature and man-made world: didactic games for children, cards for download. informative video for children about animate and inanimate nature.

Nature and the man-made world: a didactic game for children
In this article you will learn how to introduce your child to the world around us, how to explain what animate and inanimate nature is, what a man-made world is and how they differ, what developmental and educational games will help you.
Today I am pleased to introduce another reader of the Native Path website and a contest participant. This is not only a mother with many children, but also a student at a teacher training college and a kindergarten teacher by profession. Marina has prepared a game for familiarizing children with the surrounding world for readers of the Native Path.
I give the floor to Marina: “My name is Marina Anatolyevna Smirnova. On the site "Native Path" I have not so long ago - about a year. I live in the village. Often. I have three children, a 4th year student at a teacher training college. I work as a kindergarten teacher. I am fond of beadwork, drawing (both with pencils and paints), plasticine painting, modular origami, I sew simple toys for training from felt, I make various crafts, etc. I recently started making didactic games for children. ” And today, Marina Anatolyevna shares with us two games and cards to them.
The world of nature and man-made world. Living and inanimate nature
In didactic games, not only the ideas of children about the world around and the need for caring for it are clarified, but also develops: connected speech, cognitive interest, the ability to analyze, compare, generalize, group objects, and children's attention.
In didactic games, children learn that the objects around them are different.
Some objects are made by human hands (man-made world), while other objects are created by nature (natural world).
The natural world is also very diverse. There is wildlife, but there is inanimate nature.
To the world of nature include stars and the moon, forests and mountains, grass and trees, birds and insects. These are those objects that exist outside of man; he did not do them with his own hands or with the help of machines and tools.
- To inanimate nature snow and sand, a ray of the sun and stones, clay and mountains, rivers and the sea belong.
- To wildlife include plants, fungi, animals, and microorganisms.
To the man-made world our clothes and shoes, homes and vehicles, tools and hats and much more, shops and other buildings around us, stadiums and roads.
How to explain to children how the world of nature differs from the man-made world and how the living and inanimate nature are different from each other?
It is very well explained to children what nature is and how nature is alive and inanimate in my favorite program for children around the world “Shishkina school. Natural History. " Watch this informative fun program for kids with your children. Play the game with its heroes, discuss their answers and mistakes.
What kingdoms does the natural world consist of?
Children learn about this from the program"Bump School" on the theme "Kingdom of Nature", and together with the little animals - the heroes of the program - will guess riddles about the inhabitants of these kingdoms
And now, when your baby has learned what nature is, how to distinguish the natural world from the man-made world, how to distinguish animate and inanimate nature, let's play a didactic game and consolidate and clarify children's ideas about the world around them. And the games and cards of Marina will help us with this.
Didactic game 1. "Living and inanimate nature"
Material for the game
- Pictures depicting objects of animate and inanimate nature (planet earth, duckling, forest, butterfly, mushroom, mountains, etc.)
- Red and green cards (for each child)
- Two dolls or other toys.

Game progress
Create a game situation with the help of toys. Two toys (dolls) quarreled and could not separate the pictures. Ask the children: “How can we reconcile our dolls? How can these pictures be divided between Katya and Masha? ” Children discuss how toys can be helped.
Pay attention to cards - tips, remember what they mean. Duckling is a world of wildlife. And mountains are a world of inanimate nature. The child helps the dolls to correctly divide the pictures.
- You can give pictures to dolls, for example, to Masha’s doll - to give cards with the image of wildlife, and Kate doll - with the image of inanimate nature.
- And you can enter conditional icons. The duckling card is green, and the mountain card is red. Invite the children to close the pictures with the image of wildlife with green squares (like the duckling), and close the pictures with the image of inanimate nature with red cards (like the "mountain" card).
- If the game is played with a group of children, then an adult gives each child a set of pictures and cards of red and green color for their folding.
The task of children is to correctly divide all the pictures into two groups.
Doll Masha and Katya each take their pictures and thank the children for their help, praise them for being very quick-witted and inquisitive.
Download pictures to the game "Living and Inanimate"
Didactic game 2. Nature and the man-made world
In this game, children will learn to distinguish objects of the natural world from objects made by human hands, classify pictures, reason and draw conclusions, describe objects.
Materials for the game
You will need pictures to play with the image of objects of the natural and man-made world (anthill, mirror, bell flower; electric lamp, etc.).

Game progress
A group of children is playing. You can play in a pair of "adult and child."
Each child receives a set of pictures from an adult depicting various objects of the man-made world. An adult shows a picture of an object of nature.
For example, an anthill is the home of ants. Among their pictures, children look for objects of the man-made world, similar to an anthill. For example, a pair for an anthill can be a modern house, birdhouse, stable, house made by human hands. Or perhaps your child will find another pair and be able to prove that it is suitable, because similar to the original image for some reason.
It is necessary not only to guess and find the right picture, but also to prove that this picture is suitable as a pair of the picture shown to adults.
Examples of such pairs in the cards for the game:
- bell flower (natural world) - bell (man-made world),
- the sun is a light bulb
- hedgehog - a metal brush - a comb with long teeth,
- live butterfly - a butterfly for a festive costume,
- planet earth - a toy ball
- spider web - fishing nets,
- swallow with wings - an airplane with wings,
- claws of cancer - ticks as a human tool,
- snowflake and snowflake - lace doily,
- live mouse - a computer mouse.

We recommend reading
 Keeping children safe on the road Why accidents happen
 Consultation for educators "valeological education of preschool children" Valeale program "Kid"
 The program of parental education "Parent University" educational material on psychology on the topic of parental education at school
 Words of reassurance for a girl