If you prefer elegant, graceful and fashionable at the same time, stylish manicure, comfortable to wear, think about whether it’s time to make a French jacket. With it you can forget about constantly repainting your nails to match your clothes; it is suitable for a special event and everyday life at the same time.
With the help of exquisite French techniques, you can advantageously emphasize any shape of nails and, conversely, hide minor imperfections and damage. The French style is laconic and simple to perform; in order to create it, you do not need any special skills, only the desire to be even more attractive and feminine.
When a woman has enough time to monitor the proper condition of her manicure, you can do without gel polish, but if you are constantly on the move and do not have the opportunity to sit for a long time drawing pictures, use gel polish, especially since the procedure can be carried out at home.
Benefits of gel polish
Why should you choose gel polish:
- it is universal big choice the palette provides a huge field for experimentation and creating unique masterpieces;
- these masterpieces can be preserved in their original form for a long time - from 2 to 3 weeks of active wear, regardless of how often you wash the dishes and clean the apartment;
- it has been proven that gel polishes strengthen the thinned nail plate, restore and heal it;
- a nail decorated with gel polish still breathes;
- following step-by-step technology, you don’t have to worry about fungus appearing on your nail, because this is impossible;
- nails coated with gel polish can crack only if the surface is strongly squeezed or pressed by some object (thanks to the gel substance, the manicure becomes strong and durable, and you do not need to worry about its integrity).
French gel polish: step-by-step instructions
 A step-by-step guide to creating a French manicure looks something like this:
- Do regular manicure, soften the nails in a bath with nourishing oil, push back or even trim the cuticle, and use a nail file to give the desired shape. Dry your hands.
- The trick to good adhesion of gel polish to the natural surface of the nail is degreasing and the absence of a sticky layer. To do this, be sure to run a soft buff over the surface of each nail. There is no need to literally file off the top nail layer; a couple of movements is enough.
- Now degrease your manicure using a degreaser. If this is not available, you can use a cotton swab soaked in medical alcohol at home. Ideally, you need to buy lint-free wipes that will not leave a trace of excess oil in the area of the nail plates.
- Open the base bottle and, scooping up a small amount of product with a brush, distribute it in an even and thin layer over the entire surface. Move the brush from end to end, sealing it well (running the brush perpendicular to the growth of the nail). To make the liquid dry quickly, there is special equipment called a UV lamp. Without it, you cannot create a French gel polish; the substance will dry for many hours and will disappear in a few days. Drying the gel polish in a UV lamp takes 2 minutes.
- It's time to start drawing the smile - the edging at the tip of the nail. Some people use stencils, but experts do not recommend using them; it’s easier to practice drawing a straight line several times and, once you get the hang of it, enjoy the end result. Ideally, a thin flat brush or a brush from a bottle of gel polish is suitable for painting.
- Gel that gets on the skin can be easily removed with an orange stick.
- If you need to modify a slightly lopsided smile, use a thin, damp brush slightly moistened with a disinfectant (degreaser).
- After correction, the material is fixed in a UV lamp for up to 2 minutes.
- If you are not completely satisfied with the result, and the varnish has formed a transparent layer, apply another coat and place your palm again in the polymerization equipment.
- If you want to make the background coating pale pink or beige, you can apply it both under the smile and on top of it, it all depends on the degree of glow and transparency of the composition.
- The French nail is secured with a top coat, which should also be sealed well on the end of each nail. When your manicure is completely dry, soak a cloth in degreaser and go over your nails thoroughly.
- At the final stage, apply nourishing oil to the cuticle and nail plate. https://www.youtube.com/watch?v=nbn_43yBn2M
We decided to do French manicure gel polish? Then take note of a few tips and read the detailed instructions.
First, let's decide which shades of varnish to choose for the jacket:
- if you have a fair skin type, then the ideal option for you would be peach and soft pink shades
- for dark-skinned people the following palette is suitable: beige-light and “dusty rose”
- for a festive occasion, pay attention to gel polishes with small “glitters”
- To give a natural look to your manicure, choose milky shades and muted white.
Which method to choose for French manicure?
- or acrylic. A manicure will delight you for up to four weeks, a long process (from 90 minutes) + high cost
- false nails (lasts up to 8 days, fast process + affordable cost)

- gel polish (lasts up to 14 days + average cost + quick procedure)
- ordinary varnish (lasts up to 5 days, quick application process + product availability).
Detailed instructions on how to do a French manicure with gel polish?
What tools do you need to prepare for the job?
- manicure set (scissors, various files, buff, orange stick for treating cuticles, lint-free wipes)
- A UV lamp is required for drying nails
- primer
- prepare a degreaser for the nail plate
- fixative varnish
- base for varnish
- top coating
- gel polishes in two selected colors (for the base layer + coloring the tip of the nail)
- special stripes for French makeup or a thin brush (for drawing an even smile line)
- cuticle oil + moisturizing hand cream

French manicure with gel polish at home
As always, we put our beautiful hands in order so that the manicure looks more well-groomed and neat:
- Take the cuticle cleaner and distribute it evenly around the nail plate. Thanks to this product, the skin is well moisturized and the cuticle quickly softens.
- then use an orange stick to gently push back the cuticle
- Using a nail file (medium hardness) we make the required shape for the nails (oval, square or round)
- Using a buff, we begin to grind the nail plates to remove the protective layer (this is necessary for better adhesion of the gel to the natural material)
- then take lint-free wipes, dip them in degreaser and treat your nails. Try not to touch anything after this stage so that dust and other particles do not remain on your nails. Your future manicure and its strength will depend on this.

Note: You can also use a regular hand bath with soap or alcohol instead of a degreaser. It is not recommended to use cotton pads or cotton wool. Now we begin to do the French manicure with gel polish in stages.
Step 1. We cover all nails with primer (so that the gel adheres well to the natural plate) and wait until it dries (there is no need to use a UV lamp). In addition, the product also strengthens the nail structure well and prevents delamination. Note: the primer can be used 1-2 minutes after degreasing the nails.
Step 2. Apply the base coat in a thin layer and distribute evenly over the nail plate. To prevent the polish from peeling off, apply the base to the ends of the nails. Dry under a UV lamp for up to 40 seconds (maybe more, it all depends on the power of your lamp).
Step 3. Next, take our selected base color of gel polish and distribute it in a thin layer over the nail plate. Place it under a UV lamp for 2 minutes. If you think the shade is looking dull, then apply another coat.

Step 4. Now the main part. There are two ways to make a “smile” on your nails: using a stencil (simply glue the strips and paint the free ends with a selected color) or manually (take a thin manicure brush, apply gel polish in 2 layers and dry under a lamp for 2 minutes). Remember that the ends of the marigolds must also be sealed. French manicure using gel polish is performed under the rays of a UV lamp, in contrast to the conventional technique of applying varnish, which requires plenty of air.
Step 5. We cover the nails with a top coat (protects from damage, cracks and chips) with a thin layer. Afterwards, place it under a UV lamp for 2-3 minutes. To make your jacket last longer, use gel polish rather than a regular topcoat.
Step 6. The remaining sticky layer wipe with a lint-free cloth, which we first dip in a degreaser (you can use regular alcohol).
Step 7 The final stage: apply cuticle moisturizer to the nails and do not contact with water for at least one hour. Now you know how to do a French manicure with gel polish, follow the written recommendations and then you will get an incredibly beautiful and stylish manicure.

Reasons why the manicure didn't work out:
- While working, you forgot to degrease the nail plate
- skipped the base and topcoat step
- Problems with the UV lamp (incorrect power, weak bulbs)
- low-quality gel polishes
- incorrect sequence of applying gel polish
Different kinds french manicure
Are you tired of the classic French jacket and want something unusual? Then pay attention to the varieties of this nail art:
- French with a pattern (special stencils with a pattern/pattern are applied to the edge of the nail, rhinestones, stones, beads, etc. are added)
- multi-colored French (the edges of the nails are painted in different colors of your choice)
- millennium (classic French shades + microdust or glitter is applied to the free edge of the nail)

- lunar French manicure
- twist French (the design uses two contrasting shades of gel polish)
- art French Here you can give free rein to your imagination: manicure can be done in different color scheme, add decorated elements (beads, rhinestones, polka dots), stick various patterns etc. Check out a few .
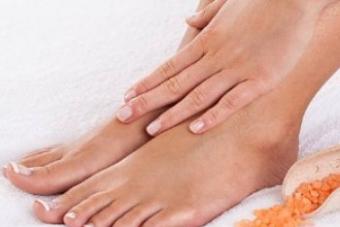
Every woman has at least heard of such a type of manicure as a French manicure, but not everyone imagines French manicure with gel polish, which is just starting to become popular. French with this coating can be done in a salon or at home. This will be discussed in our article.
If you don’t know yet, or have forgotten, we want to remind you what French is. French manicure involves painting the main part of the nail bed in a nude beige, cream, soft pink or transparent color, and the free tip of the nail in white. We are talking about a classic interpretation of the French jacket without an emphasis on fashion trends.
A traditional French manicure with gel polish involves using the same colors as a regular manicure. The only difference is that gel polishes are unique hybrids that successfully combine the features of gel and polish at the same time. Simply put, gel polish stays on your nails as long and as firmly as gel, and is applied just as easily as polish. Ideally, a French coat with gel polish will last you 2-3 weeks. If the gel polish peels off or peels off the surface of the nail plate after just a week, it is a low-quality varnish and should not be used.
When talking about French manicure, you should know the following important definitions:
- Smile line. This is the name given to the border separating the main part of the nail bed, which is painted in a natural shade, and the free edge of the nail, which is white. The smile line traditionally resembles a smile, but in accordance with fashion it can have a different shape - zigzag, wavy, triangular, etc. Regardless of its shape, the smile line should always be perfectly even on all nails. If you are unable to achieve even lines, resort to a little trick - disguise the smile line with varnish of a different color, sparkles, rhinestones or other decor.
- Stencils for French. This is the name given to special strips for French manicure, which can be purchased in the store separately or as a set. The strips can also be made independently from available materials - old stickers, tape, electrical tape, etc. The main requirement of the sticker is a sticky bottom layer, which allows you to fix the stencil on your finger. The tip of the nail should remain free, which you will paint while the stencil is used. The length of the stencil for one finger should be such that you can wrap it around your finger. The width is usually 5 millimeters - this is enough to paint the free tip of the nail without affecting the main background.

How to prepare for a French manicure with gel polish?
The main idea of French manicure is to give the hands a well-groomed and healthy looking. If you have injuries, wounds, sores, or hangnails on your hands that cannot be removed, you should refuse the French coat and postpone the procedure until the skin is completely healthy. One of two main types of manicure will help you give your hands a well-groomed look. By the way, experts recommend preparing for a French coat with gel polish the day before the event.
- Trim manicure. Involves soaking the hands in warm water for 10-15 minutes. Then the hands are wiped, the cuticle is pushed back with an orange stick, and carefully cut off. The nails are given the desired length and shape, and nourishing oil or cream is applied to the skin of the hands, cuticles and nails.
- Unedged manicure. Soaking your hands with this manicure is not necessary, but if you wish, you can perform this pleasant procedure. A special softening composition is applied to the cuticle after which it is removed with an orange stick. You can massage your arms with cream.
Classic French involves the use of varnish pastel colors And white on the tip of the nail, but having learned how to apply gel polish to the nail plates and draw an even smile line, you can move away from traditional canons and bring to life:
- Wedding jacket. The main tone and pattern of the jacket should be combined with the tone wedding dress and a bouquet. For example, it could be a white background and a red tip of the nail.
- Colored French. The free edges of the nails are painted in various tones of the color scheme.
- Stylized French. The edge of the nail should be decorated with rhinestones, a drawing or pattern, stickers or decorative stones should be applied.
- Millennium. This is a classic French manicure, but the free tip is supplemented with microdust or glitter.
- Non-standard. Can combine various shapes, styles, colors, decor, etc. solutions.

What is needed for a French manicure with gel polish?
In a beauty salon, the cost of a French manicure with gel polish is about the same as for a regular French manicure. On average, the price varies between 600-1000 rubles. You can save on the procedure in the salon and do the French hair yourself; for this you need to purchase the following attributes.
- UV lamp. This can be an LED lamp or a 36-watt lamp. Keep in mind that a 9-watt lamp will not be as powerful, which is why you will have to spend more time drying the varnish layers.
- Buff for polishing the nail plate.
- Degreaser.
- Lint-free wipes.
- Primer.
- Varnish base.
- Alcohol or a special gel polish remover.
- Two colors of gel polish - for painting the tip of the nail and the base layer.
- Stencils for French. Instead, you can also use a thin brush, which allows you to draw an even smile line.
- Top coating.
Having prepared your nails for a manicure and armed with all the necessary tools, you can begin processing your nails and creating a French manicure.
- Degrease the nail plates. Use a buff to buff the nail plate to remove excess shine from your nails. Then use a degreaser, which can be replaced with nail polish remover. By degreasing the plates, you will ensure good adhesion of the gel polish to the nail. You can degrease your nails by making a small bath for your hands with the addition of liquid soap. Hold the hands for a couple of minutes, dry them and treat them with a lint-free paper napkin. Alcohol is also suitable for this purpose. You cannot use cotton wool or cotton pads!
- Apply primer. It will prevent the nail from peeling. There is no need to dry your nails after using the primer in an ultraviolet lamp. The primer can be applied a minute after degreasing the nail.
- Cover your nail plates with a clear base. The layer should be thin. It is necessary to carefully and evenly distribute the product on the nails. To prevent the polish from peeling, seal the end of the nail.
- Dry your nails under the lamp for 30 seconds. The time may be longer depending on the manufacturer's recommendations.
- Cover your nails with the main tone of gel polish. Dry the varnish under the lamp for 2 minutes.
- Apply stencils to your nails to draw a smile line and paint the tip of your nail the color you want. Instead of stencils, you can use a brush. The tip of the nail should be coated with gel polish twice. After applying each layer, dry your nails under the lamp for 2 minutes. Don't forget to seal the end of the nail.
- Cover your nail plates with top coat, which will prevent a carefully executed manicure from cracking and chipping.
- Remove the sticky layer from the coating. To do this, use a special lint-free napkin, onto which you should apply a little product and wipe the nail plate with the solution. Special product Can be replaced with regular alcohol.
- Apply a nourishing agent to the cuticle.

How much does gel polish for French manicure cost?
The cost of Shellac gel polish, which is very popular in modern manicure is 600-700 rubles per bottle. The price of the top coat and base coat is approximately the same.
To create a smile line in a classic color, the manufacturer offers two varnish options - Studio White, Cream Puff. The latter is characterized by a viscous structure, which prevents even application by a non-professional, but this tone is brighter. Studio White is less bright, but much easier to apply at home for the amateur.
The main colors for a classic French manicure are the following shades:
- Negligee– a transparent coating with a slightly pinkish tone and a neon tint.
- Beau– is a soft pink tone with small sparkles.
- Clearly Pink– a transparent composition with a pinkish tint that is natural for the nail.
- Mother of Pearl– a transparent product with small sparkles that shimmer depending on the type of lighting.
- Zillionaire- a transparent composition with colored glitter.
You can choose other colors in shades of blue, red, green, etc.
By performing a French manicure with gel polish yourself, you can save a lot of money. Of course, you will have to spend money on an ultraviolet lamp, the coating itself and related products, but the result will delight you for a long time, and you can change the design at any time.
There is no point in describing the advantages of French manicure in too much detail. They are already known to absolutely everyone. It is thanks to them that for many manicure lovers this design remains a favorite and is most often used. In this article we will talk about how to make French gel polish, present training videos and photos of the results of such a manicure.
French gel polish
French manicure
Why is it so good this type manicure with gel polish? French manicure has the highest versatility, which means there is no need to select it according to the occasion, clothing style and other factors. It will look good and appropriate in the office in combination with a business suit, and in a festive atmosphere, and at a noisy party, where it will fit perfectly under Evening Dress or club outfit.
If you really love this design, then in order to always remain flawless, one way or another you will need to constantly update your manicure. Although this is not a quick or very simple process. If you choose gel polish, you will provide yourself with a beautiful and neat jacket for a period of two to three weeks. Moreover, there is nothing complicated about how to paint French gel polish.
If we were talking about a colored coating, then difficulties might arise associated with the selection of suitable clothing etc. When it comes to French, such difficulties are excluded. This manicure can be left unchanged for months, making only timely corrections.

French with a pattern
How long the gel will last on your nails depends on the condition in which your nails were originally, as well as on how accurately the manufacturing technology for this manicure was followed. So, on peeling nails, the gel will begin to peel off in about a week. And if you neglect to use a degreaser and primer, it will begin to move away from your own nail in large layers.
What other advantages does knowing how to make French gel polish have? This design will suit absolutely any nail length. Well emphasizes both the glamor of long and the neatness of short plates. Made in classic shades, it also suits absolutely any skin tone and shape of hands and fingers. If the gel is applied to long natural nails, then serves as good mechanical protection for them from scrap and cracks, thickening the plate.
Nail preparation
To apply the gel, no special nail preparation is required, since this is not an extension. However, given the long-term wearing of such a manicure, all stages must be performed more carefully than usual.

- Make a hand bath using vegetable oils, useful for the cuticle. The water should be almost hot and it should take about 20 minutes to hold your hands in it. After this time, dry your hands with a napkin or towel;
- Once your nails are dry (and only then), move on to pushing back the cuticles. Do this with an orange stick or a special pusher;
- Remove the cuticle in the usual way for you - dissolve it with a remover, cut it off or simply leave it aside;
- Correct the shape of your nails by filing the free edge. It is very important to do this only when the nail is completely dry. In this case, the file must be held strictly perpendicular to the plate, since only this position ensures accurate and uniform filing of all layers of the nail. Otherwise, it will begin to exfoliate and come off in layers along with the gel;
- Polish the nail with a delicate buff. It does not require as much cutting as when building up, but you need to process the entire plate very carefully.
Now your nails are ready to apply the gel. All preparatory procedures will not only prolong the life of your manicure, but will also be able, in some way, to protect natural nails from the negative effects of the gel.
Execution technology

Below is the technology on how to correctly implement such a design. However, it can also be used to perform the opposite, and not just the classic French gel polish, and in addition, moon manicure. The difference in this case will only be in the location of the stencils. If you know how to do French without them, then the whole process becomes a little easier for you.
Before the stages of how to create a French polish using gel polish are described, and the technique of applying it is described, let’s talk about the specific preparation of nails. They need to be degreased and primed.
After the manicure is completed, treat each plate with a special degreaser. This will allow the varnish to hold tighter and not peel off. Once you have done this, you can no longer touch the records with ungloved hands.
Now you need to wipe your nails with primer. This acidic composition helps the nail plate dry out and opens the nail scales. All this allows the gel base to firmly adhere to the nail. Simply apply primer to the plate and wait a few seconds. You will know that it has worked when something like a white coating appears on the plate. This means that the scales have opened and you can move on to the next steps.

French manicure
- Apply a protective transparent gel polish base to your nails. It is very important to carefully seal the free edge of the nail. Dry it under an ultraviolet lamp with a power of at least 24 watts for the time specified in the instructions. It should be applied in a thin layer;
- Remove the sticky layer with a lint-free cloth. Apply the stencils in a suitable manner. Opening the free edge in order to make a colored French gel polish, covering most of the nail bed - for a reverse French, separating the lunula - for a lunar manicure;
- Cover the desired part of the nail with the chosen color. If we are talking about how to make a classic French manicure with gel polish, such as in the photo and video, then you need to paint the free edge of the nail white. It is very important to carefully seal the tip. Dry the gel under the lamp, keeping it there for the required time. Then, if necessary, apply another layer of varnish and dry it too. After the drying time has ended, remove the sticky layer from the coating;
- Remove the stencils sharply;
- Cover your nails with a thin layer of gel fixative and dry it too under a lamp;
- Remove sticky residue with a lint-free cloth.
If necessary, decorate your nails. This could be foil or rhinestones, which are usually glued to a sticky layer, or something else.

French design
In the absence of stencils, colored or classic French can be drawn by hand. To do this, you need to stock up on a thin brush for nail art, especially if the plates are short. For long nails, it may be possible to cope with a simple brush. So, draw a smile line and paint over the entire edge of the nail from there. Then take cotton swabs or manicure corrector and wipe off all excess, thereby straightening the line.
At the same time, when drawing a smile line, it is important to hold the brush correctly. It should not be parallel to the nail, as we usually place it when painting in one tone, but perpendicular. Thus, the border is smoother and clearer. You can replace stencils with tape, children's stickers, and even plain paper. However, not all available tools and materials are designed to be exposed to a UV lamp.
The video lessons posted in this article will tell you more about how to paint French gel polish. This process, as can be seen from the description of the technology, is not much more complicated than other painting of nails with varnish.
The smooth lines of a French coat (that’s what stylists call this type of nail art) look amazing on women’s hands. To keep it on your nails for as long as possible, it is better to use special compounds. You can do a French manicure with gel polish (see photo) yourself. In this article we will describe in detail all its types and methods of creating it at home. So let's get started.


Tools and materials for French manicure
It is very difficult to draw smooth, perfect, even lines with a regular brush. If you want your French manicure with gel polish to look perfect, it is better to purchase a ready-made set or buy everything you need separately.


We will need:
- nail files with different abrasives for processing and polishing nails;
- degreaser: alcohol, weak vinegar solution or nail polish remover;
- a set of self-adhesive stencils for a French jacket or tape for making them;
- a soft brush made of sable fur or a brush with a beveled edge; There are also special French brushes with a smile shape on sale;
- if you plan to further decorate your French manicure with gel polish (see photo) with designs, you must also purchase special brushes;
- a transparent base varnish to protect nails from the harmful effects of dyes, it allows the gel polish to adhere better; it can also be used as a top finish;
- two or three colored varnishes;
- UV or ice lamp for drying the gel; in the latter case, the nails dry faster.


If you are not afraid of experiments, it is perhaps better to arm yourself not with stencils, but with strips of tape. After all, with the help of them you can create not only standard semicircular ones, but also any asymmetrical or geometric shapes smiles. With some skill, you can draw any lines with a thin brush.
Advice! If the gel polish begins to thicken, hold the bottle in hot water 5 minutes. He will immediately soften.
Types of gel polishes. Which to choose?
The composition of gel varnishes includes esters of acrylic acid, which allow them to ideally adhere to the nail plate, and film formers, which form a durable coating under the influence of ultraviolet radiation. The introduction of special additives makes the composition more viscous and plastic, and also gives it shine.


There is simply no point in purchasing cheap varnishes. They only spoil your nails and peel off after just a couple of days. A high-quality gel composition stays on the nails for 2-3 weeks. It should be quite dense and not spread.
The favorites among such varnishes are products of American companies Gelish, Jessica Geleration, Pnb And Kodi, German O.P.I. and Japanese Masura. A special place among them is occupied by the company's shellac CND with a more gentle formula. To remove it, cutting is not required - it can be removed quite easily even with acetone.
Chinese factory brands are also popular Canni, Cristina, Bluesky. True, they have a sharper smell, but they are inexpensive (about 250 rubles), and in terms of durability they can compete even with American varnishes. Russian ones also received good reviews. Aurelia And RuNail with a wide range of colors.


The latest innovations in this area include:
- Multilac companies ruNail, does not require either a preliminary base coat or a top coat;
 New on the market - Multilac. Requires neither a preliminary base coat nor a top coat
 - Striplac companies Alessandro International: can be removed from nails without using any products, just with your hands, but its cost is still prohibitive.

Advice! Gel polymerization time depends on power ultraviolet lamp. For drying regular gels 4–6 watts is enough. Some compounds require more power up to 9 watts. It is more convenient to use a lamp with a timer - in right time she will give a signal.
Preparing the marigolds
Any manicure should look perfect, and French manicure even more so. Unevenly processed cuticles or poorly filed nails will immediately catch your eye. It is advisable to treat wavy nail plates with a special leveling agent.


To remove cuticles, we advise you to use a new product in the field of manicure: remover (cuticle softener). In this case, you will be completely protected from cuts, and you will be able to easily and easily remove excess skin without tweezers. This method of treatment is called unedged French manicure.
Let's tell you how to work with this composition:
- In order for the remover to be absorbed into the skin faster, it is better to first hold your hands in water for 4–5 minutes;
- the cuticle moves back, for this you can use an orange stick or pusher;
- Remover is applied to this area and left for about 3 minutes;
- Without wiping the nail, we begin to carefully move the cuticle with an orange stick;
- wipe the nail;
- lift the cuticle and scrape it with a metal or orange stick.


Advice! An excess of remover can negatively affect the health of the nail plate. Try to purchase only mineral or oil based formulations. But even they need to be applied only to the cuticle line, without affecting the nails.
What do you need to know about working with gel formulations?
Gel polish is able to spread on its own over the surface, so it is much easier to work with than regular polish. However, it’s still not possible to give them a manicure in half an hour. So, let's look at this process step by step:
- apply the base varnish in the thinnest layer; the brush only needs to be slightly moistened and “rub” it into the surface; In order for the gel polish to adhere firmly, such a base must be carefully painted over the entire surface, including the corners of the nail;
- place the handles in a UV lamp for 1–2 minutes to polymerize the nails;


- since the top sticky layer, called dispersion, remains on the gel after drying, it must be carefully removed with a brush, otherwise subsequent layers will lie unevenly and flow into the corners of the nail;
- It is better to apply bright colored varnish not in 2, but in 3 very thin layers, in which case it will stick better; each of them is also dried in a lamp for a couple of minutes;
- dark colors are usually painted unevenly the first time, this is normal, because the next layer will cover it;
- It is advisable to remove the dispersion layer with a brush or napkin after each drying, in this case the layers will be even and thin;
- white varnishes for French are usually denser, so it is enough to apply them in 1–2 layers; To prevent the coating from turning yellow, it needs to be dried a little less - from 20 seconds to 1.5 minutes;
- The layer of fixing varnish should be slightly thicker than the color one.


Advice! The main condition for a high-quality gel polish coating is to alternately apply the layers and dry them thoroughly. Otherwise, bubbles will form on the surface. The first layer should be the thinnest. If there are only two layers, the second one can be applied a little thicker.
Simple French manicure with gel polish
To create a smooth smile line with a French brush, you will have to practice. It is better to do this first with regular varnish. It is distributed along the edge of the nail from the center to the corners. That is, first we apply the composition to the tip of the nail, and then distribute it in two directions. There should be a minimum amount of varnish on the brush. After several such trainings, you will get the hang of it and can easily do not only a French manicure, but also any nail design with gel polish (photo).


It's much easier to work with stencils or tape. They are glued onto the nails, the desired part of the nail is painted over, and then, without waiting for it to dry, they are removed. French can be applied either to a colored base or to an unpainted nail plate.
Advice! The intensity of the nail color depends on the number of layers of gel polish. When coated in one layer, they will be translucent. Dense, rich colors of varnishes in bright shades are obtained with two or three layers of coating.
Unusual French ideas
With the help of gel polishes you can easily create any type of French manicure:
- The simple classic French style, in which the nails are coated with clear varnish to highlight them, does not lose its relevance. natural beauty and shine, and the ends are painted white; can be used as an everyday option;
- colored French: a combination of any types of contrasting varnishes;
- inverted French: the smile line does not run along the line of the nail plate, but at the cuticle in the area of the hole; such a manicure can be combined with a classic one;


- asymmetrical: the smile line moves in any direction;
- geometric: the tip of the nail is designed in the form of one or more triangles, squares, polygons, stripes or diagonals of different thicknesses;
- deep French: with a shift of the smile line to the main nail plate;
- gradient: the smile line is formed using color transitions, this method is called ombre;
- marble: tip of the nail or itself nail plate painted with the finest patterns imitating the texture of stone;
- vintage: using special “cracking” craquelure varnishes;
- Twist French: a combination of several colors at the tip of the nail;
- using drawings: the tip of the nail or the plate itself is painted over with thematic patterns, flowers or funny figures;
- combined: French nail art is combined with other types of manicure.


Advice! It turns out that in 10% of women, the nail plate can simply reject the gel, so after a couple of days the coating peels off. If you fall into this category, you will have to switch to regular polish.
French design finishing
French manicure with gel polish (photo) 2017 can be additionally decorated with all sorts of details. It is allowed and even encouraged to be supplemented with patterns made using stencils or by hand, sliders, pieces of foil, drawings, broths, kamifubuki, bows or rhinestones. In order for them to stay firmly on the nails, they must be applied to undried varnish.


If these details are applied only to the edge of the smile line or completely replace the contrasting varnish, this type of design is called the millennium French. You can also decorate and decorate your nails with varnishes with a metallic, matte, “sugar” effect or halogen compositions.
Advice! Small parts are very difficult to handle. Use a regular toothpick or orange stick to stick them on.
French manicure with a pattern
For drawing on nails, you need to purchase special acrylic compounds. They differ from ordinary gel polishes in their lower viscosity, so you can use them to paint even the thinnest openwork patterns. It is very convenient to work with such compositions: they do not dry out before placing them in a UV lamp and are easy to mix. To create color transitions, you can use ordinary watercolor paints - the finishing varnish will securely fix them.


For work, it is advisable to purchase at least 3-4 brushes of different thicknesses:
- liner brush: thin with long bristles to create long lines;
- a brush with medium bristles, it will be convenient to draw curves;
- with a wide pile for applying glitter or “sand”; it can also be used to create color transitions and large details;
- small brush with short bristles: for drawing the finest patterns.
A palette is used to mix paints. You can replace it with a small piece of foil. Simple patterns can be easily made even with an ordinary toothpick or a needle of a suitable size. It is more convenient to apply various types of dots, commas or stripes with a dots - a tool with small metal balls at the ends.
It is better to start learning how to draw on nails with the simplest geometric patterns. Of course, this will require a lot of patience and perseverance. But, of course, the result is worth it. Once you feel confident, you can begin to do more complex work.


Advice! If you need to combine several shades without mixing them, purchase a special fan brush. With it you can type different types varnishes and carefully transfer them to the nails. You can also draw abstract patterns with it.
So, we tried to describe in detail and step by step the process of creating a French coat with gel polish.