Tired of a hairstyle? Want to change the style? Learn how to cut your bangs yourself, and feel free to add perky notes to the bored styling.
Which bangs are right for you?
When choosing a bang, you can not rely only on fashion or taste. The main thing is to find the right shape. To do this, take into account the shape of the face and hair structure:
- A round face - you will not have problems with a bang, since almost all forms are suitable for a round face. Short will give enthusiasm, bangs to the middle of the forehead will make you more feminine, while oblique will visually narrow your face. And you shouldn’t refuse a long thick bang!
- Oval face - cannot boast the same versatility as the previous version. A face of this type requires an elongated straight or graduated bang;
- Square face - stop at a light asymmetric shape, it will correct a heavy chin;
- Triangular face - the thickest bangs to the eyebrows are ideal for you;
- A narrow small face with small features - give preference to a shortened bang with milled or torn edges;
- Wide-cheeked face - a rare bang of medium length will help soften its features;
- Curly hair - you can cut bangs, but be prepared for daily styling with an iron and varnish;
- Thin and sparse hair - choose the option starting at the top and covering the eyebrow line. Such a bang will make styling more voluminous.
Haircutting tools
To cut your bangs yourself, you will need several special tools:
- Ordinary scissors - their quality affects the result. Ideally, the scissors should be professional. In extreme cases, arm yourself with the sharpest;
- Thinning scissors - necessary to create interesting effects;
- A comb with thin cloves or a comb. It will be just fine if you can get a double comb. On one side there are rare cloves, on the other - frequent;
- Crabs, clips, elastic bands - are necessary for fixing hair.

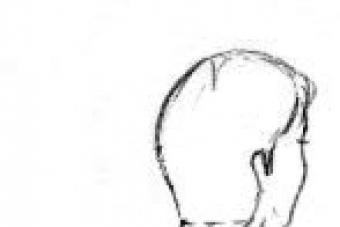
Straight Bangs
How to cut a bang at home so that it remains flat?
- Separate future bangs from the rest of the hair. Stab her with a crab.
- It is advisable to collect the remaining hair in the tail so as not to interfere.
- Take one strand in your hand, hold it between your fingers and pull it down.
- Cut the length just below the eyebrow line. Keep the scissors at an angle of 45 °, otherwise the blades will slip off the hair.
- We repeat the procedure with the remaining strands, focusing on the cut length. Make sure that the line of the bangs is strictly horizontal.
- Gently comb the bangs with a comb.
- Remove the kinks by holding the scissors at an angle of 90 °.
- Press the bangs to your forehead and check for evenness.
- Dry the strands with a hairdryer and lay with a round brush.

Important points, watch the video:
The technique of cutting oblique bangs
How to cut a slanting bang? With our help it’s very easy to do!
Step 1. Separate the future bangs from the bulk of the hair. Stab her with a crab.
Step 2. Collect the remaining hair in a ponytail.
Step 3. Carefully comb the hair and cut it obliquely. Cut from bottom to top, holding the scissors at an angle of 45 °.
Step 4. Dry the bangs with a hairdryer.
Do you know the main mistake when cutting? Look at the video:
How to make a thinning?
With the help of thinning, you can achieve interesting effects, make the bangs airy and facilitate its styling. You will need special scissors to perform the thinning. Their blade consists of small cloves, thanks to which not all hair is cut from the lock, but only a small part.
- Remove excess hair from the face.
- Divide the bangs into separate strands.
- Twist the lock into a light harness.
- With thinning scissors, make an incision approximately in the middle of the lock and at a distance of 2-3 cm from the ends.
- In the same way, process the remaining strands.
This is exactly how the masters advise to perform filing:
There are several other ways of thinning. You can walk along the ends of the hair, holding the scissors strictly horizontally, or you can turn them vertically and make several cuts diagonally. In the latter case, the bangs will be torn.
Important to remember!
When deciding to trim a beautiful bang, listen to our helpful tips:
- When cutting for the first time, do not cut too much. It is better to give preference to elongated options - if you don’t like the bangs, it can be stabbed and it will grow faster;
- The width of the future bangs is equal to the size of the forehead and is limited to the temporal cavities - it should not go beyond them;
- Should I moisturize my hair before cutting? There is no single answer. When cutting a bang “dry”, it will not turn out perfectly smooth, especially on curly or wavy hair. If the bangs are wet, then the final length will jump by about 1 cm.
Do not be afraid of stylish changes, try to be different, and the bangs will help you with this!
(1
ratings, average: 5,00
out of 5)
Most women at least once in their lives in the salon or on their own cut their bangs. Some do it regularly, then grow it, and then cut it again, adding variety to their image in this way. There are those who wear bangs constantly only, from time to time, shortening it as it grows, so that it does not close its eyes and looks normal. The main thing in these manipulations is to know how to cut the bangs correctly at home.
In contact with
The universality of the bangs is that it looks harmoniously with any hair color, length, both with a short haircut and long curls. It is important to choose its shape for your face type. The easiest way is to go to the salon and cut the bangs there, but the prices of modern stylists are such that even for such a seemingly simple service, they will take a lot of money. Therefore, many girls and women prefer to cut their own bangs at home.
It is very important to choose the type and shape of the bangs correctly, taking into account the features of the face shape and other features. Otherwise, the bangs will emphasize the existing flaws. For example, if the forehead is narrow, it is better not to cut a straight bang, because the face from this will appear rounder. If the forehead is wide, a straight bang can hide it, and it will not be evident.

Oblique bangs are considered universal, because it suits any type of appearance, oval face, hair color, short and long hair. It can be easily transformed, changed shape. Also, it can be combed discreetly with the rest of the hair, removed with a rim or bandage if necessary. As for the shape of the face, if it is oval, an oblique wavy bangs will do. For a round face, it is also better to choose an asymmetric oblique bang. A multilayer bang, which will end at about the level of the cheekbones, is perfect for a square face shape.
If it’s hard to decide which bangs are right for you, you can go to the store where wigs are sold, choose the ones with bangs and try them on in turn. This will determine which option is more suitable.
It is better to go not alone, but with friends, so that they also appreciate and give advice, help with the choice.
 Regardless of the length and shape of the bangs, in order for everything to work out, you must follow the basic rules:
- bangs should be not only fashionable, but also consistent with the shape of the face, oval;
- if the hair is curly or curly, you need to not only wet it, but also straighten it, otherwise the bangs will turn out to be curved;
- when trimming, the hair must be wet;
- it must be remembered that after the hair has dried, the cut bangs will “bounce”, so you need to cut it not at the expected level, but slightly lower;
- if you are not sure that it will be possible to cut the desired length for sure, it is better to step back a little so that you can shorten it later;
- do not pull hair down too much;
- good sharp scissors should be used.
 How most beautiful to cut a slanting bangs:
- It is necessary to separate the front strands that are planned to be cut.
- The rest of the hair is collected back into the tail with an elastic band or is cut off.
- The hair needs to be wet, combed, outlined the shortest and longest strand, take the scissors and cut it off.
- You need to cut from the bottom up, that is, from the longest strands we go carefully diagonally to the shortest.
- Comb your hair to see if it worked out exactly. If there are flaws, you need to fix them.
- Then the bangs need to be dried, combed to see what happened.
- If everything is in order, the edges of the bangs will need to be processed with thinning scissors.
In most cases, it is a straight bang that is cut off for women, believing that it is very easy to do. This is not entirely true, and many women make irreparable mistakes, which can only be corrected after a certain amount of time has passed, when the damaged bangs grow back.
 In order to cut a straight bang, you first need to use a comb to part and separate the front strands. All other hair is pulled back, piled in a tail, or pinned.
The front strands that need to be cut off must first be wetted so that they are moist, but the water does not drain from them. It is necessary to comb them. One of the main mistakes of women is that they cut off straight bangs at once, taking all the front curls. Since they grow, albeit in front, but in different parts of the head, it will not work out exactly. First you need to take a strand at the temple left or right and cut off at a level just below the eyebrows. The same thing is done with a strand on the opposite side. Then, in turn, take the strands in the middle and cut them off, adjusting the length to the side.
It should work out the same way, if everything is done correctly. If there are bumps, they will need to be fixed by cutting off where necessary. After that, the bangs need to be dried in order to evaluate the final result. If everything is in order, the hair is wet again and proceed to thinning.
The Basics of Proper Thinning
Filtration is the final processing of the edges. It is needed in order for the hair to look better and fit well. The process is to make the length of the hair at the ends different, but not much so that there is no asymmetry. The volume is artificially reduced due to such thinning. For this, special thinning scissors are used. Such a tool is unlikely to be found in everyone’s house, so if it is not there, you can simply use good sharp scissors.
Thinning is best done on dry hair. Small curls are taken separately horizontally at an angle of 90 degrees to the face.
Scissors should not be held perpendicular to the hair, but at an angle of 45 degrees. Otherwise, the places where the filing was carried out will be striking.
Moreover, this is a bang. It is necessary to cut off hair when thinning very carefully and just a little bit. You can use the technique when scissors grab a very small curl and the tips are plucked out. After thinning, the place of hair cut will not be ugly in the eye, stick out in different directions. It will be possible to easily lay such a bang, align it.
The video reveals the secrets of how to make bangs transformer:
Thick bangs can set off your face. And with it you will look "collective farm" and groomed. That is why most hairstyles include thinned bangs. But how to make a rare bang at home on your own? If you do not know how to create hairstyles, then do not do this. But in any beauty salon you will undergo this procedure for little money.
How to make a rare bang?
When a rare bang is done, the hair is wetted. This is especially true for girls who have curls.
For thinning hair, sharp and large milled scissors are used. They should not pull off hairs and leave sharp edges.
And to make a slanting bang, you need to hold the scissors upright, cutting the strand by strand.
Rare bangs and hair styling
After trimming, the hair must be washed and dried with a hairdryer. In this case, it is necessary to dry from the roots to the ends.
Then take the mus and give the bangs the desired shape. For example, comb it a little to the side.
If you have, then twist the ends of her hair. A rare bang with a small curl looks quite elegant.
Sometimes a girl is just lush bangs. In such a situation, comb it with a round comb. And it will become noticeably more voluminous.
Rare Bang Properties
This technique is often used by professional stylists. After all, with the help of rare hair you can:
- Add volume to a thin face if the bangs are straight;
- Reduce the chin and cheekbones by applying a ragged version;
- Make a serious image. Long ragged bangs;
- Zoom out face. Oblique bangs.
It is important to note that this technique does not require complex styling and great effort. And you can easily look elegant, thinning your hair once a month.
But do not think that in this way you can become a beauty. This type of haircut is not suitable for all girls. And perhaps you will have to pick up something else.
Features of self-milling
If you decide to thin out the strands yourself, then you need to separate the bangs from the rest of the hair. Just clip the rest of the hair into a ponytail.
Pay great attention to the evenness of the bangs. To do this, you can cut hair in strands. You can also periodically apply hair to your forehead to see the line that you are working on.
Hair for this should be well washed and combed. You need to do everything in front of the mirror and not rush anywhere. Of course, making bangs is less likely than cutting it. But here there are some nuances. And if you do not feel full determination in yourself, then go to the hairdresser.
Want to change? Cut the bangs. Want to look younger? Cut the bangs. Dozens more “want”? There is only one answer - cut bangs. It will help to give the appearance of mischief, ease and attractiveness. And we will tell you how to trim a bangs at home.
The choice of bangs for any kind of face
Is it said? Done! And now the extra hair is lying on the floor, and the result in the mirror is terrifying. You can ask yourself why it happened for a long time - the answer is obvious: the bangs must be selected taking into account the shape of the face. Consider the current form:

Oval
A face shape that does not bring its owners problems in hairstyle or makeup. With this form you can afford any bangs. A special charm will add a straight elongated version, touching the tips of the eyelashes. It will be interesting to look bangs made in the form of an arc.
Heart-shaped
Here you can also consider any options, however, the thickest beloved by most women will be straight thick bangs. On the high frontal part, it will look massive and highlight a sharp chin, which, due to improper selection of hairstyles, will look even sharper.
Square
Discard the thick, straight bangs toward the heavily profiled. Ideally, if the ends of the hair will have a ragged look. Asymmetric bangs visually make the face elongated and soften the corners.
Rectangular
Take a closer look at the arched bangs. In addition, a beveled shape will be a good option. The bevel angle is not important in this case and can be selected depending on individual preferences.
Round
Extend your face with asymmetric and beveled options. Be sure to mill them.
These are the basic recommendations needed to know how to cut bangs at home. Do not forget to take into account the condition of the hair: its density, state of health can significantly affect the choice of the element of hairstyle. You can make a preliminary selection of bangs in ours: upload photos online and enjoy a pleasant choice in your home environment.
How to make a straight bang at home

The simplest kind of bangs, which will require minimal concentration from you. All manipulations with the haircut must be performed on dry hair. It will not be superfluous to wash the hair.
Consider step by step how to cut a straight bang at home:
- Before you start the main procedure - prepare tool. Hairdressers advise using steel scissors with short and thin blades. Find the lightest room in the house and cut in front of a large mirror. Nothing should block the view.
- Determine the thickness and width of the bangs and stab the selected mass of hair back. The width, as a rule, does not exceed the width of the forehead. Models with wider bangs that go beyond its borders are recommended to be done at the hairdresser.
- Start cutting hair in cascades, in 2-3 sets, depending on the density of hair. Separate the first part - between it and the remaining hair there should be a horizontal parting. Cut the hair to the required length. Repeat the procedure until the shuttle hair ends.
- Comb the result. Trim hairs out of the overall composition. If desired, and technical feasibility carry out thinning.
This completes the procedure for changing appearance. Do not forget that any haircut is carried out by the inclined position of the scissors.
Mowing yourself at an angle

Technically, the execution of such a haircut of the front strands of hair is no different from the direct option. The only nuance will be change of cut shape: Select the side and cut angle to lie on your shoulders.
Shearing option - half circle

This element of hairstyle is recommended to be performed at the hairdresser. However, if you want to save money or time, you can deal with it yourself. It is better if at the same time you will have not only a theoretical understanding of hair cutting: this option assumes exact observance of symmetry and shape. Consider the technology:
- Spray hair on the front of the head with spray water. Separate the required mass of hair and create a parting in the form of the letter P.
- Start the haircut in the middle of your forehead. Cut a strand of the selected length and shift alternately to the sides: for each indent cut increase the length of the bangs by 1 mm. You should get a smooth and symmetrical semicircle.
- Profile - this will remove excessive density. Dry and lay. You can use the ironing.
Torn strands

This option can be made perfect even if you are holding scissors in your hands for the first time in your life. In the pursuit of excellence, keep in mind: the selection of torn bangs is possible only for a certain type of haircuts. This is a cascade, bob. The more the haircut of uneven lines, the better it gets along with the torn element of the hairstyle.
Consider the step-by-step instructions at home:
- The first steps are standard and do not require explanation. The discrepancy lies in the fact that you don’t stab the selected mass of hair, but divide it into small locks, folding each into a bundle.
- Cut them using a conventional blade with a difference of 1-2 mm from each other, alternating length.
- Check the result: any imperfections can easily be repaired with a blade.
It is best to lay the torn shape sideways - so it will look more interesting, giving the hairstyle additional volume.
As you can see, self-cutting bangs is easy. The first time you have to spend a little more time, however, over time, you will be able to devote 10-15 minutes to this procedure. Remember - all manipulations with cutting hair should be performed on a dry, clean head. Otherwise, an unpleasant surprise may await you. Now there’s less by one riddle: you know how to cut bangs at home and do it flawlessly.
Want to trim your bangs? First try how it will look. It is best to do several options for hairstyles, photograph the result, look from the side. You can even ask friends for advice or see the reaction in social networks, only then calmly decide on this step or refuse it. It is also a great way to change your look for just one evening.
Instruments
- hairbrush or comb
- rubber bands
- invisible
- hair band
- ironing (optional)
Laid on bangs and a side braid
1. Separate a portion of the hair from the front, approximately from ear to ear. And collect them in the tail.

2. Lower the hair forward - onto the face, and lift it so that the ends end somewhere at the level of the eyebrows.

3. Put the ends of the hair on the forehead as you want the bangs to look, and with invisible hair pin the hair directly above the forehead.
4. If you still have a loop of hair on top, simply divide it into two parts, twist each of them and fasten it on the sides with the help of invisibility.

5. Select a suitable headband.

6. Hide the excess hair under the bandage.

7. Lay your “bangs” with an iron.
8. Comb it and give it a finished look.
9. Braid the side braid and pull out the strands slightly for volume.

Laid on bangs and two bunches
1. Divide the hair into two parts horizontally from ear to ear.
2. Gather the top into the tail right on the top of the head.

3. The remaining hair also collect in the tail.

4. Divide the upper tail into two parts.

5. From the front, make a bang, as shown in the previous hairstyle. In this case, it is not necessary to use the bandage, if you do the hairstyle without it, then the invisibility will be hidden under other strands.


6. Comb the second part from the first tail and wrap it in a high bundle, secure with invisible.

7. Take the lower tail and also comb it a little, wrap it in a bundle directly under the first bundle and secure it with invisibles.

High bun and patch bang
1. Comb your hair up and make a high tail.

2. Separate a small part of the tail from the front and make a bang out of it, as shown in the first hairstyle.

3. A little comb the hair in the tail.

4. Start wrapping your hair around the base of the tail.

5. When you reach the ends, twist them a little, making a small tourniquet.

6. Secure the bundle with invisibility.

- A little trick to make the bangs perfect: put your palm to the bottom of the bangs, as if you are saluting, then lower your eyes down, sprinkle your bangs with varnish and take your palm - you get the perfect line.