Every girl wants to look her best, and manicure is not the least important part of her look. It’s easy to spot a girl who takes care of herself by her well-groomed hands. Agree, no one likes to look at broken, unpolished nails.
Most of us are accustomed to painting our nails with one color of polish, and the most we can decide on on weekdays is a few rhinestones or a couple of highlighted nails in a different color according to the teachings of Feng Shui.
However, monotony gets boring, and often you want something unusual. Due to their inability, girls refuse such experiments, but in this article we have collected 10 best photos lessons creative manicure for any occasion.
Option 1. White with stripes
Paint your nails with white polish. Wait for it to dry completely and stick thin silver metallic manicure strips (nail tapes) to your nail (or several nails). Such strips can be bought in a store or ordered online; they cost about 50 rubles per roll of one color. Use nail clippers to cut off any excess strips. Don't forget to coat your nails with clear polish or sealer. It turned out to be a great everyday manicure!
Option 2. Blue and white stripes

Cover your nails with dark blue polish and wait until dry. Glue 2 wide white stripes on some or all of your nails, pinch off the excess ends. Using a thin brush, draw a small heart on the tip of your fingers. Don't forget to seal with clear varnish.
A simple summer version is ready!
See how easy it is to make and step by step instructions
How to choose a suitable eyeliner and how to apply eyeliner, read
Don't know how to get rid of annoying blackheads on your nose? Lots of masks at:
Option 3. Flag of the United Kingdom

There are a lot of fans of this manicure, but not everyone can do it with their own hands. For this design you will need 3 varnishes: red, white and blue, as well as brushes of different thicknesses.
Apply 1-2 layers of blue varnish and let it dry. Using a brush, draw a cross on the nail with white polish, and 4 diagonal lines from the center with a thinner brush. Using the thinnest brush, paint a cross with red varnish inside the white cross. Seal with clear varnish. The flag is ready!
Option 4. Black matte + gloss

A very stylish evening manicure for girls who are not afraid to stand out from the crowd. Apply matte black polish to all nails and let it dry. Next, you need to take masking tape and cut out a zigzag (the pattern can be any). Apply tape to the nail and paint the remaining half of the nail with glossy black polish. There is no need to coat it with clear varnish, otherwise you will spoil the combination of matte and glossy shades.
Option 5. Pineapple motif

Chic manicure for summer and the beach!
Cover your nails with yellow polish, then with a thin brush brown draw diamonds with dots inside them. Emphasize the brown lines with white varnish. Use green polish to paint “grass” on the tips of your nails. Pineapple is ready!
Option 6. Clear geometry

This manicure is suitable for both office and leisure. Glue a triangle of tape onto unpainted nails and paint the free ends with silver metallic polish. Next, move the triangles closer to the hole and outline the shape with a simple pencil. Fill the resulting triangle with gold varnish.
Option 7. Skin effect

Paint your nails with the desired color of polish in two layers. Without waiting for the second layer to dry, apply a piece of fabric mesh to the nail and press. Carefully remove the fabric. Can be secured with clear varnish. This manicure can be worn both at the office and on an evening out, it all depends on the color.
Option 8. Bow

Cover your nails with turquoise polish and let it dry. Paint the tip diagonally with white varnish, try to make a curved line, as in the picture. When the varnish is dry, paint a bow in black along the line where the flowers join. This elegant manicure can be done for a celebration or just worn to work by drawing bows on only some of the nails.
How to attract love, money or success with nails? Find out everything about and how to choose colors
Curly hair can be easily straightened by keratinizing the hair. Read details
Option 9. From rich to light

Very interesting manicure for everyday wear - not flashy and original at the same time. You can achieve such color transitions with just two varnishes: the main color and white. Paint your thumbs with polish. Then make 4 middle dots of this polish on the paper. Take White color and start dripping into these points. One drop in the first, two in the second, and so on. Mix polishes at each point and paint the corresponding fingers.
Option 10. Stains on nails

You can probably go anywhere with this design. On the main white color of the nails, add blue and light blue drops. Using a needle, make streaks in a chaotic manner. Seal with clear varnish.
Which manicure did you like best?
(1
people already rated)
It's hard to imagine nails modern woman without original manicure. Today, fashionistas do nothing but compete to see who has the most fashionable and original manicure.
But often, we simply don’t have enough time to go to the salon and get a manicure.
We offer you several options for an original manicure for all occasions, which you can do yourself at home using simple improvised means.
But you should be patient, because... Not everything can work out the first time.
All you need to become the owner of beautiful nails is multi-colored varnishes, special manicure brushes, which can be purchased at any cosmetics store, or other available products. More on this later and in more detail.
1.So, let's start with the simplest.
As for me, the simplest manicure option is a manicure with polka dots or dots. This manicure couldn't be easier to do. All you need is a special brush with a ball on the end, or you can use a regular pen. Here's a good example. 


2. Ombre manicure.
Popular and current manicure ombre, i.e. gradation from dark to lighter colors and vice versa can be easily done at home. All you need is a few polishes and a sponge or piece of foam rubber.
There are two options gradient manicure. The first and simplest option is to paint each nail with a single-color varnish with a color gradation from dark to light. Of course, if you have five polishes in different shades of the same color, then the task becomes much easier.
You can also make this manicure using just two polishes - any colored polish and white.
![]()
The second version of the ombre manicure is a little more complicated, but it can still be done and even necessary. Apply several stripes of varnish different color onto the sponge and quickly apply to the nail, using horizontal movements to carefully paint the entire surface of the nail. Carefully remove any remaining varnish using a cotton swab.


3.Negative space.
The now popular manicure called “negative space” can also be done by every girl on her own. To do this, you need to purchase various stickers for manicure in advance. These can be stencil stickers for a French manicure or foil strips for a manicure. What pattern to create is a matter of your imagination. And we offer you several scheme options.


4.Geometric manicure.
In general, depict various geometric figures, stripes are always relevant. And by the way, it's not very difficult. For this manicure, use special stickers or regular tape.


5. Manicure “Frame”.
Manicure frame is today's trend. You can do it in two ways. First: paint your nail one color. This must be done very carefully, carefully painting all corners of the nail. Let the varnish dry. And then paint the nail with a second color. Do this in such a way that the bottom and sides of the nail remain unpainted.

DIY manicure frame
And the second option: paint the nail with one color, and then, using a thin brush, outline the edges of the nail.

DIY manicure frame
Another option for frame manicure is to simply paste round beads on the sides of the nail or make polka dots with varnish.

6.Leopard.
Doing a leopard print manicure yourself is also not difficult for those who really want it.
![]()
DIY leopard print manicure
7. One more original idea for manicure is a manicure using feathers. If you have beautiful feathers, then feel free to use them to create an amazing manicure.

DIY feather manicure
8. Manicure in a mesh.
A manicure with a fine mesh will look very original. To do this, you need to find a dense fine mesh and get started.

DIY manicure with mesh
9.Caviar manicure.
The so-called caviar manicure is also very popular now. Exist special varnishes, and it can also be done using special small beads for manicure. All you need to do is paint your nail and roll it in beads.


- How to do matte manicure?
- Lunar manicure: creation scheme
- How to do a water manicure?
- How to do an ombre manicure?
- Ideas for a beautiful manicure
- A manicure that you do yourself has several undeniable advantages. Firstly, you do not need to make an appointment at the salon in advance and waste time on the road. Secondly, this skill can save you a lot of money. And thirdly, the procedure for creating a manicure can be truly exciting. We have compiled a detailed beauty cheat sheet that will help understand the issue even for those who have never held a nail file in their hands.
How to give yourself a manicure?
Before you start using bright varnish or creating complex nail art, you need to prepare the appropriate ground - in other words, do a basic manicure. We'll tell you how to do this at home.
What do you need for a manicure?
© site
Of course, the list of essentials depends on many factors. For example, depending on what type of manicure you prefer: . But the standard set of tools you'll need looks something like this:
- nail polish remover,
- cotton pads or lint-free wipes,
- nail clippers or nail scissors,
- orange stick or cuticle pusher,
- cuticle remover (cuticle remover),
- file for shaping nails,
- nail file,
- hand cream,
- base coat for nails
Simple unedged manicure at home: step-by-step instructions
Have you prepared everything you need? Then make sure your workplace properly lit - and follow our instructions exactly.
Wipe your nails with nail polish remover
The first step is to remove any remaining old polish using cotton wool or a lint-free cloth moistened with nail polish remover. By the way, it is better, if possible, to do this with a napkin: cotton pads often leave small fibers, due to which the varnish is then distributed unevenly. And even if there is no polish on your nails, still wipe the nail plate with nail polish remover to degrease it.

© site
Use scissors or clippers to trim your nails. If your nails are not too long, or you do not plan to shorten them significantly, you can skip this step and immediately proceed to using a nail file.
Use a nail file to natural nails abrasiveness 180-200 grit. You can find out how to choose the right tool, and choose suitable form our detailed nails will help. Do not move the file in a “right-to-left” pattern, this can lead to splitting of the nails: move in one direction, with smooth movements. Round your nails very carefully and do not overdo it: if you file your nails on the sides too actively, this can lead to ingrown nails in the future.
Under no circumstances use a nail file immediately after taking a shower; the nail plate must be completely dry!

© site
Sand the edges
Use a buffing file to smooth the edges of your nails to avoid splitting and lightly buff the surface. But, again, do not try to achieve a mirror shine: it will be difficult for nail polish to “fix” on a perfectly smooth surface.

© site
Using an orange stick or a special pusher, carefully push back the cuticle and pterygium - the lower layer of the cuticle, which is a thin film.

© site
Apply a special cuticle softener (remover) and wait 20-30 seconds.

© site
Push back the cuticle again
Using an orange stick or pusher, gently push back the cuticle again, trying not to press too hard on it. If you don’t have a special remover on hand, you can use a rich cream instead.

© site
If necessary, remove burrs with pliers or scissors. Treat the skin of your hands with cream.

© site
After removing cuticles, use an alcohol-based solution or nail polish remover. This will help remove any remaining remover and degrease the nail surface. By the way, some beauty brands produce special nail degreasers; they are also very effective and easy to use.
Apply base coat
Be sure to use a base coat: it will prevent yellowing of the nail plate and provide better adhesion to the polish. Distribute the base in a thin layer, slightly retreating from the cuticle. Don't skip this step, even if you plan to paint your nails with a light polish later.

© site
Video tutorial on how to create a manicure
Beauty blogger Lena Sevelenium has prepared a simple and understandable video tutorial on how to create a basic manicure at home. Let's see!
Is it worth getting a trim manicure?
Nowadays, the procedure of unedged (European) manicure is more popular, the creation schemes for which we presented above. With this manicure, the cuticle is not cut, but softened using special means(removera), and then moves away.
If you usually stick to an untrimmed manicure, it's best not to start trimming your cuticles: the more often you trim them, the rougher they become and the harder they are to remove.
In addition, the cuticle serves as a barrier and protects the skin from infections. If you are still used to trimmed (classic) manicure, but would like to switch to a European one, just stop trimming the cuticles, start using a remover - and be patient. Fortunately, the process is reversible, and if you refuse to trim your cuticles, with regular European manicure After some time, the cuticle will become softer and thinner.
How to do a French manicure at home?

© iStock
French is one of the classic types of manicure. If the tip of the nail is highlighted with a contrasting stripe, then this is a French style. The canonical version involves a combination of “pink translucent varnish plus a white stripe,” but today, more and more often, in French manicure they use different and different textures - shimmer, glitter, and matte.
According to latest trends the colored line at the tip of the nail does not necessarily have to be even. But if you want to create a classic version of French, then this problem will be the main one you have to solve.
The most common way is to use special stencils to create a French jacket. You will only need to glue the stencil (you should not start right at the base of the nail, but slightly away from it) and mark the tip with varnish. When it dries, peel off the stencil: a perfectly even strip will remain on the nail.

© site
A brush can also help you quickly and conveniently draw an even strip. french manicure, the edge of which is not straight or beveled, but with a semicircle “cut” in the center. Such brushes are sold only in specialized stores, so you will have to spend some time searching for them, but they will save you a lot of time when creating a French jacket.

© site
The third way (and perhaps the easiest) is to buy special stickers for the jacket. You just need to glue a ready-made strip of the selected color to the edge of the nail.
French manicure: step-by-step photo instructions
For anyone who is skilled enough to work with manicure brushes, making a French manicure will be as easy as shelling pears. You will need the brush itself (the thinnest possible), a transparent base, soft pink or another varnish light shade, white or any colored varnish with which you will paint a stripe on the tip of the nail, as well as a fixative varnish.
Apply clear base coat.
Apply two layers of light pink or beige nail polish and wait a couple of minutes for it to dry.

© site
Using a thin artistic brush, carefully paint the tip of the nail with white or colored varnish, creating that very “smile” that distinguishes French manicure from other types of manicure.

© site
How to do a quartz manicure?
A nail plate with imitation of streaks and veins, like on the surface of quartz, is one of the main nail trends of recent years. How to repeat this image? First, stock up on a soft pink polish with a translucent texture, white polish, a toothpick or needle, and, of course, base and top coats.

© carbonfairy
Apply a base coat and paint your nails with a soft pink translucent polish in several layers (for example, a classic French polish is suitable). In this case, it is not so much the specific shade that is important, but the texture: the varnish should not be dense, otherwise it will not be possible to create the quartz effect.
Wait for the layers of pink polish to dry thoroughly and begin creating those very white “veins” that distinguish this type of manicure from the rest. Paint them with a toothpick, a needle or a special manicure brush with old or pearl varnish applied to it. Draw the lines in a random pattern, and then, before the polish has time to dry, cover your nails with another layer of translucent pink polish so that the lines end up a little blurry.
Apply clear topcoat.
How to make a matte manicure?
The easiest way to create a matte manicure, which has recently become a serious competitor to the usual glossy manicure, is to use a special matte coating: many nail brands produce these today. The coating can be colored or transparent - the latter can be complemented by any other glossy varnish to turn it matte.
- You will need: nail polish remover or nail degreaser, cotton pad, colored polish of any shade, matte finish.

© site
Apply a special degreaser to your nails or wipe with a cotton pad soaked in nail polish remover.
Apply any varnish from your collection in two layers. It can be with a dense or translucent texture, with shimmer or glitter, metallic or pearlescent. But it’s worth clarifying that an ordinary plain varnish with a dense texture will look more impressive in combination with a matte top.

© site
Make sure that the coating is perfectly smooth, without the slightest flaws. A matte top will highlight imperfections, so if you are not happy with something, it is better to repaint your nail. Also keep in mind that a matte finish can change the original shade of the varnish - for example, make it lighter. Apply a matte finish to your nail. Manicure is ready!

© site
You can learn about other ways to create a matte manicure using available tools from.
How to do a marble manicure?

© greciimua
Marble manicure in your own way appearance resembles quartz, as it is made according to the same principle. In this case, it is proposed to create a pattern on the nails that imitates the surface of marble tiles with multi-colored veins. How to quickly create it?
- You will need: a base clear coat, white varnish, black varnish, gray varnish, manicure or thin art brush, sponge, transparent top coat.
As usual, start your manicure by applying a layer of base coat that will protect your nail plate.
© site
Apply one or two coats of white varnish, depending on how thick its texture is. Your task is to create a coating without “bald spots”. Wait for the polish to dry thoroughly.

© site
Using black varnish, using a special manicure brush or the thinnest artistic brush, draw thin stripes on your nails in a chaotic manner.
Use gray polish to paint a few dots on your nails. Do this when the black lines are already dry so as not to smear the previous coat of varnish.
Carefully apply a clean cosmetic sponge to the surface of the nail: this action will help create those “marble” stains.

© esnail_la
Seal the effect with a clear coat.
DIY mirror manicure
The easiest way to create a mirror manicure is with a special shiny powder (rubbing), which can be found in specialized stores. Also, you will have to use not ordinary, but gel polish. In addition, you will need special coatings for gel polish (base and top), a UV lamp and a cosmetic sponge.
Apply a special transparent base for gel polish, hold your nails under a UV lamp for two minutes so that the coating has time to harden.

Looking through the Instagram feed, my eyes widen from the abundance of designs. I want to try each of them on myself and show off my brand new nails to my friends. You can repeat the beautiful coating or decorate your fingers at any nail salon. But how to do a manicure yourself?
It is enough to understand the technique and study the principles of application. It is not necessary to buy expensive equipment and a huge number of tools. The most simple ideas designs are made with the help of several bottles of varnish and imagination. How to do it original manicure do it yourself for beginners and what is the easiest way to do it?
Care
Any nails must first be put in order and the plate properly prepared for application. Only then can color be applied. All procedures will take no more than 30 minutes of free time.
Form
You need to give it the desired shape with a nail file. Classic and popular forms today:
- oval;
- square;
- soft square;
- almond.
How to choose the right nail file? There are many types of materials:
- metal;
- glass;
- ceramic;
- plastic;
- sand.
First you need to determine how hard your nails are. The numbers written on the files indicate abrasiveness. The average abrasiveness for natural nails should start from 190 and end at 270 grit, for extensions from 90 to 180 grit. It is recommended to cut them in one direction, touching them lightly so as not to damage them too much.
When doing a manicure with your own hands, the best and most natural option is a glass nail file.
Steaming
After this, you need to steam your hands. Place the hands in a warm bath with aromatic salt for 10-15 minutes. It nourishes the nail plate and also softens the cuticle.
Then you need to cut it off with special nail scissors. And treat all areas with nourishing oil. If you don’t have scissors, you can use products that soften the cuticle. It can be easily removed with an orange stick.
Polishing
A special procedure that gives your fingers well-groomed and healthy looking. You need to prepare in advance:
- buff (special nail file);
- oil;
- cream.
The nail plate is polished with a buff. You need to cut carefully, lightly touching the surface. Special attention It is worth paying attention to the cuticle, the area of the side rollers and the tip. After the procedure is completed, a nourishing cream is applied.
Coating
How to do a manicure yourself? Just a few years ago, girls used ordinary varnishes, which were washed off literally on the second day. Each time I had to re-paint the nail, which was very inconvenient. It was replaced by gel. This is a whole system, thanks to which the color lasts longer on the nail for about 2-3 weeks.
Preparing for a manicure with your own hands, step-by-step video instructions.
Materials and tools
After we took care of our nails, it’s time to choose materials and tools to do your own manicure. You can now work with the prepared nail. If gel polish is chosen as the coating, then a manicure like a pie consists of several layers. It includes:
- primer;
- base;
- 1 layer of color;
- 2 layer of color;
- clinser;
- lamp.
The primer strengthens the adhesion between the nail and the polish. It is best to use acid-free ones. It can be applied to the entire nail or to the tip. Some masters and girls neglect the primer. But with the first piece of gel polish that flies off or peels off, the situation changes.
A beautiful DIY manicure starts with a base coat. It provides a strong connection between the nail surface and the gel polish. It is applied in a thin layer. The base dries in an LED lamp for about 10 seconds, and in a UV lamp for about 1 minute. After drying with a lint-free cloth, it is recommended to remove sticky layer.
Painting has its own subtleties. Before starting work, you need to lightly shake the bottle, rotating it in different directions to avoid bubbles. If there is too much varnish, then there is a high probability of getting a wavy and swollen coating during polymerization in a lamp.
Remember that 3 thin layers are better than 2 thick ones.
When the shade density is sufficient, you can apply the top. It can be either glossy and catches glare, or noble matte. The top is dried in an LED lamp for about 30 seconds, and in a UV lamp for about 2 minutes. When the manicure is finished, it is necessary to remove the dispersion (sticky) layer with a cleaner.
Step-by-step instruction
Next, we have prepared for you several DIY manicure ideas in the form step by step instructions. With just a few bottles of colored polish in your arsenal, you can already create a simple design on your nails. It is recommended to complement the images with manicure accessories and gradually complicate the design. All tools are available for sale at any nail store.
French
Classic manicure is so universal in everyday life that it can not only be combined with any in a feminine way, but also easy to implement. The French finish consists of a camouflage pattern that matches the shade of the natural base and white smile. As a base, you can choose any beige and light pink shades. To draw a thin white smile line, you can use arc-shaped stencils.
The good thing about the design is that you can always add modern touches to the classics. For example, snow-white holes, patterns and the intersection of straight lines will look luxurious on a nude base. A laconic and simple design can always be diluted with sparkling rhinestones and ribbons. And also change the colors of the holes and the substrate to contrasting ones. , made with your own hands, can be seen in the photo.

Gradient
When monochrome is too ordinary, a gradient comes to the rescue. This is a transition from one tone to the next. It is best to choose those shades that are in harmony with each other, or are nearby on the color wheel and differ by a couple of tones. It is done in several ways:
Option 1
- Before application, it is recommended to protect the skin around the cuticle with skin defender or cover it with tape.
- Apply 2 or 3 shades onto a sponge or kitchen sponge, slightly overlapping each other. White varnish can serve as a middle tone.
- Use a sponge to transfer the colors onto the nail using light patting movements.
- For brightness, repeat the procedure 2-3 times, updating the colors on the sponge.
- After reaching saturation, apply gloss varnish. It will smooth out the transition well.
Option 2
- Apply the first color to half of the nail. Apply a second color to the remaining half.
- Using a thin brush, carefully blend the border between the shades.
- Repeat the second color layer.
- Cover with topcoat and dry in a lamp.
Ombre can't always be on just one finger. The color transition can be done by using all fingers at once. Starting from the largest, which will be covered in dark shades, and reaching the little finger, which will be painted in the lightest.
Multicolored nails
This manicure can be done by yourself and is suitable for all beginners because it is very easy and simple to do. It is recommended to experiment endlessly with this design. Paint each finger in different shades or combine colors on one nail. On a darker substrate you can paint figures with a light varnish or vice versa. You can also create entire shapes or divide an area into several parts using color.

Patterns, drawings and sparkles
There is nothing easier than to dilute a monochromatic design graceful patterns or beautiful drawings. You can draw with a dots, toothpick or bobby pin. The most simple options:
- peas;
- symbols;
- figures;
- stems;
- straight and smooth lines;
- glitter.
- In addition, we recommend trying it. You need to perform a light manicure with your own hands step by step:
- Cover the skin around the cuticle with tape.
- Add a drop of the first colored varnish to a warm glass of water.
- When this drop spreads over the surface, forming a circle, have time to drop a drop of the second varnish.
- You can alternate shades in any quantity and order. There should be about 30 circles in total.
- Use a toothpick to draw pictures.
- Lower your finger for 10-15 seconds, picking up the design on the nail.
- Cover with a layer of top.
The secret of overflow
There is no girl who has not seen those very original mirror nails. Whether it's a gold surface that looks like a smooth foil, a glittery sparkling effect or a shift from one shade to another. But few people know how to do such a manicure themselves.
To perform this you will need a special powder, which consists of small multi-colored particles. The future effect depends on its texture. Find different types You can rub it in any cosmetic store. After applying the base and top coat onto the nail, use an eyeshadow applicator to carefully rub in small particles. The result will be original iridescent nails. That's the whole secret.
velvet Looks good in New Year and summer designs.With these simple ways Now you know how to do your own manicure.
These manicure trends are killing us. I want to try some of them, because it’s interesting how they wear in real life. Others simply smile, others you just want to unsee. See our selection of the most unusual nails this year. Now we have seen everything!
1. Custom manicure with wire.
“This booze” originated from eastern countries, where manicurists constantly experiment with their clients’ nails in order to create a more outrageous masterpiece. We hasten to note that some manicure options with wire look completely fine. For example this one:
Now compare with these nails with wire - “well”:
 @nailsbymei
2. Unusual manicure with chains.
Nails with chains look beautiful only if the work is done delicately and with precision. Rough pieces of chain are bulky and too flashy. Let's look at this strange option:

And here there is simply an unrealistic number of chains:
 @pilki_nail
 @nailsbymei
 @nailsby_evon
3. Manicure with DEAD ANIMALS!
There are battles on the Internet about whether such a manicure is beautiful, or whether it’s somehow scary to sculpt dried spiders, scorpions and seahorses on your nails. We present to your attention the “dead souls” nail design:
 @deadlynails
 @deadlynails
 @deadlynails
 @deadlynails
 @deadlynails
Real snake skin!!!
 @deadlynails
And another unusual manicure with a scorpion:
4. Dynamic manicure - steampunk, spinner manicure.
Dynamic means moving, and from here it is immediately clear that we are talking about nails with spare parts that can be twisted, pressed, and separated. Human imagination has no limits!
 @deadlynails
5. Strange manicure with marijuana.
Weed nails are too much! 🙂 Let’s just leave this here. No comments.
6. Amazing manicure with large stones.
Some nail artists use pieces of real turquoise in their work, others use pearls, and others use crystals. Whether or not to be such a trend is your decision.
 @coyarose
 @coyarose
 @kaori_nails
 @sweetlyflawless
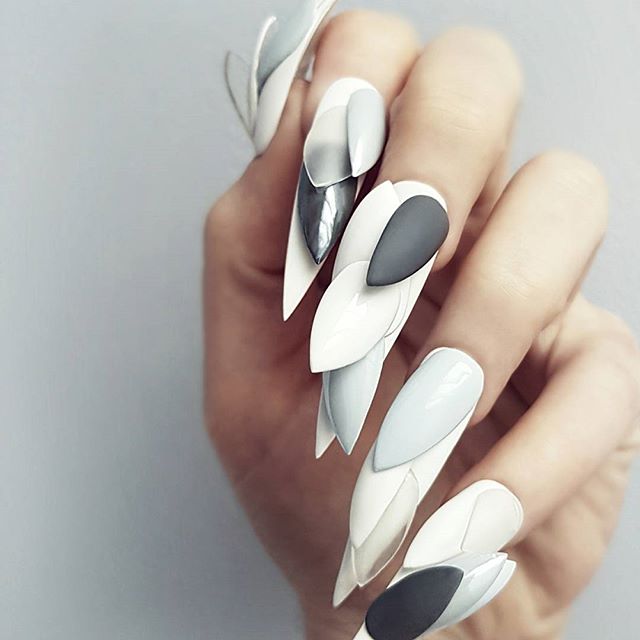
7. Amazing volumetric modeling.
Between ourselves, we called this manicure a design “with body parts.” You can sculpt anything - even the butt and chest, even the nose, even... in principle, read about this last “even” soon in our article “manicure 18+” :)))

 @yana_luzan
8. Smart radio manicure with microcircuits.
If you are a radio amateur, then this unusual manicure is just for you. If not... Just take a look and write to us if you like such masterpieces.
 @nanasanzmes3
9. Fun Lego manicure.
Lego nails are impressive. Abroad, many would give their souls for such a design. What do you think?
 @hy_effect
 @nailtop_kik
10. Huge nail piercing.
We are not talking about that one ring or nail in the nail plate. We mean a really huge piercing, which is painful to look at) But it’s perfect for a photo shoot!
 @flossgloss
 @flossgloss
11. Manicure with pom-poms.
The fur trend has already passed, replaced by an unusual manicure with fur pom-poms.
 @jaysmommie


12. Double-sided manicure.
It's like Louboutins - good no matter what. The second side of the nail is either painted with some shade (sometimes contrasting) or sprinkled with sparkles (glitter). Naaais!
 @nailsbymei
13. Transparent nails.
They are either built up or glued to their short nails. Sometimes, we agree, it is very impressive!
 @perfect10customnails
14. Extra-long nails.
A slightly scary trend, but it exists. They say that such a manicure costs about $1000.
 @thenailceo
 @deadlynails
15. Comic prank manicure.
I really liked the idea! The joke was a 100% success!!!
 @cal.m_nails
16. Manicure with dried flowers.
Looks very cute, has repeatedly appeared on the websites of famous publications such as Glamor and Teenvogue.
 @nunis_nails
 @nunis_nails
17. Manicure with real candies.
For real lovers of shocking! It turns out that you can use anything in nail design, even your favorite candies.
 @deadlynails
 @basecoatnailsalon
18. Manicure with jelly bears.
Tell me honestly, do you also love vitamin jelly bears, and when you give them to your kids, do you take a few for yourself? Then you will love this manicure! Watch the video to better understand how this sweet masterpiece was created.
 @nail_unistella
19. Unusual manicure with real leaves!
There was a manicure with dry grass, now it’s just leaves. And yes, you can insert any small plant under the layer of material, and everything will be as reliable in your socks as rhinestone sparkles.
 @nailsby_jamie
20. Fake fake nails.
Of course, this is just a spectacular fashion picture, for photo shoots and enthusiastic exclamations of “wow” from connoisseurs of everything strange and unusual. But it still looks strange.
 @nailsbymei
 @perfect10customnails
21. Strange alien manicure.
And our selection ends with an unusual alien. This cosmic manicure would look great at a Halloween party. So take note for the fall!
 @naominailsnyc
22. Nails with live succulents.
Roz Borg has a very interesting Instagram account. There are a lot of photos of succulent plants, which sometimes appear in the form of macro photography,
then in tiny ikebana. Nails with cacti-succulents were published by many authoritative publications. This is how you can become famous thanks to your favorite hobby and being different from others.
23. Strange manicure with geode stone.
These nails are easy to do and look impressive. First, the marble effect is created. Then, using foil or glitter, a “geode” texture is created for the stone.
 @red_iguana_
24. Aquarium nails.
Without words. Between two nail plates(your own and artificial) liquid and glitter are placed. You move your nail like this and you see cute bubbles.
 @nailsby_evon
Video on how to make these aquarium nails:
25. Manicure that glows in the dark.
If you love nightlife, then buying this glowing nail polish is a must for you. Unrealistically cool!
 @mukibuci
You will find more photos on the topic of manicure on our Pinterest board and on our Instagram @thenewestnails. Subscribe, save ideas, get inspired!
All rights to the photo belong to their authors, if you see your photo and do not agree with its placement, write to [email protected], and we will immediately solve this problem. But... well, I really wouldn’t want to delete such masterpieces! If you are included in our selection, then you are really cool!


