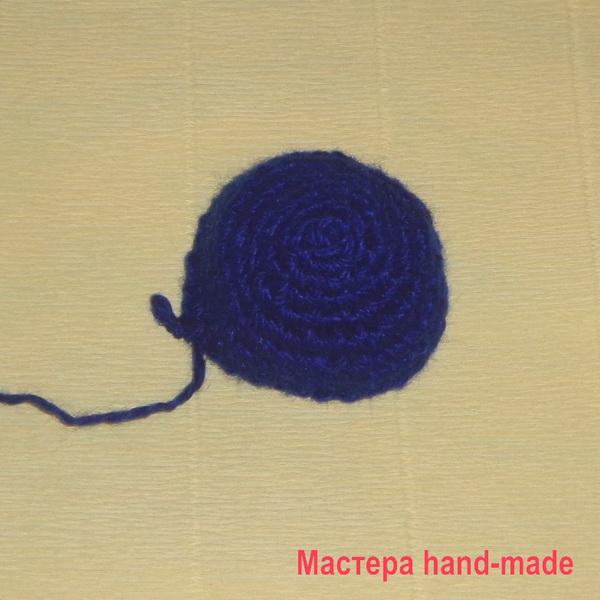
Such large voluminous stars in the form of stars came to us from Sweden and Scandinavian traditions. Today, for several years these stars have been one of the Christmas and New Year trends throughout Europe and even in the USA. Which is not surprising: their charm, both in a lit and in a quenched state, evokes the most festive mood. They are hung in the house and on the street, in clubs and cafes, placed on shelves, placed on a festive table on special thin high holders and even mounted on the tops of decorated Christmas trees, as a classic symbolic star of Bethlehem.


These stars are glued from music paper, from filigree cut (as) modules, from colored, waxed and tissue paper. They are made plain and colored, simple and decorated. You can glue a huge and small star, with long or short tops, a classic five-pointed, 18-pointed or even a ball in this style - the choice is yours. First, let's see the basis for creating such a star, then we will discuss design options and how to implement them.

You will be required:
- Thick paper (the thickest for the printer) or very thin cardboard (or thin sheets of easily cut plastic), as well as optional colored paper or scrapbooking paper with prints;
- Access to the printer;
- Scissors of different sizes - from long to manicure;
- Clerical knife (optional);
- Glue or good double-sided adhesive tape;
- Needle and thread;
- Unnecessary newspapers.
Putting a Star:
1. We print the template of one vertex for the star from here. In the pdf file you will find templates for stars of three different sizes - choose to taste. Later, starting from them, you can model stars of an individual shape and size.
For a small star, all 5 vertices fit on one page, for large stars, respectively, you will have to print several pages if you make a star out of plain white paper. If your printer is capable of printing on thin color paper, be sure to print on the back - white - side of it.
If you just need a template for colored paper - which you will then trace with a pencil on the back of colored sheets - print only 1 template from all those presented in the file. If the colored paper is too thin to create a star, simply stick it first on thin sheets of white printer paper and let the glue dry.
2. Cut out the details from the template along solid lines (dashed line - bend lines). Bend the parts in dashed lines.
.jpg)
.jpg)
So far, for the first craft, you need 5 of these pieces. Then you will count and set the quantity yourself.
3. We glue each module on the side of the tab, specially provided in the template. We make sure that each time we stick the tab inside the modules, and not out. We put glue a little so that it does not protrude over the edges and leave no traces on the paper.

.jpg)
You can always use a high-quality double-sided adhesive tape for these purposes - it will hold no worse, and it will be easier (and faster) for many to work with it. But really hot bulbs can melt the tape, so choose the material wisely and be careful!
4. We take 2 modules and glue them in pairs for the 2 lower tabs of the first module like this - see the picture below. The tongues go inside the second module.


.jpg)
5. Two paired modules and one remaining are glued in the same way into the star. At the same time, we do not glue the first and last modules together (if you want to place a light source inside the star; if the star you have is a simple decoration without lighting, feel free to glue these modules together with the edges). Instead, cut two identical long ropes from medium-sized yarn (or take two thin ribbons), glue the tip of the first (at least 5 cm), or stretch the first module from the bottom to the inside from the inside (if you decide to "sew in", do on the rope / ribbon tip the knot is larger, you can also string a small circle of cardboard on top of the knot for sealing, finally sew the ropes / ribbons no more than 2-3 cm from the lower edges of the modules), the tip of the second is inside the second module. We are waiting for the glue to dry, if used. For these strings you can tie the cones so that the star retains its shape.

.jpg)

Or you can take one long rope to pass it into the holes of both modules - also from the inside out. This method is not suitable if you put a Christmas garland inside the star.

Here, the ropes are sewn in the middle of both modules, but this is unaesthetic, and basically they don’t. By the way, tying the ropes will be quite difficult, so have patience and / or ask someone with longer and thinner fingers to do this (or just help you hold the first knot).
6. Fully insert a short Christmas tree garland inside the star with a battery-mounted control unit (we place the block at the very hole in the star) and then tie the strings onto the bow so that you can easily untie them and turn the garland on / off or change the battery in the garland as necessary. See below for light source options.
.jpg)
7. What is remarkable, when you untie the ropes and take out the light source, your star folds perfectly into such a multilayer flat shape for absolutely safe storage - and almost does not take up space!
.jpg)
IMPORTANT : although your stars are not connected to the network, for safety reasons, do not leave them turned on without supervision, because sometimes the bulbs get quite hot, which can cause a fire. The optimal type of light bulbs for these fixtures is compact fluorescent bulbs and, of course, LED bulbs, which are usually - usually! - remain relatively cold.
An alternative light source for a Swedish star-shaped lamp - also turning off:
1. Buy individual small LED bulbs (1 bulb per star, the optimal bulb length is about 10 mm; available on the Internet both in RuNet and in real building supermarkets), a set of large flat round batteries (CR2032; 1 battery - 1 light bulb) and as many small flat neodymium magnets (commercially available). Also prepare a transparent or matte plain tape - you can individually reel tape 1.9 and 1.2 cm wide - and any double-sided tape. The coin in the picture below is just for clarity of size.

2. From cardboard we cut rectangles 4.5 cm long and as many rectangles 1.9 cm long. Their width should be slightly larger than the width of a large flat battery. The number of such paired parts is equal to the number of stars that you want to illuminate. We buy a set of gaskets for holes (if you find it on sale) or cut rings from the same cardboard (the diameter of the ring is equal to the width of the strip).

3. We glue the ring on the tip of a longer cardboard rectangle. The glue has dried - we cut out such a hook here on this tip. A hole for convenience in the center can be made with a hole punch.


5. We shorten the wires-antennae of the LED bulb with approximately 0.6 cm of wire cutters. This may or may not be done, depending on the size of your star, so that the bulb then hangs strictly in the center of the star. Moreover, if you still cut, do it at the same angle at which the antennae are cut initially so that one antennae remains shorter than the second.


7. Now the battery with adhesive tape - completely sealed with the edge forward - squeeze between the antennae of the LED-bulb, while the longer antenna must fall on the plus side of the battery, and the shorter one on the back of the battery. And we stop the longer antennae on the edge of the tape so that the wire does not touch the battery. If you are not sure which antenna should be attached to which side of the battery, push the battery deeper so that both antennae touch their sides of the battery: if placed correctly, the light comes on - and then pull the battery back to the desired level; if it doesn’t catch fire, swap the antennae on the battery.

8. Glue the battery with the bulb with the back side down to the bottom of the cardboard label - to double-sided tape - and securely fix in place and below the adhesive tape originally glued to the battery. Be careful - do not move the upper antennae of the bulb beyond the border of the tape.


And here is how it works: we apply a magnet simultaneously to the free tip of the antennae from the bulb and to the large battery - and the bulb turns on. The magnet will attract to the battery and it will "sit" in place quite firmly. Turn the cardboard with the magnet over on the other side (magnet up) - and again attach it to the large battery - and the light goes off, and the cardboard with the magnet still holds in place. That’s the whole secret!


For such a label with a light bulb, the connecting rope on the star above must be solid - so that you can hang the label on it by the hook.
.jpg)

Design options for classic Swedish star lights:
1. Buy curly hole punchers and make curly holes (after step 2) in the bent but not yet glued modules of the star - as symmetrical as possible or just in random order. It can be completely different figures from stars and months to hearts and flowers, and you can use only 1 type of figures (and also - of the same or different sizes). Classic volumetric Swedish stars - usually come with curly holes, rather than solid paper.


2. Having marked with pencil the same design of large slots on each module that has not yet been glued (it is optimal to do this according to a single template from cardboard - for complete symmetry of the pattern on the finished star), put each module on a stack of newspapers or a special mat for cutting and cut it out with an office or craft knife this design.


4. Top stars can be decorated with pencil or rhinestones, sparkles or additional details from colored paper, but, as a rule, the patterns in these cases are made very simple and most restrained so as not to distract from the simple graceful beauty of the star itself. It’s just so classic, the rest is up to you!

5. Paste thin colored paper onto thin white (so that later the light passes better) before cutting out the modules - and you will get not a white, but a colored star.

6. If you have 5 sheets of paper with the same large pattern, you can, overlaying and tracing the pattern in a strictly defined place on the patterns, cut the modules with the pattern in the center, and then, as described in paragraph 2, cut individual specific parts of this pattern on all modules. Again, under the cut-out areas, you can again stick colored tissue paper, or you can simply leave the holes as they are.

.jpg)
.jpg)


.jpg)


Add additional ears to all lower edges - and you can glue a pointed “ball” instead of a star.


And it doesn’t matter if you made a complicated pattern on a star or simple - it will look amazing anyway!
Happy New Year!
Sources:
www.homemade-gifts-made-easy.com/paper-star-lantern.html
www.meandmydiy.com

Among all the holiday crafts, the Christmas star has a central place, because it is a symbol of Christmas.
Also, the Christmas star is a traditional decoration for the Christmas tree and various Christmas compositions. Using a thread, it can be hung from the ceiling or window frame. In addition, it can be a wonderful gift for family and friends.
How to make a christmas star?
There are many options for making a Christmas star. It all depends on the materials available, the craftsmanship and the imagination of the creator. You can make a Christmas star from paper, cardboard, fabric, wire, nuts, cones, etc. If you have knitting skills, a knitted star will look very cute. At the final stage, you can decorate the finished product with sparkles, beads, beads and other materials.
Consider some of the options for making a Christmas star with your own hands.
Master class "Christmas Star"

DIY Christmas star will not only decorate your home, but will help create a festive mood.
 |
 |
 |
How to make a Christmas star out of paper with your own hands for a competition in kindergarten or school? Now we will show 5 ways to make this Christmas craft, and you already choose what you and the child can do.
Paper Christmas Star: Option # 1
The first craft is not just a Christmas paper star. This is a star-lamp. So get ready, it will not be easy to do it. However, it's worth it. To build such beauty with your own hands, you will need 5 sheets of thick paper, scissors, a paper or construction knife, glue, a stapler and a cord.
Paper Christmas Star: Option # 2
Making this Christmas star out of paper is much easier to do with your own hands than the previous one. You will need two sheets of paper, scissors and glue. Fold the paper as shown in the picture, make cuts, and then glue it with the second same part.
Or here's a video version of this Christmas craft.
DIY Christmas star: option number 3
Origami Christmas star. Great Christmas crafts for adults and children. The main secret is patience. A lot of patience.
Paper Christmas Star: Option # 4
These incredibly beautiful Christmas stars are called Scandinavian. They can be made not only of paper, but also of cotton fabric. The algorithm is the same: cut the fabric into strips and weave.
DIY Christmas paper star: option # 5
The simplest of all the crafts. So, meet, a Christmas star, which you can do with your own hands in one minute.
We hope that these workshops on how to make a Christmas star out of a bmagi with your own hands inspired you and your children to exploits.
The New Year is approaching and the bulk of the time in the last days of the outgoing year is preparation for the holiday. To decorate the main symbol - the Christmas tree - we use a variety of different decorations. Some people prefer Christmas balls, others take old Soviet toys from the mezzanines, and still others prefer to make decorations with their own hands. Let's figure out how to make a star on a Christmas tree yourself, and save this year's holiday budget.
Paper toys are easy and inexpensive
Both children and adults love tinkering with paper. Try to decorate the Christmas tree with one of the long winter evenings with your child. So many variations of paper stars on a Christmas tree have been invented that you can’t list everything. Do you think that paper toys will look too simple - not at all. You just look at what beautiful crafts are obtained from this material.
 |
To make a star, use double-sided paper of your favorite color. Fold it in accordion. To ensure that the parts are even, we recommend that you first fold the sheet in half, then unfold and fold each half again in half. Expand and repeat the actions with a quarter of the sheet again, i.e. a quarter of the sheet should be folded in half again. You will get fold lines that make it easy to fold an even accordion. |
 |
Fold the accordion in half, this is done to mark the middle line. Expand this fold. Cut a piece of paper diagonally from the outer bottom corner to the middle, but not reaching it. |
 |
Fold the accordion in half and cut the exact same piece of paper from the second half along the cut line. In principle, you can cut off the excess immediately, but since the paper is in several folds, it will be difficult to do. |
 |
Tie the blank in the middle with what you subsequently attach it to the tree. |
 |
Expand the star. On two sides between the rays of the star there will be extra gaps, glue these areas with tape. |
 |
Spread the star and fasten the Christmas tree on the crown. |
If you prefer five-pointed stars in the style of the Soviet era, then they are easily made from thick paper or cardboard - ordinary, for children's creativity, or decorative, which is used in scrapbooking.
Follow the instructions below.

Here is another variation on this topic from cardboard with perforation.

If the previous options are best fixed on the top of the tree, then a star made in the next master class will decorate the branches. It looks more like a fluffy needle ball, and you won’t immediately say that it is independently made of paper, it looks so professional.
 |
Cut 10 round blanks. You can use a round object or a compass to draw. |
 |
Bend the circle in half. Then again in half and again. Lay out the figure. |
 |
In the center, draw a small circle about 2 cm in diameter and cut along the folds to the inner circle. |
 |
Lubricate the tip of each petal with glue and, using a sharpened pencil as a shape, roll each petal into a cone. |
 |
Greasing the petals with glue, you can sprinkle them with sparkles, additionally decorating. |
 |
Now collect the star. In the center of each workpiece, make a hole with an awl. |
 |
Put a small sequin on the cord. Insert two threads immediately into a thick needle. |
 |
String the first part so that the inside is facing up. The rest are strung on the contrary. We fix the last part with sequins. Pulling two threads in different directions, form a star. |
And paper is made of stars using the origami technique. Perhaps at first glance it will seem complicated. But if you carefully follow the instructions, it turns out that the process is not so much complicated as painstaking. The easiest way to make a star is from individual modules, which are then nested one into the other.

 |
For manufacturing, you need 6 squares of paper of different colors 9 by 9 cm. |
 |
All modules add up the same way. Fold the sheet diagonally. Rotate 90 degrees clockwise and fold diagonally again. |
 |
Turn 90 degrees clockwise, flip and fold in half with a little book. |
 |
Expand, push the paper from the sides and it will be folded. It will turn out a double triangle. |
 |
So he looks from the back. |
 |
And so - on top. Make 6 such details. |
 |
Getting to the assembly. Each module has two corners on each side. Take the red module and yellow. |
 |
Insert the two corners of the yellow module into the two pockets of the red module. |
 |
Insert to the end. |
 |
Fold in half. Turn back. It will fold. |
 |
Now in this place the paper opens. |
 |
Fold it in the same way as in the photo. |
 |
Take the new red module and insert into the pockets of the yellow module. Push it all the way back. |
 |
Fold the fold. Unfold and overreach. |
 |
Connect the modules further in order, alternating between the red and yellow modules. |
 |
At the end, close the figure. Do not forget to fold. Spread it out. It remains only to thread the thread. Make an eyelet and slip it into the pocket. Glue so that the thread does not fly out. |
Here is another instruction for making small stars, they can decorate a miniature forest beauty.

 |
We make notes on a sheet of paper two centimeters. |
 |
Draw the line marks to get smooth stripes. And cut off the strips. |
 |
Take one paper tape. Fold the edges into a loop: the left edge under the right. The left edge should be a bit. |
 |
We put the left edge into the loop and align. |
 |
Turn the small tail up. |
 |
Lower the upper ribbon down and to the left. Spread exactly on the edge. |
 |
Turn the figure over and rotate so that a long piece of tape is on top. We bend down and to the right. Turn over again, bend down and left, turn over - down and right, then turn again - down and left. |
 |
We hide the remaining piece in the formed pocket. |
 |
Push the sprocket from the sides with your fingernail and it will become voluminous. |
For a more complex master class in making origami, see the video format.
Video: Origami Star of Bethlehem
Made of fabric: a star on top of a Christmas tree and shred pendants
Fabric toys look a little unusual for us. But how great they will look on the tree. For example, this eight-pointed star can be tied to the crown. It is not done in 5 minutes, but for the sake of such beauty you can spend some time.
 |
To sew a lace star of Bethlehem on a Christmas tree, a pattern is required. You can build it yourself, but we recommend using the finished one, just enlarge the image to the desired size. In the original, the size of the finished sprocket was 24 cm. |
 |
Source materials:
|
 |
Cut out eight “petals” of the star for the front side and the back side of the two halves. |
 |
Fold in the details and sew where you see the red lines. |
 |
Smooth seams well. |
 |
Fold the resulting parts in two together and sew again. |
 |
Now you have two face parts that need to be smoothed out. |
 |
Just sew them with one center seam. |
 |
Finally smooth the part. |
 |
Sew a 50-60 cm long tape and a 10 cm long loop from the back. |
 |
Sew both halves and cut with scissors where marked in green. |
 |
Stuff the toy and sew. |
 |
Decorate at your discretion or as in the photo. The central bead is sewn through, while at the same time a button is attached to the back side. |
Now look what result you can get. Such needlework can be put as a gift.

And if you make several small toys, you can make pendants out of them.

A six-pointed star is also sewn in a similar way.

Speaking of pendants. Original variations on the theme of the Christmas eight-pointed star are obtained from shreds. These stars are unusual, but they are also hung on a Christmas tree.
 |
They themselves are round, but the pattern, created from shreds of different colors, forms a star. Such a decoration looks very elegant on a Christmas tree. Moreover, the color of the toy is mainly red, New Year's. |
 |
First of all, prepare the material. You can buy it specially in needlework stores, but it’s much more practical to use old shirts, blouses, bedclothes for this purpose - just to make the colors go well together. In total, 40 parts with sides 5 by 4.5 cm will be required. Of this number of elements of the specified size, a decoration with a diameter of about 10 cm will be obtained |
 |
Bend the long side of each part inwards by about 1 cm and iron it. |
 |
Now lay out a few parts face up and draw a line in the center. Do it with all the details. |
 |
We cut out the square-substrate and draw it as in the photo: two diagonals and a cross passing through the middle of the sides. |
 |
Lay the first part so that the top edge and the line in the center coincide with the lines on the substrate. |
 |
Slide the second part down a bit. |
 |
Just put three more details. |
 |
Sew back all the details. Be sure to ensure that the edges of the parts are sewn, the stitch must be exactly at the beginning of the part. |
 |
Sew another seven rows in the same way. The center lines on the parts coincide with the lines on the substrate. |
 |
Bend the right part first. |
 |
Then lower it. |
 |
Bend again, but up. |
 |
Do the same with the left part. |
 |
Then everything is simpler. It will only be necessary to fold the part first in the form of a triangle. |
 |
Then lay down. Nothing is bending up. This is done only with the first part in a row. |
 |
We repeat similar actions with all shreds in all rows. |
 |
As a result, such an ornament is obtained. Pin the front to the backing with pins and cut. |
 |
Sweep and, stepping back from the edge about 1 cm, draw a line in a circle. |
 |
We cut out the back part and the synthetic winterizer circle for the inner layer on the front side. On the back, we also draw a line, departing 1 cm from the edge. |
 |
We take a slanting inlay for the store or from the material from which the toy was sewn, we cut out a strip along the oblique. |
 |
Gently sheathe the decoration in a circle. We process the edges. |
 |
Do not forget to sew a ribbon. |
Openwork and original thread jewelry
Maybe you still have a small skein of yarn from knitting and you don’t know what to make of it for the good of things? Try to make airy, elegant charming stars on a wire frame.

 |
To make such a cute fluffy pendant star, you will need very few materials. |
 |
Prepare the wire. |
 |
Bend the wire so that 5 rays are formed. |
 |
Cut the wire, leaving a small margin. |
 |
Take fluffy yarn. |
 |
Glue grease the frame in the place where you will start wrapping the sprocket. |
 |
Gently thread the entire frame. |
 |
Then, in a chaotic manner, fill in the gaps, as shown in the photo. |
That's all. It takes only a few minutes to make the pendant, and with such toys you can decorate the whole Christmas tree, you don’t even need anything else.
And how do you like the next master class, which shows the manufacture of stars from cardboard and twine? Original jewelry painted with acrylic paint.
 |
Make a cardboard template. Outline the outline. You will need two identical parts. |
 |
Cut out the frame of the future star from cardboard. |
 |
Lubricate one half of the frame with PVA glue. |
 |
The little star that came out of the middle of the big star can also be wrapped with thread. |
 |
Glue two layers of the frame for the small and large stars. |
 |
Coating cardboard with PVA glue from the outside, start wrapping it with twine. Fix the edge of the twine to the glue. |
 |
The star can be painted with acrylics and a sponge. |
 |
It remains only to tie the thread. |
An openwork star, similar to a real work of art, will turn out if we make a frame for stretching the threads from matches. Moisten the thread itself in PVA glue, and then start wrapping the frame: first along the contour, then in the middle, creating a fantasy pattern. Let the star dry and remove from the matches. The toy, thanks to PVA glue, will keep its shape.

See the video for making a star according to this scheme, it will be simpler, but the technology is similar.
Video: star of thread
Products from beads and beads

To make stars on the Christmas tree, they also use beads and beads. They are unusually beautiful, graceful. You will need wire, beads, beads, wire cutters and a lot of patience if you want to make something more complicated than in the photo above.
Video: yellow bead star
An option from several rows looks more interesting, but not everyone can make such a star.
Video: how to make a snowflake
Small glass bead pendants can also serve as Christmas tree decorations. We offer one of the manufacturing schemes.

Do you want a simpler, but very decorative option? Make a frame from thick wire, and collect a lot of multi-colored beads over a long stretch of thin wire for weaving. Then wrap the frame with wire with beads. This is what you should get.

Newspaper Crafts
An interesting direction of needlework is weaving from newspaper tubes. Preparation is very simple. It is necessary to cut the newspaper sheet lengthwise into strips about 7-8 cm wide, then twist them diagonally, using a knitting needle, wooden skewer or something similar for the template at the beginning. Of these tubes make decorative crafts, souvenirs, doll furniture, flower pots and, of course, stars on the Christmas tree. It is quite difficult to present clear instructions in the photo, so we suggest that you familiarize yourself with the master class in video format.
Video: weaving a star from newspaper tubes
Decorate the resulting star with bows, rhinestones, paint with paint.


Stars are made not only from the listed materials, but also from ordinary thin branches.

Imagine and make original decorations on the Christmas tree. Good luck in your work!
Photo pendant stars


The Star of Bethlehem is a symbol of Byzantium, which is more than two thousand years old. The mysterious heavenly luminary is so beautiful that poets tirelessly describe it, painters draw, and icons paint. The eight-pointed star, the symbol of the Birth of Christ, was given to children for the Christmas holidays, it decorated the top of the New Year tree, hung on the front door, which symbolized peace, kindness and hospitality. Also, the star is used as an element in the decoration and creation of iconostases. Despite the fact that today there is no shortage of Christmas decorations and various crafts in stores, we will try to tell you how and what you can make a Christmas symbol from yourself, because everyone knows that what we do with our own hands is much more valuable, since we invest in it soul. So, consider the manufacture of crafts of the Star of Bethlehem.
Paper star
One of the simplest and most affordable materials for crafts is paper.

You can use any: color, corrugated, thick, newspaper and even from under the boxes. Production does not require any special skills and adaptations. Everything is very simple. We arm ourselves with pencils, scissors and glue.
We pass to the master class:
- For one star from paper, two square blanks of equal sizes will be needed. Fold the paper as shown;
- Next, measure the distance equal to half the length of the line from the center itself, make incisions on the bends;
- Form the cones in the form of a triangle from the notched edges, pre-coating the sides with glue, and fasten the parts of the square to each other;
- One of the component stars is ready. Do the same with the other and glue the blanks together.
New year symbol
At the beginning of the article, we mentioned that you can decorate with a star not only a Christmas tree, but also the front door. In this tutorial, we’ll show you how to make a foam star.
For this we need:
- a piece of polystyrene foam (the size is arbitrary, it depends on how much you want to get a star at the end of the master class);
- compass;
- pencil;
- stationery knife and scissors;
- thick paper;
- glue;
- wrapping paper or foil (all the wealth that is in stock from past holidays).
So let's get started.
The most important thing is to cut out the base for the star from polystyrene. At this stage, you can use the template, but do not worry if you do not have it, in this master class we will tell you how to make a blank yourself. Take a compass and draw two circles. Their diameters are 20 and 40 cm. Next, measure seven equal parts along the circles and draw rays to them from the center.

Then, draw the lines that connect the base to the ends of the corners, and cut the workpiece strictly along the contour.

Prepare the decorated paper and cut the parts to the size of the middle and the rays. Stick the rays and then the missing parts. To avoid wrapping the wrapping paper, go along the outline with a beautiful lace, cloth or thicker paper, cut to size and stick. Decorate the tops of our beautiful stars with bells.

You can complete the work when you decide for yourself that your work is sufficiently decorated. In this master class, apply your entire flight of imagination, you can glue beads, wrap tinsel around the rays, and even decorate with a neon ribbon.

Bethlehem miracle
Another original way to create a star is straw.
This time the process will be somewhat laborious, but it will not lose its fascination at all, it’s more convenient to create if you repeat everything in four hands.
What is required? We stock up on straws, a hammer, a plank, cloves, a thick thread, a pencil, a ruler.
Position the board as shown. Count 50 straws and place them next to each other on a dense thread. Tie them in the middle, forming a blank in the form of a bow. While one of you binds in the middle with a thread, the other straightens the ends in opposite directions. Now, without letting go of the middle of the part, try to make a circle out of the “bow”. Then, fasten all the straws with the thread, as tightly as possible in relation to each other. To facilitate the task, in the center, drive in a carnation, which will fix the craft in place.

Now tie the remaining straws in the center. The sticks are tied together, forming them in pieces. Well, our symbol is ready, it remains to form the long rays of the star, for which it is necessary to break the straws in half and along the edges, forming corners. These rays are inserted between the ends of the straws. Corners are also knitted with a thread.

The points of the rays can be decorated with small Christmas balls, painted in any color or decorate the core of the star. Such crafts will not only complement the pastime of adults, but also give children genuine joy and involvement in an interesting process.
Video on the topic of the article