Knitted cakes, muffins, bagels and cakes are sweets that can be decorated kitchen interier. You can feed dolls with such goodies, as well as knitted edible toys - a great gift for a girlfriend on March 8th. For such “snacks” you don’t need a lot of yarn, just a few grams of yarn residue. In this master class we offer tie a piece of cake with raspberries. The process of knitting a cake is very exciting and will interest your child, and this is a great moment to attract him to needlework.
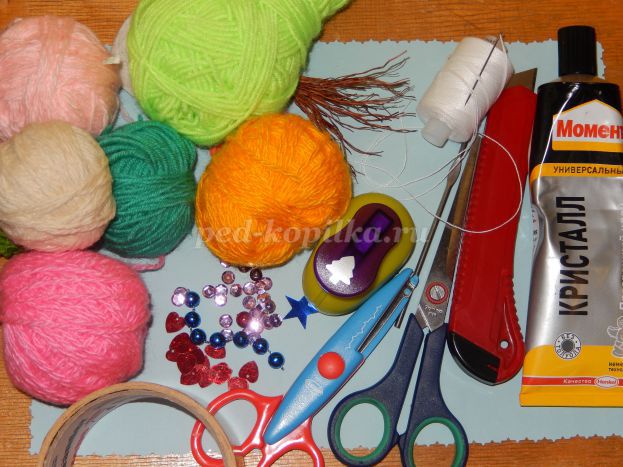
For a knitted piece of cake we need:
- hook;
- needle;
- white yarn, Iris will do;
- red yarn of any quality;
- synthetic winterizer;
- fabric, well, a very small cut from which several leaves can be cut;
- scissors;
- pVA glue and "Moment".
Knitted cake consists of several parts: bottom, side walls, upper part.
Bottom (white). On 2 air. p. tie three tbsp. with a crochet. In the second row add on both sides 1 tbsp. Then add in every second row until then, until the row is 17 tbsp. Having connected the triangle, be sure to iron it.

Cut the same triangle out of paper, we will need it in future work.

Tie the bottom of Art. non-cash
Side wall. Replace the thread on the red and tie one row of Art. b / n., catching a hook on the back wall of the previous column. On two identical sides it should turn out to be 33 Art.

Tie one row of Art. non-cash white yarn. One row of Art. with 1 double crochet with crosses of mottled (white connect with red sewing threads) yarn.

According to a number of ordinary art. non-cash white, red, white yarn. A row of crossed columns mottled and a row of white.

For the top of the cake, a triangle is knitted according to the description of the bottom.

Take the cake cover to the bottom, tie them, alternating Art. non-cash and air. n. Set aside for a while.

From the synthetic winterizer, according to the pattern that we did at the beginning of the work, cut out 5-7 parts. Connect them together and sew them with an ordinary white thread without pulling them together. Just lock them with each other so that they do not “swim”.

Fill a knitted piece of cake with syntepon. Crochet the remaining hole.

It was the turn to decorate the cake with whipped cream. We will imitate them with a knitted ruffle. We impose chains of air. p., alternating their number (7 and 10). Grab them as shown in the photo.

Tie the "arches" of Art. with 1 double crochet (9 and 15), at the junction with the cake, knit three tbsp.

Since we have a cake with raspberry filling, we will decorate it with fresh raspberries, and for more color, add green leaves.
Knitted raspberry. Dial 9 air. n., lock in a ring, tie 11 tbsp. non-cash Row straight, in the next two, decrease by 2 tbsp. Finally, knit all the loops together. Hide the end of the thread inside the raspberries.

One raspberry is not enough.

Tie another 4 pieces, but two of them are smaller.
Leaves. Saturate a small section of the fabric with PVA glue, dry it, cut out the leaves. Attach all the details to the cake, placing in a favorable place.

It remains to stick knitted raspberries and leaves to the cake. In order not to get confused and not to forget the location, take one raspberry, apply a drop of glue on it and attach it to the cake. Do this with the whole berry.
Glue the leaves.

Knitted slice of cake with raspberries.
Our knitted sweets are ready!

Cake with raspberry filling!
Knitted cake can be a great souvenir on women's day. Putting it on a saucer, it will be a wonderful addition to the interior of the kitchen room - creative ideas are always held in high esteem, by linking one piece, you won’t calm down, you will want to cook more and more ...
KNITTED PIECE OF CAKE
Stage 1. With white thread we knit the top layer of the cake - a triangle according to the scheme.
To do this, gain 2 vp and in the first we knit 2 tbsp. non-cash In each new row add 1 tbsp. non-cash, knitting 2 tbsp. b / n from one anywhere in the row. Knit until you get 19 tbsp. non-cash
Stage 2. Knit cones from whipped cream.
To do this, we knit five popcorn elements (from the freeform technique):
* 1 tbsp. non-cash, 1 vp, skip 1 tbsp. b / n of the previous row, from one loop of 6 tbsp. with 3 nak. knitted together, 1 vp, skip 1 tbsp. non-cash previous row *
Repeat * 5 times. 1 tbsp. non-cash Between the first art. b / n and a bump, and between bump and the last art. b / n loop before. do not miss a row (see diagram)
Track. a number of art. non-cash (21 tbsp. B / n), (see the diagram)
Stage 3. We tie a triangle with 2 sides of art. non-cash
Stage 4. On the third back side of the triangle (where the bumps are), we begin to knit the back wall of the whipped cream cake. To do this, we knit 1 row of arches: 1 tbsp. b / n for the front wall of the loop, 3 vp, skip 1 tbsp. b / n of the previous row and knit 1 tbsp. b / n for the front wall of the loop. Repeat until the end of the row.
5 stage. Again we tie a triangle from 2 sides of Art. b / n for the back wall of the loop before. row to get a scar on the edge of the cake from the face.
6th stage. We continue to knit the back wall of the cake.
We knit a number of art. b / n for the back wall of the loop of the row from which we knitted arches.
* Expand knitting. We knit a row of arches (see Step 5) for the back wall of the loop before. row.
Expand knitting. Knit a row. St. b / n. behind the remaining loop wall. *
Repeat * 5 times.
7th stage. We knit the side walls of the cake. We take brown threads for biscuit and yellow fillings for layers.
Turn the product inside out towards you.
1-2 rows: We tie the side walls of Art. b / n brown threads.
3 row: the first 3 tbsp. b / n brown threads, the remaining art. b / n yellow threads, last 3 tbsp. b / n brown threads.
4 row: Art. b / n brown threads.
5 row: the first 3 tbsp. b / n brown threads, the remaining art. b / n yellow threads, last 3 tbsp. b / n brown threads.
6-7 rows: Art. b / n brown threads.
8 Stage. From the inside, we connect the ends of the back and side walls of the cake.
9th stage. We knit the bottom of the cake with brown threads.
To do this, repeat the triangle from paragraph 1, we only finish when the row will consist of 21 tbsp. non-cash
10 stage. We put both parts facing each other. We connect the side walls of the cake to the sides of the bottom. To do this, we knit them together next to Art. b / n, while the side wall of the cake is taken for the back wall of the loop to get a scar on the edge of the cake from the face. We turn out.
11 stage. Now with the white threads we attach the back wall of the bottom to the back white wall of the cake. To do this, we knit them together next to Art. b / n, while the back white wall of the cake is taken for the front wall of the loop. For 2-3 cm to the end, leave a hole in which we fill the synthetic winterizer. We continue to connect to the end.
12 stage. We unfold the knitting and knit another row of arches (see Step 5) for the remaining loop wall.
The cake is ready! It remains to decorate the top layer with knitted goodies (fruit slices, berries, cream roses).
Description of cake decorations:
Berry: (circular knitting)
2 row: 1 st. B / n in each st. (6)
3 row: * 1 st. B / n, 1 decrease (from 2 tbsp. Knit 1 st. B / n) * 3 times (3)
Large berry: (circular knitting)
1 row: 2 w / n, knit 6 st.b / n in the first of the w / n, close in a ring (6)
3 row: a row of St. b / n (12)
4 row: a row of St. b / n (12)
5 row: 6 decreases (from 2 tbsp. Knit 1 st.b / n) (6)
Fill with a padding polyester, tighten the hole.
Strawberry: (circular knitting)
1 row: 2 w / n, knit 6 st.b / n in the first of the w / n, close in a ring (6)
2 row: 2 st. B / n in each st. (12)
3 row: * 3 st. B / n, 1 increase (2 st. B / n in 1 tbsp. Previous row) * 3 times (15)
4 row: a row of St. b / n (15)
5 row and further: * 2 st. B / n, 1 decrease * repeat until 6 loops remain
Fill with a padding polyester, tighten the hole.
Embroider the bones.
Orange Slice: (circular knitting)
1 row: (white) 2 w / p, knit 6 st.b / n in the first of the w / p, close the ring in (6) do not break
2 row: (yellow) 2 st.b / n in each st. before row (12)
3 row: (yellow) * 1 st.b / n, 1 increase * 6 times (18)
4 row: (yellow) * 2 st.b / n, 1 increase * 6 times (24)
5 row: (white) * 2 st. B / n, 1 increase, 1 st. B / n, knitted from the center of the circle * 6 times (30)
Fold the circle in half, knit a row of st.b / n in orange, capturing both halves of the circle.
Make 3 increases in this row every 4 tbsp.
Rosette:
15 high-lift, 2 high-lift.
3 tbsp / n in 1 loop. Repeat 5 times.
3 tbsp.s2 / n in 1 loop. Repeat 5 times.
3 tbsp.s3 / n in 1 loop. Repeat 5 times.
Twist into a spiral, fasten.
Leaf under the rose:
2 military in the 1st military unit knit: 1 st.s / n, 1 st.s2 / n, 1 st.s3 / n, 1 st.s4 / n, 1 st.s5 / n.
Vanilla Cream: (circular knitting)
1 row: 2 w / n, knit 6 st.b / n in the first of the w / n, close in a ring (6)
2 row: 2 st. B / n in each st. before row (12)
3 row: * 1 st.b / n, 1 increase * 6 times (18)
4th row: 1 tbsp.b / n for the front wall of the loop, * 3 bp, skip 1 tbsp. before row, 1 st.b / n for the front wall of the loop *. Repeat * to the end of the row.
5 row: a row of st.b / n, capturing only the rear wall of the loops of the 3rd row (18)
6 row: knit as 4 row
7 row: knit as 5 row
8 row: knit as 4 row
Choco Cream: (circular knitting)
Knit like vanilla cream until the 7th row incl.
8 row: 4 tbsp./n in 1 loop. Repeat until the end of the row.
When sewing, lay in the folds.
Scheme
Stage 1. With white thread we knit the top layer of the cake - a triangle according to the scheme.
To do this, gain 2 vp and in the first we knit 2 tbsp. non-cash In each new row add 1 tbsp. non-cash, knitting 2 tbsp. b / n from one anywhere in the row. Knit until you get 19 tbsp. non-cash
Stage 2. Knit cones from whipped cream.
To do this, we knit five popcorn elements (from the freeform technique):
* 1 tbsp. non-cash, 1 vp, skip 1 tbsp. b / n of the previous row, from one loop of 6 tbsp. with 3 nak. knitted together, 1 vp, skip 1 tbsp. non-cash previous row *
Repeat * 5 times. 1 tbsp. non-cash Between the first art. b / n and a bump, and between bump and the last art. b / n loop before. do not miss a row (see diagram)
Track. a number of art. non-cash (21 tbsp. B / n), (see the diagram)
Stage 3. We tie a triangle with 2 sides of art. non-cash
Stage 4. On the third back side of the triangle (where the bumps are), we begin to knit the back wall of the whipped cream cake. For the way to knead the whipped cream, thank you Natasha Grukhina http://grukhina.ru/iblock/schema/igrushki/vjazanye_pirozhnye_i_torty/.
To do this, we knit 1 row of arches: 1 tbsp. b / n for the front wall of the loop, 3 vp, skip 1 tbsp. b / n of the previous row and knit 1 tbsp. b / n for the front wall of the loop. Repeat until the end of the row.
5 stage. Again we tie a triangle from 2 sides of Art. b / n for the back wall of the loop before. row to get a scar on the edge of the cake from the face.
6th stage. We continue to knit the back wall of the cake.
We knit a number of art. b / n for the back wall of the loop of the row from which we knitted arches.
* Expand knitting. We knit a row of arches (see Step 5) for the back wall of the loop before. row.
Expand knitting. Knit a row. St. b / n. for the remaining loop wall. *
Repeat * 5 times.
7th stage. We knit the side walls of the cake. We take brown threads for biscuit and yellow fillings for layers.
Turn the product inside out towards you.
1-2 rows: We tie the side walls of Art. b / n brown threads.
3 row: the first 3 tbsp. b / n brown threads, the remaining art. b / n yellow threads, last 3 tbsp. b / n brown threads.
4 row: Art. b / n brown threads.
5 row: the first 3 tbsp. b / n brown threads, the remaining art. b / n yellow threads, last 3 tbsp. b / n brown threads.
6-7 rows: Art. b / n brown threads.
8 Stage. From the inside, we connect the ends of the back and side walls of the cake.
9th stage. We knit the bottom of the cake with brown threads.
To do this, repeat the triangle from paragraph 1, we only finish when the row will consist of 21 tbsp. non-cash
10 stage. We put both parts facing each other. We connect the side walls of the cake to the sides of the bottom. To do this, we knit them together next to Art. b / n, while the side wall of the cake is taken for the back wall of the loop to get a scar on the edge of the cake from the face. We turn out.
11 stage. Now with the white threads we attach the back wall of the bottom to the back white wall of the cake. To do this, we knit them together next to Art. b / n, while the back white wall of the cake is taken for the front wall of the loop. For 2-3 cm to the end, leave a hole in which we fill the synthetic winterizer. We continue to connect to the end.
12 stage. We unfold the knitting and knit another row of arches (see Step 5) for the remaining loop wall.
The cake is ready! It remains to decorate the top layer with knitted goodies (fruit slices, berries, cream roses).
Description of cake decorations:
Berry: (circular knitting)
2 row: 1 st. B / n in each st. (6)
3 row: * 1 st. B / n, 1 decrease (from 2 tbsp. Knit 1 st. B / n) * 3 times (3)
Large berry: (circular knitting)
1 row: 2 w / n, knit 6 st.b / n in the first of the w / n, close in a ring (6)
3 row: a row of St. b / n (12)
4 row: a row of St. b / n (12)
5 row: 6 decreases (from 2 tbsp. Knit 1 st.b / n) (6)
Fill with a padding polyester, tighten the hole.
Strawberry: (circular knitting)
1 row: 2 w / n, knit 6 st.b / n in the first of the w / n, close in a ring (6)
2 row: 2 st. B / n in each st. (12)
3 row: * 3 st. B / n, 1 increase (2 st. B / n in 1 tbsp. Previous row) * 3 times (15)
4 row: a row of St. b / n (15)
5 row and further: * 2 st. B / n, 1 decrease * repeat until 6 loops remain
Fill with a padding polyester, tighten the hole.
Embroider the bones.
Orange Slice: (circular knitting)
1 row: (white) 2 w / p, knit 6 st.b / n in the first of the w / p, close the ring in (6) do not break
2 row: (yellow) 2 st.b / n in each st. before row (12)
3 row: (yellow) * 1 st.b / n, 1 increase * 6 times (18)
4 row: (yellow) * 2 st.b / n, 1 increase * 6 times (24)
5 row: (white) * 2 st. B / n, 1 increase, 1 st. B / n, knitted from the center of the circle * 6 times (30)
Fold the circle in half, knit a row of st.b / n in orange, capturing both halves of the circle.
Make 3 increases in this row every 4 tbsp.
Rosette:
15 high-lift, 2 high-lift.
3 tbsp / n in 1 loop. Repeat 5 times.
3 tbsp.s2 / n in 1 loop. Repeat 5 times.
3 tbsp.s3 / n in 1 loop. Repeat 5 times.
Twist into a spiral, fasten.
Leaf under the rose:
2 military in the 1st military unit knit: 1 st.s / n, 1 st.s2 / n, 1 st.s3 / n, 1 st.s4 / n, 1 st.s5 / n.
Vanilla Cream: (circular knitting)
1 row: 2 w / n, knit 6 st.b / n in the first of the w / n, close in a ring (6)
2 row: 2 st. B / n in each st. before row (12)
3 row: * 1 st.b / n, 1 increase * 6 times (18)
4th row: 1 tbsp.b / n for the front wall of the loop, * 3 bp, skip 1 tbsp. before row, 1 st.b / n for the front wall of the loop *. Repeat * to the end of the row.
5 row: a row of st.b / n, capturing only the rear wall of the loops of the 3rd row (18)
6 row: knit as 4 row
7 row: knit as 5 row
8 row: knit as 4 row
Choco Cream: (circular knitting)
Knit like vanilla cream until the 7th row incl.
8 row: 4 tbsp./n in 1 loop. Repeat until the end of the row.
When sewing, lay in the folds.
Today, the fashion for knitted food: all kinds of cupcakes, hamburgers, sushi, fruits - in a word, everything that pleases the eye and creates an unusual decor.
In this post you will find description of a delicious knitted cakewhich will surprise your guests a lot. We are sure that they will certainly ask themselves such knitted cheesecake For a present. All delicious knitting!
Normalynn developed the cheesecake knitting pattern, and Valeria Luchenok translated it into Russian.
Cake
Knit with pastel yellow yarn:
1 row: 6 sb in the amigurumi ring
2 row: 1 VP for lifting, increase: 2 sb in each loop, connect (12)
3 row: 1 VP, (1 SBN, 2 SBN in the next loop) - 6 times, connect (18)
4 row: 1 VP, (2 SBN, 2 SBN to the next loop) - 6 times, connect (24)
5 row: 1 VP, (1 SBN, 2 SBN to the next loop) - 12 times, connect (36)
6 row: 1 VP, (2 SBN, 2 SBN in the next loop) - 12 times, connect (48)
7 row: 1 VP, SBN in a circle without increments, connect (48)
8 row: 1 VP, SBN in a circle for the rear loops, connect (48)
9-14 row: 1 VP, SBN in a circle without increases, connect. At the end of the 14th row we attach the brown thread.
15 row: 1 VP, SBN in a circle without changes, connect.
16 row: 1 VP, SBN in a circle for the rear loops, connect. Fasten the thread.
Chocolate syrup
We knit with a yarn of dark brown color:
1-5 row: knit according to the description of the previous part (cake).
Starting from the 6th row, free-form knitting (flowing chocolate) goes beyond the circle and returns to it again.
Knitting example: 13 VP, half crochet, skip the next loop, half crochet in the next loop. Half crochets in the next 3 sc. 14 VP, 1 PRS, 1 single crochet in the 3rd loop. Half crochets in the next 2 sc. 11 VP, (sbn, sbn, half-crochet with a crochet in the remaining loops), half-crochet without crochet in the 2nd sb. Half crochets in the next four sc. 10 VP, SBN, half-column without a crochet in the next SBN. Half crochet in the next sc. 9 VP, 1 PRS, half crochet in the 3rd sc. Half crochets in the next 3 sc. 11 VP (2 half crochets with a double crochet, 2 SBN, half crochets with a crochet in the remaining stitches), half crochets with a double crochet in the 2nd loop. Half crochets in the next 4 sc. 13 VP, 1 PRS, half-crochet in the 3rd loop. Half crochets in the last 3 sc. Fasten the thread.
Whipped cream
Knit with white yarn:
1-3 row: knit according to the description of the cake.
1 vp, turn. 4 sb in each front loop in a circle. Fasten the thread.
Cherry
Knit with a yarn of dark red color:
Make an amigurumi ring
1 row: 3 VP, 6 PRS in the ring, connect.
2 row: 3 VP, decrease: 1 PRS in a circle, connect. Fasten the thread.
Wafer
Yarn tan color: 12 VP We knit in rows (not in a circle), using single crochet and lowering on the sides on alternating rows. Fasten the thread when 1 sbn remains.
The cake is ready! Bon appétit!
Translated by Handcraft Studio. Copying only with a link to our website.
The cake is knitted from the Semenov yarn "Bonfire", acrylic with lurex, 394 m / 100 g. Size on the hook is not indicated, about 1.5. It took 100 g of chocolate and 60-70 g of white. For decoration - red and green strings, grams of 10-15. You will also need 6 cm thick foam rubber, a piece of 18x18 cm, a velcro tape (Velcro) 7 cm long, a ruler, a sharp knife and a tapestry needle.
The basis
From the foam rubber we cut a circle with a diameter of 18 cm (I used a small plate as a template), lined it into 8 equal sectors and cut along the lines. I cut with scissors, but it will be more convenient and even than a knife, for example, a clerical one. You can do the opposite (to whom it is easier): tie a triangle and mark the foam rubber on it (just do not cut individual triangles from the foam rubber! You must cut from a whole circle). Here it is, the future merger (oh, who took two pieces? Cake is still raw!):

A piece of biscuit
1 . We start from the top.

With a white thread we knit a triangle clearly according to the pattern. I applied it directly to the foam part, but you can circle it and make a paper template, it’s easier to work with it. The order I got is this (at the beginning of each row we do not forget about the lift VP):
Chain of 3 VP (air loop),
1 row - 2 sc (single crochet)
2 row - 2 sc
3 row - 4 sc (2 in each loop)
4 row - 4 sc
6.7 rows - 6 sc
8.9 rows - 8 sc
10.11 rows - 10 sc
12,13,14 rows - 12 sc
15.16 rows - 14 sc
17.18 rows - 16 sc
19.20 rows - 18 sc
21,22,23 rows - 20 sc
24.25.26 rows - 22 sc
With the same thread, we tie the long sides of the triangle with single crochet columns (we get about 55 sc - one per row on each side + 3 in the corner). We cut the thread. We will cut all the threads not "at the root", but leaving the tip 3-5 cm, then it will be inside, and you can not worry that the knitting will open.
The side on which the “pigtail” turned out to be tied is the front side.
The finished tied part should repeat the pattern size to size, no more and no less.
I have missed the 2nd row, because of this the corner turned out to be dumber, as a result, the finished pieces of the cake did not want to dock without a hole in the center.
2 . We put the white triangle face down, the longest vertex to itself, attach the chocolate thread in the upper right corner, we knit 55 RLS for the back (wrong) half loop. On the front side there are free half loops that form a fold line (we introduce such a symbol, then it will come in handy).

4 rows of chocolate thread
2 rows of white
4 rows of chocolate
2 rows of white
5 rows of chocolate.

The height of the knitted fabric should be 0.5-1 cm less than the height of the foam. The number of rows you have may be different, as well as the number of layers of biscuit (I have 3, you can make 2 or 4). Do not forget that each thread needs to be knitted an even number of rows (the first and last layers are an exception), otherwise you will have to cut the thread each time. When changing the color, the last RLS in the row should be started with the current thread, and finished with a new color thread.
3 . We attach a chocolate thread to the short side of the triangle. We knit the first row (22 loops) for a half-loop (the line remains on top, on the front side), then for both half-loops there are as many rows as on the sides (in my case 17). In the process, I tied this part to the edges of the striped fabric using connecting posts. But later I realized that it is better, and it will be faster to simply knit the fabric, and then sew along with the next part.

4 . We knit the bottom part of the piece with the same thread (without trimming) in the same way as the upper (white triangle), only now we reduce the number of RLS according to the same pattern. The first row is for the half-loop, leaving a line on the front side. The rest - as usual. We cut the thread. Further 2 options are possible:
If the back wall of the piece is not tied, then we tie the RLS of the edges of the back and bottom parts at the same time (make sure that the chain is on the front side), leave the thread at least half a meter long, insert the foam piece and sew it with a tapestry needle, grabbing the back wall and the bottom triangle only one half loop (the one closest to the inside). From the front side, fold lines are again drawn.
If the back wall is tied, as I have, then we only bind the triangle from the open sides, leave a long tip (40 centimeters), insert the foam rubber and sew it. In a triangular part, we capture only one half-loop. The fold line is "drawn" only along the border of the triangle. In my photos this is exactly this option, but (I repeat) if I ever dared to repeat this knitting feat, I would prefer the first.

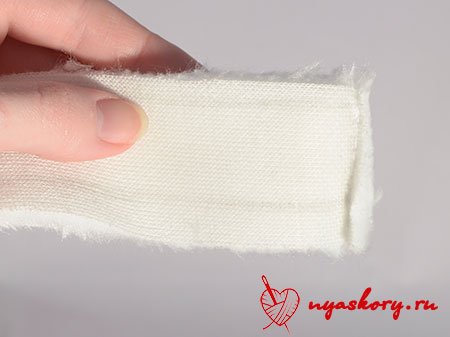
Knitting should fit foam rubber, but not tight. There should not be any voids between the foam rubber and the harness. The finished piece should ideally remain the same size as the original foam. Here's what happened after sewing:

And this is a top view and a rear view:


Frankly, I overdid it a bit with a tightening (apparently, I did not take into account that the threads are thin and give very little additional volume). The pieces were chubby, like crumpets. As a result, when I put all 8 pieces together, spaces were formed between them that disrupted the whole perception of the cake. But everything is fixable. Corrected this flaw in two stages.
The first is advisable to make, even if the cake comes out in perfect shape. To do this, we need the left half loops. We will tie the pieces along the fold lines with a thread of the corresponding RLS color. The resulting protrusions will subsequently close the gaps. In the corners we make increments: 3 sc in the most corner loop. Tying the white part can be combined (with one thread) with tying the cream.
If you do not have enough patience for the whole cake and you decide to limit yourself to one piece :)), then this point can be skipped. But, in my opinion, in any case, your clarity will not spoil the extra clarity. For comparison - untied and tied pieces.

Cream

We attach the cream to the short side of the upper part (white triangle). Above the RLS series (if you missed the previous moment, we knit a row of 24 RLS in the fold line, i.e. 22 and add RLS one from the edges for splendor) we knit 2 lift VPs, SSN (double crochets) for the front half loop (we place the piece the upper part to itself) 3 CCH in each loop, at the end of the row 2 VP, CST (connecting column) at the base of the row. Now we turn the work, in the left half loops we knit a series of RLS (24). Again, turn, 2 VP, 3 CCH in each loop, 2 VP, CST in the base of the cream (close to the chocolate). If it seems that there is not enough cream, you can add a number more according to the same principle. But two will be enough for me, I need to protect the figure :)) Therefore, the second row of the CCH was knitted for both half loops.
I also grabbed the cream with white sewing thread around the edges, pulling them down a little, and in the center - not pulling them, just so that they would not bulge up in the process of an active children's game. The result was scallops.
And now - the second stage of eliminating the shortcomings, if the pieces are too chubby and do not want to connect into a neat cake. Just take the chocolate thread (if it is very thick - split in half), insert it into the needle and pull off our pieces where necessary. I had to tighten all the corners, the outer ones a bit, and the inner one is stronger.
Now you can sew on Velcro. I sewed it here, stepping back a bit from the edge:

but it could be close to the edges.
Here are eight such pieces to tie. To be honest, I knitted them for almost a month - I do not like monotony. But I did it! And you will succeed.
Decoration
I have a cake with natural strawberries. We take 8 berries and 32 leaves (description
