Good day, dear needlewomen. You have already thought about New Year's gifts. A do-it-yourself dog is a great option.
This presentation has several advantages:
- low costs, as you can find many materials in bins;
- originality, handicrafts do not find their counterpart in absolute similarity;
- positive energy, a piece of the soul will be invested in each masterpiece.
Hand-made gifts will also benefit their producers. Since the creative process develops motor skills and expands thinking.
DIY crafts for the New Year 2018
What to make puppies for the holiday? There are many variations. Surely every master has a favorite type of needlework. I love to bake beautiful goodies, weave with beads and sew from felt. All this is just right for creating the symbol of the year.
In the article you can find various master classes:
- products from improvised means (bottles, bags, etc.);
- dog-shaped cookies
- clay products;
- felt toys.
Homemade doggies are useful not only for gifts, but also for personal use. Decorate them with a Christmas tree, a table or use them as a keychain, magnet, home decor, etc.
Ideas for making handmade dogs for the New Year holidays
The dog is officially recognized as the symbol of 2018. According to the festive custom, in every house there should be an image of the mistress of the year. It can be presented in different guises: a souvenir, a toy, a magnet, a keychain, a picture, a calendar, etc. However, one of the best options is considered to be a do-it-yourself product.

Crafts from felt with patterns
Felt is a dense material similar to felt in texture. Available in rolls and in sheets of various colors. The fabric is different in thickness. For future little puppies it is better to purchase a thin canvas.
Working with such raw materials will bring a lot of pleasure to the needlewoman. The felt does not require processing along the edges and is easy to stick together. Any shape can be cut from it, and it will not take much time.
Master class on the production of adhesive tape
This toy is easy to manufacture. Even a child can handle it. Therefore, if you have children, feel free to connect them to the process. Any kind of needlework develops motor skills and thinking, instills taste.
We will need:
- light felt felt;
- glue gun;
- threads of similar colors;
- needle;
- scissors;
- tape bright colors;
- a pen;
- black beads;
- safety pins;
- paper;
- filler (synthetic winterizer).
Sewing stages:
- Print patterns according to the pattern and cut them. Fasten the finished samples to the material with pins for easier cutting. For one dog, it will be necessary to make 2 patterns for the lateral part of the trunk and legs, as well as one piece for the ears and forehead.
- Attach the fabric part to each other and fasten with pins to make it easier to stitch. Do not forget to leave a small hole for stuffing toys.
- Make eyes out of black beads by attaching them with thread with a needle or glue gun.
- Build a collar from the tape. Glue the felt flower on the side of the neck girth.
- Only four steps will lead you to the work of your masterpiece. The step-by-step instruction of all felt puppies is similar to the above stages. Only the patterns are different.

Spotted dog
To sew such a toy, sheets of felt in contrasting colors will be required.
The puppy’s mouth can be embroidered with black floss thread.

Such small products are well suited for the manufacture of trinkets and magnets. Just insert a key ring or stick a magnetic tape.
Pug keychain
The photo says how much each part will need to be cut. The phased production of a pug-shaped keychain includes standard steps.


In the same way, you can make different versions of the symbolism of 2018 according to the patterns.


Arm yourself with all the necessary items, print out the patterns, select the appropriate colors of the material and create masterpieces in advance.
Polymer clay figurines
Interesting solutions can be realized with the help of such a subject for creativity as plastic. It is available in different structures:
- liquid;
- rubber;
- translucent;
- with the addition of sparkles;
- able to glow under ultraviolet rays;
- mother of pearl;
- for the production of dolls and molds.
The color scheme of the material is quite extensive. This will allow you to create puppies of any design.
Before you start working with polymer clay, study the basic recommendations:
Prepare the work surface and the necessary tools:
- stationery knife;
- toothpicks
- rolling pin.
- Select the baking dishes that will not be further used for baking products. It is advisable to cover it with baking paper.
- Take sandpaper for sharpening bumps and a varnish for plastic, so that the products retain their original appearance longer.
- If you want to make dogs in the form of jewelry or a keychain, then stock up on accessories.
- In order to gain entry-level skills and see if you enjoy modeling, check out Anna Oskina’s tutorial.
Polymer clay dog: step by step with photo
We will need the following items:
- polymer clay of different colors;
- board or other working surface for modeling;
- tools.
Manufacturing steps:
- To make the clay softer, you need a warm temperature. Your hands will do. Remember her a little and she will become elastic.
First of all, blind the body to the future polymer puppy. Roll a piece into a ball and form a drop shape.
Form the legs. Use the stack to give them fingers. - Gather the parts together: torso, legs.
- Take black matter and give it the shape of the ears, eye and nose. Attach them to the face.
Attach the pink collar and place your head on it. - Slip the handles and attach them to the base.
- From a red ball, form a skate with yellow clay wheels.
- Combining the dog with a sporting attribute, you get a finished toy.
Knowing the basics of working with matter, one can understand the stages of making a figure from the pictures. The image depicts the production of a Dalmatian.

As we can see, only two plastic colors are required here: black and white. Image Source Magazine: Porcelana Fria
A more complicated option is a puppy in a basket. Colored clay, toothpicks and a stack will be needed.

Cute snow-white polymer clay dogs are easy to manufacture. Their step by step instructions are displayed in the photo.
They can be made in different poses and put on the shelf as a talisman for 2018.

Want to be able to sculpt any puppies, including cartoon characters? Watch the video with the master class.
The phased technique of weaving dachshunds from beads
- The color scheme is not limited. Decide on her own. The photo shows a dachshund of brown beads.
- Weaving technology is divided into two levels: lower and upper. This can be seen from the junction line in the picture. The wire is taken 2-3 mm thick, depending on the size of the beads.
- Take one bead of black color, a couple of pieces of brown and stretch. The length of the wire will be one and a half meters.
- Second row: the upper tier consists of three beads. Pull the second end of the wire through them and secure so that you get two rows.
- Further weaving occurs in the same way.
- The third row should contain 4 and 5 beads, the fourth - 5 and 7.
- Fifth row: in the upper tier, a black bead is strung after every two brown beads; in the lower tier, five are monophonic.
- No more dark beads will be required. In the sixth row, it is necessary to leave the residual segment under the ears. The upper level - 10 pcs., The lower - 5 pcs.
- In the seventh row there are 10 beads into which the second end is stretched and is not strongly tightened. An extra piece for the ears goes through six beads in the center. In the lower tier at this stage there will be 4 beads.
- Weave ears with an ordinary flat cloth.
- The eighth row contains nine and six parts, the ninth - seven and nine, the tenth - six, eleven.
- Six beads are strung on the upper tier, on the lower 13. Here the second end of the wire is threaded with the remainder of the thirty-centimeter section for the legs.
- The twelfth and thirteenth row consists of the same amount of beads as the previous one. Here it is necessary to draw the second tip without pulling together for the foot.
- 14 row: 6 and 13 pcs.; 15 row: 6, 12; 16 row: 6, 11; 17-18 rows: 6 and 10 pcs.; 19 row: 6, 9.
- In the twentieth row, which contains 6 and 8 beads, it is necessary to draw a residual segment for the formation of the hind legs.
- 21 rows: 6 and 8 beads.
- In the 22nd row, a tail of 11 beads is formed in the upper level. There will be 6 parts below.
- In the 23rd row, the base of the body ends. Here 2 and 1 beads are typed.
- From the remaining wire, weave the hind legs with surround technique.

This toy can be hung on the Christmas tree or on the front door as a talisman in the coming year of the dog.
Dogs for the New Year from improvised materials
Do you want to please your loved ones with special gifts, but do not go broke shopping? You can create wonderful gizmos with the symbol of the year with your own hands. You don’t have to spend much on accessories for creativity, since many objects are usually found in almost every house.
Toy for the year of the dog from plastic bottles
Surely in every house there is an unnecessary container for drinks. Do not rush to throw it away. Various crafts can be made from them, including gifts for 2018.
A detailed master class of a dog on a photo from the city of masters can be seen in the video.
The symbol of the coming year from plastic bottles can be of different sizes, colors and shapes. It all depends on the source materials and your imagination.
For the manufacture of crafts, we need the following materials:
- bottle,
- glue or double-sided tape,
- colored paper
- covers (4 pcs.),
- tubules for cocktails (2 pcs.).
The creative process itself takes a little time and includes the following steps:
- We measure the girth of the bottle and cut out two strips of the desired length from paper in different colors.
- We make 2 ears, a tongue, a nose, eyes, a tail and four small hearts to decorate the dog’s future legs.
- Glue to both ends of the cover tubes.
- We trim the body of plastic with prepared parts and get a nice toy.
- You can simplify the manufacture of crafts and make it without cutting and gluing additional parts. Only paint is needed. Beads for eyes and nose are used as desired. Everything can be drawn. At the same time, possessing artistic talents is not required.
- Take two bottoms from the bottles and fasten them together with glue. Then take paints and decorate the plastic base.
- You can sheathe a container for a drink, and then you get an interesting option for the image of the mistress of the year.

Pug-shaped piggy bank step by step instructions
A product from a plastic bottle can not only decorate the shelf as a toy or souvenir, but also perform useful functions. For example, store cash.
We will need:
- two-liter containers washed after a drink;
- four skeins of sewing thread;
- paint;
- glue gun and adhesive tape;
- newspaper;
- flour diluted with water in a ratio of 1: 1;
- paper bags;
- hole puncher;
- black marker;
- decoupage;
- red, black paper;
- felt;
- traffic jams;
- file;
- patterns for the bottom (1), ears (7.8), nose (6), eyes (4.5), tongue (2);
- grinding tool.

Piggy bank in stages:
- Glue the threads from the coil to the body. They will serve as legs. On the places of the ears we attach figures from a transparent material (file, food bag). Mark the center line with a marker.
- We fasten the paper and form the tail. For its stability, we wrap part of it with adhesive tape.
- We glue the base with newspapers using flour with water. After drying the first layer, lay the next. In total, 3 layers should be obtained. For convenience, it is recommended to cut the newspaper into strips. To dry the layers faster, you can resort to using a hairdryer.
- We cut a hole for coins, apply decoupage and paint the product.
- In the blank for the nose, we make holes with a hole punch. If the device is not at hand, then cut them yourself.
- We decorate the edges of the paws with black felt, apply dots that imitate the mustache, eyes, nose and tongue on the muzzle.

Thus, we get a beautiful handmade piggy bank.
Toy from plastic bags
From simple, accessible to everyone, everyday objects, quite good things are obtained.
The following items will be needed:
- packages (the amount depends on the size of the dog);
- foam rubber;
- threads, needles;
- the cloth.
Such a dog is made as follows:
- Cover the foam with a cloth. You should get a torso with a head, legs and tail. Patterns are not needed here.
- We make wool from packages. Cut them into strips and sew to the woven base. Proceed from the side of the tail.
- Eyes and nose can be cut from both fabric and paper.
- Spread out the “hairs” of the craft and decorate it with a bow, collar, etc.

If such products are sewn in small sizes and tied with laces, then they will perfectly serve as Christmas tree decorations.
Holiday cookies
Treats in the shape of dog faces will decorate your New Year's table and will be suitable as a gift to your family.
To bake such creations, you will need:
- flour (3 tbsp.);
- two eggs;
- butter (100 gr.);
- vanilla sugar (1 tsp);
- baking powder dough (1 sachet);
- sugar (0.5 tbsp);
- two tablespoons of sour cream and cocoa.
Cooking Technology:
- Chop the butter into small crumbs and rub it with sugar.
- Add sour cream, eggs and beat the contents with a mixer.
- Mix the flour with the baking powder and form a slide, in the center of which you put the whipped mixture.
- Knead the dough and divide it into two parts, one of which is colored in dark with cocoa. Then put it in the refrigerator for half an hour.
- Cut out a few hearts of dark and light color from the dough. In order to get ears, cut the figure in half.
- Put the products on a baking sheet and put in the oven to preheat to 180-200 degrees. Cooking time is 15 to 20 minutes.
Detailed instructions for Christmas baking are described in the video.
Handmade dogs can be made using any kind of needlework technique. Here everyone chooses a method to their liking.
Do-it-yourself dogs at home: video workshops
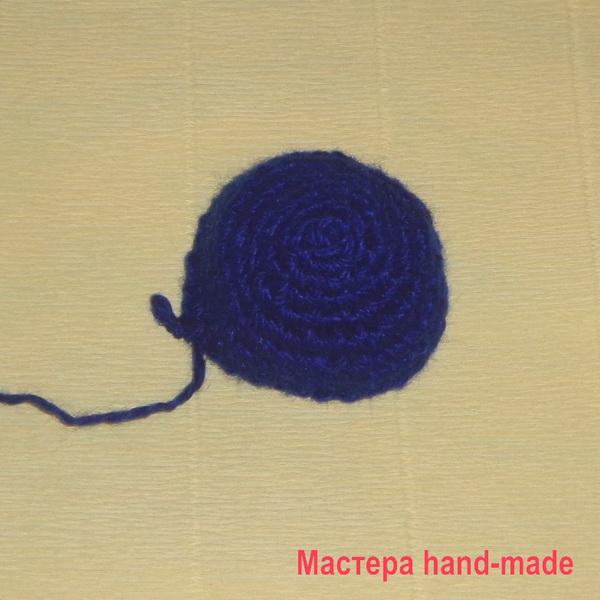
The first video will reveal all the steps of a step-by-step production of a dog from the most common twine.
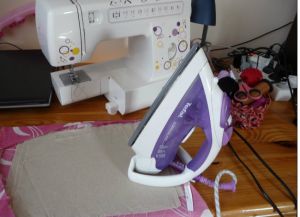
The second is from satin ribbons. A small ribbon souvenir can be attached to a hair clip. And you can stick a magnet to the finished piece of satin ribbon on the back, and put your four-legged friend on the refrigerator door.
The original symbol of the New Year will come from junk material, such as tights. We'll have to stock up on tights of different colors, a filler, New Year's toys, glue, and paints on the fabric. How to make a symbol of 2018 with eyes, cilia, look at the video.
Do you want to always be filled? Subscribe to update our blog. If you liked our simple workshops, then share the article on social networks.
Sincerely, Natalya Krasnova.


According to the eastern horoscope, the dog is the patroness of the coming 2018. Souvenir shops showcase souvenir compositions with funny dogs of various species and breeds. But the best gift is a handmade one. Thanks to this step-by-step master class, you can create a cute polymer clay dog \u200b\u200bthat will become the New Year's mascot.
Tools and materials for sculpting dogs
To create a cute dog for the New Year you will need:
- materials - polymer clay black, red, yellow and green, foil;
- tools - flat blade stacks;
- auxiliary materials - silicone or plastic mat, oven with thermometer, wet wipes

How to make a polymer clay dog: step by step instructions
Prepare the necessary materials. Mash clay well before work. Roll two balls from foil: one larger, the other smaller, with a diameter of about 4 and 2 cm.
 Squeezing a little, give them the shape of an ellipse. Connect the foil strip in the place where the neck should be.
 With two more stripes, form the frame of the paws.
 For different shades of brown, mix red, yellow, and green clay.
You can use the finished brown clay, but then the color will be uniform, without transitions.
 Make two strips - yellow and brown, 2-3 mm thick over the entire length of the product. The brown stripe should be larger.
 Fingers flatten the strips in the place where the nose will be, sharpen one end.
With a sharp end, attach a yellow strip to the nose of the figure, grasp the stomach to the tail. Gently press the strip to the frame.
 With a brown strip, wrap the dog, grabbing its paws and tail. It is desirable that there is an overlap on the strip covering the stomach.
 Carefully smooth the joints in one direction.
 Rolling clay between the fingers, form the legs and tail.
 Cut the bottom of each foot twice. Smooth it all out.
 Advice! Before you take clay of a different color, wipe your hands with a damp cloth.
To make the eyes of the dog, roll two yellow balls 5 mm in diameter. Press at the top of the head.
 While pressing into the muzzle, smear one edge from top to bottom along it. Gently smooth the edges. Try to do everything symmetrically.
Make two small identical cakes, these will be the ears.
 Attach them with your fingers to the head. Bend the ears.
With the tip of the stack, make indentations for the eyes.
 Roll up two black balls with a diameter of 1.5 mm and insert into the eye sockets.
In small pieces of clay, shape the eyebrows, nose. With a stack, form a mouth, slightly cutting in place of the mouth.
For a hat, roll up two multi-colored flagella and fold them in half. One turn right to left, the other - vice versa.
 Wrap around the head, make the base and brush.
Inspect the figure for flaws. Make amends for irregularities.
 Blind the gift bag by wrapping a ball of foil, stretching out part of it with your fingers.
Flatten the plastic at the ends of the bag in the form of corners. Decorate with balls of different colors. Insert the bag into the mouth of the figure.
 Bake it strictly according to the instructions for your clay.
Natalya Neustroeva prepared a creative workshop on modeling a New Year’s toy - a dog made of polymer clay with her own hands.
 By the year of the Dog, you can also create your own fragrant and original New Year's Eve creativity and happy holidays to you!
Hello, dear friends, today we will sculpt a dog from polymer clay. As you know, the next new year 2018 is the year of the Dog in the eastern calendar, so the child and I will sculpt a polymer clay dog \u200b\u200bas a keychain or a souvenir for the Year of the Dog. Rooster made of polymer clay for the year of the Rooster we sculpted here.
The main condition is how to easily and quickly mold a dog from polymer clay, plasticine, plastic, fimo clay. We will consider more complicated modeling of dogs in this article: "How to mold a dog from polymer clay." Here we have gathered for inspiration and example just these photos of cute plastic crafts - dogs, simple and light, which even a child quickly blinds.

Plus, I personally love such simple "kawaii" forms of animals - crafts made of polymer clay. Also for such a souvenir modeling with children, you can use the Play Do clay and dry the craft. And if you take ordinary plasticine for sculpting dogs, then you will need to open it with varnish, so that the craft lasts longer.

For some reason, the craftswomen who blinded these dogs out of plastic used eh as earrings of cloves. I don’t know who would think of wearing such earrings, maybe for children? But thanks to them for the idea. It is possible to make key chains and figurines of dogs made of clay, or plastic, or plasticine based on these earrings.
 Earrings - dogs made of polymer clay.


 Look, this is not just an ordinary polymer clay dog, even different breeds of dogs are represented here. Dogs huskies, terriers, spitzles. How lovely.


And this is my favorite:

And these are my favorites number two.