Creating voluminous paper applications is easy and very interesting. All you need is a simple pencil, an eraser, color and white paper, glue, scissors. Of course, you must have free time and a good mood. Paper is a very rich material, in needlework it can be used in a variety of ways. If you have children, they will also be interested in participating, in addition, any kind of creativity develops perseverance, imagination and fine motor skills.
Paper application as art
Everyone knows the simplest technique, when flowers, houses, butterflies, etc., cut out of colored paper are glued onto cardboard. It all started with that. Then they came up with a way to make such pictures voluminous. And here lies great for design thought, because you can create original greeting cards and decor elements. There are real masters whose voluminous applications from paper turn into masterpieces.
In addition to layering and silhouette cutting, face-cutting and quilling techniques are used. In the first case, small squares are cut out of paper, which are twisted into small tubes with a rod or match. They are vertically glued to the base. Quilling uses twisted strips of colored paper. In this way, you can create a huge variety of different compositions that will look very easy and delicate. The volume application of paper with your own hands is done, of course, with the use of origami.
To master these techniques is quite realistic. If something doesn’t work right away, you should not back down. And, perhaps, it should begin with the simplest.
Making a volume application with a child
Creating voluminous paper applications for children is not only interesting, but also useful. It perfectly develops fine motor skills, imagination, perseverance, attention, spatial thinking. In addition, kids are very fond of doing something with adults.
A child up to six years old needs to introduce game elements in order to keep his attention, for example, asking riddles as work progresses. They can be about objects and images that will be depicted on the final composition.
So, first you need to draw a template on paper. In this case, it will be a tree with leaves and a bird.
In the process
Any volume application from paper begins with a sketch. On a brown sheet, draw a tree with thick branches. As a crown, as in this example, you can use just an uneven circle. Separately, on small green sheets, draw small leaves. The bird should contrast with the rest of the details. Here for this purpose a lilac color was chosen for her. Let the child cut out all the details of the future composition himself.
To make the leaves symmetrical, they need to be cut from a sheet folded in half. Make several pairs at once, putting them into one another.
The very first crown is glued to the background. For the next step, you need to prepare small bundles of brown paper. They stick to the tree on the back side and are the link between it and the crown.

A voluminous paper application welcomes the use of origami, which means that the bird can not be cut out, but curled in a special way. Or build her a tail from an accordion-assembled sheet. In this case, the wing is glued so that it also rises slightly above the rest of the composition.
What else can you come up with?
Children can be taught more complex and interesting techniques. Any fluffy objects are created by simply gluing torn pieces of paper onto the template. And also sheets are crumpled, compressed, flattened or folded before becoming part of the picture. These methods of creating masterpiece elements are always very exciting for the child.
Volume applications of paper for children can be made using facing. In this example, the entire composition is completed in this manner.
We take paper in yellow, blue, green, brown and white. Now it needs to be cut into small squares - one square centimeter is quite suitable. To create the convolutions themselves, you will need a rod or a toothpick. Although any object with a narrow sharp end will do. It is placed in the center of the square, which is crumpled and curls around it. Glue in this case is applied to the desired area of \u200b\u200bthe sketch. Do not pull out the rod before the package is firmly attached to its place.

The voluminous paper application created by oneself is a very painstaking work, but it relaxes the nervous system well and accustoms one to perseverance. To facilitate the process, it is better to first prepare all the necessary convolutions, and then proceed to gluing. By the way, you can fill in only the outline of the sketch. Do not worry if any convolutions are uneven - they will look very harmonious in the finished picture.
Volume application made of paper. Flowers
Typically, such crafts are relevant on the eve of March Eighth. However, for creativity it is not at all necessary to look for some reason.
First make a pot. The top can be glued to a specially placed paper roll, as was done in the application of the tree, or simply leave the edge on top and turn it down.

Flowers will be layered. You can not do them with five petals, as shown in the picture. If you want more, the way it will be. The middle can be cut out of polystyrene foam and painted, or just stick a small crumpled piece of sheet on this place.
It is appropriate to additionally decorate volume applications from paper with ribbons, fabric and other improvised means that are glued or sewn to the composition. In this case, the tape is such an element. It can simply be threaded through specially cut holes. If your imagination goes further, decorate the applique with beads, beads or anything else.
Corrugated paper flower arrangement
This is a great way to give the craft airiness. All we need to do is cut out the corrugated paper with the petals of the right size. Let their size vary - from the largest from the outer edge to the smaller in the middle. On each petal from the bottom edge we make a small incision. Overlapping the resulting edges. Now you can bend the petal either outward or inward and stick to the base.
Absolutely any flower can be made using this method, whether it be a rose, peony or chamomile.

We resort to quilling
The most interesting and eye-catching volume applications of paper are made thanks to this technology. If you are going to apply quilling for the first time, please be patient as it will not be easy. The main thing here is training.
Double-sided colored paper needs to be cut into strips from 2 to 9 millimeters wide. The narrowest will be used for finer and finer details of the composition. Still need sewing needles with balls, tweezers, patterns, scissors for manicure, cork or any board with a similar soft surface. Workpieces are made as follows: a strip of paper is wound with a serpentine around a needle stuck in the board. Create patterns will help patterns. For the petals, several needles are needed so that the distances between the paper twists inside them are even. Graph paper is useful here. The lowest needle will help to make a sharp end, the crochets should first wrap around the middle needle, then the upper one. Just attach the finished part to the intended place, greased with glue.

It is impossible to imagine summer without bright colors. What they just do not. Summer is the time of year when you can see the most beautiful and varied flowers. Flowers grow everywhere: in kindergartens, flower beds, at the grandmother’s dacha, and even in a kindergarten on a summer playground.
Let us leave a piece of summer and make bright summer applications together in children.
Application for children "Bells"
To make an application, you need to prepare:
Colored paper;
Application paper;
Scissors;
Cloth to remove excess glue.
Step-by-step process of making summer applications
1. Choose the basis for the application.
She could be like that.

You can take and draw the base with paints or pencils, or you can take just a sheet of plain paper.
2. From the violet (blue) paper, cut out the squares, fold them in half and draw the silhouette of the bell.
.jpg)
3. Cut and unfold the workpiece. We got a bell flower.
.jpg)
We cut out several of these flowers.
4. Cut the stem from green paper.
.jpg)
5. We take the green paper, cut out the rectangles from it. Fold them in half, draw a leaf silhouette.
.jpg)
6. Cut and open the workpiece. We cut along the edge to make the leaf more “alive”.
.jpg)
7. Glue the stem to the base, draw the stems with a pencil or felt-tip pen and glue the flowers on them.
Our application is ready.
.jpg)
Tip. In the same way, you can make a lily of the valley.
You can make applications of colors using ready-made templates.
Application "Bell"
Templates for the application "Bell"
Having printed out the templates, you can collect the bell flower (sample at the top of the picture)

Application "Camomile"
Patterns for applique "Daisy"
After printing out the templates, you can collect daisies (sample at the top of the picture)

Application with patterns "Sunflower"

Workshops on making summer flowers
|
Do-it-yourself summer applications for kindergarten In summer, even weeds are so beautiful and juicy. How I want to capture them in my memory. So let's make applications with these beautiful juicy weeds together with the children. We offer you to make a summer application “Burdock in the clearing”. Such an application can be given to mom, you can decorate the summer interior. To complete the application, it is necessary to prepare: ... |
|
DIY summer applications for kindergarten What bright and juicy poppies in the summer. How I want to capture them in my memory. So let's make applications with these beautiful juicy flowers together with the children. We offer you to make summer applications “Poppies in the clearing”. Such an application can be given to mom, you can decorate the summer interior. To complete the application, it is necessary to prepare: ... |
|
Do-it-yourself summer application for kindergarten How beautiful and tender are spring-summer flowers Tulips. We offer you to make a summer application “Tulips in the clearing”. Such an application can be given to mom, you can decorate the summer interior. To complete the application, it is necessary to prepare: - colored paper; - basis for application; ... |
|
DIY summer application for kindergarten Summer is the season of flowers. Chamomile is one of the most loved wildflowers. Chamomile is a symbol of kindness, love and purity. We offer you to make a summer application “Daisies in the clearing”. Such an application can be presented to parents on a summer holiday Day of family, love and fidelity. To complete the application, it is necessary to prepare: ... |
You need to familiarize yourself with the properties of paper.
1. Show the child segments of different colors, softness, texture (corrugated, writing, rough, velvet).
2. Offer to work with paper at the discretion of the child, ie as he wants. You can tear paper into pieces, crumple, crumple.
3. Ask the child about feelings, for example:
What paper rustles louder?
Which paper is easier to tear?
Which is easier to roll into a lump?
What does it look like? (This lump looks like an apple, this one like a tennis ball, this one like a Christmas ball, these strips are like pasta, and one or another pattern can be made from these cut pieces.)
4. Show how to tear the paper evenly, focusing on the cuts of the paper sheet, how to bend the sheet evenly.
5. Tell us how and from what paper is made, for example, with such text.
Paper is made of wood on special machines. Paper making takes place at paper mills, which are huge factories.
The logs are first sawn into logs. The logs are broken into chips, which are then boiled in special solutions. A special paper machine mixes paper pulp, squeezes water out of liquid paper, smoothes it with numerous hot rolls, and wraps it in huge rolls. And the paper goes to the factory where they make notebooks, where they print books, newspapers and magazines. Of course, the main purpose of paper is to be material for writing and print media. But they also make dishes, furniture, toys from paper, sew clothes.
See how paper is made on video
Volume applications
Creating voluminous paper applications for children is not only interesting, but also useful. It perfectly develops fine motor skills, imagination, perseverance, attention, spatial thinking. In addition, kids are very fond of doing something with adults.
A child up to six years old needs to introduce game elements in order to keep his attention, for example, asking riddles as work progresses. They can be about objects and images that will be depicted on the final composition.
Materials and tools:
A simple pencil;
Colored paper;
White paper;
Scissors;
Colored and white cardboard.
Volumetric app templates
ladybugs
Cut two red circles and a black semi-oval. Black dots are placed on the circles, after which one circle is glued exactly above the black semi-oval, and the second is bent in half and glued to the first circle. We supplement the ladybug with toy eyes and antennae.


Volumetric trees
1. From a cardboard we cut out a tree contour. Separately, we need to cut the trunk, which will correspond to the size of the cardboard blank. To this trunk add the upper part - branches.
2. Cut into strips of paper measuring 1.5 cm x 10.5 cm, fold the accordion. Using curly scissors we cut parts of the crown of different shapes and one lower part, equal in size to the lower part of the cardboard blank.

3. Glue the accordions to the back of the crown blanks, except for the lower part. We glue it to the tree.


4. Above is the trunk

5. We glue the crown blanks on the accordions one after another, partially overlapping the neighboring ones.


6. It remains to decorate the tree. We hang colorful fruits to get an apple tree.


Autumn flowers
Panel of butterflies
A curious world has prepared for you a selection of beautiful voluminous applications.
Children 3-4 years old can already work with almost any material, perform crafts from colored paper, cardboard, plasticine, natural materials. The main thing is that they are large, bright and safe. The child’s desire for creativity should be encouraged from an early age, because this has a comprehensive development on him, consolidates most of the useful skills. And such children's crafts will fit well into the interior of any apartment, will be a great gift. Today you will learn how to make applications for children 3-4 years old from paper.
For children who have never been involved in applications, it is best to start by gluing the simplest geometric shapes onto papers. For example, squares.

Such applications will help to obtain and consolidate the simplest skills in working with details and color.

Song Options
After mastering the simplest compositions, you can begin to create more complex ones.


Do not be afraid to help the child and cut the finished parts according to the pattern.

Following the banal pictures, the child will begin to create interesting stories through the application.


Applications can be supplemented with drawings.

For kindergarten teachers, there are notes on applique classes in various age groups. Along with them, you can download templates for crafts that will be used by the guys. The goal of any practical lesson is to master the kids with one or another application technique.

Arouse interest in creating an image, develop fine motor skills.

"Clouds ran across the sky ..."
As a rule, very few items are required for such exercises. But nevertheless, it is recommended to use additional material, which will completely allow children to immerse themselves in the atmosphere of the theme of the performed application.
Let's look at the synopsis of the lesson on creating the applique "The clouds ran through the sky." For this, the teacher will need:
- Carpograph;
- Tape recorder with rain noise recording;
- Multi-colored paper;
- Scissors;
- Glue;
- Colour pencils.

Previously, before starting work with the kids, a conversation is held about such a natural phenomenon as rain. You can all go up to the window and watch the clouds.

Together with the teacher, some works of previous groups are considered. You can pick up and recite several verses in the topic. The educator must comment on all his actions. It demonstrates.
Good afternoon, today I decided to collect in one article all ways make paper crafts feasible for children. For the ornamental season of 2017 - a decent photo piggy bank ideasthat a child can make out of paper with his own hands. These paper crafts can be used for classes in kindergarten or school (1-5 grade). There will be light crafts for preschool children (from 3 to 7 years) - for the younger, middle and senior groups. And there will also be crafts and more complicated, which require more than long school hours (for 45 minutes) - suitable for labor lessons for children of 1, 2, 3, 4 classes. As well as creative leaders skilful hands circles in kindergarten or school they will find many useful ideas for paper crafts.
- We will do flat crafts applications.
- Voluminous crafts made of colored paper and corrugated cardboard.
- Crafts Toys from cardboard or thick paper.
- Crafts using various techniques (half disks, fan, symmetrical fold, postcard).
At the moment, we already have feature articles on our site with paper crafts,
And also many ideas for paper NEW YEAR'S articles in the article:
And in this article - we will consider different techniques that can be used for paper crafts for children of different ages.
So let's take a look what paper crafts I collected in this piggy bank.
Origami
In the technique of SEMISTER
Crafts from colored paper, which we meet in kindergarten and at school, most often look like applications. I myself really like effect 3 applicationsD. There are a lot of ways to create bulges in applications.
In this article I want to highlight a technology interesting in its graphics - these are crafts from round paper discs. When all the work is laid out in the form of whole or folded in half paper rounds.
This mosaic applique made of round details is suitable for children 3-4 years old. She just suits them on the pedagogical tasks of this age, when children still do not know how to work with scissors, but already with pleasure they glue ready-made modules-templates from colored paper.
Such crafts applications look bright and unusual due to the PARTIAL ADHESION of the modules - we put only half of the disk on the glue, and its second part sticks out with a fold.

And even from circles bent in half or ovals, you can make not only flat applications but also paper crafts. So much for inspiration oval caterpillar bent in half - Children from 3 years old cope with this task, if you help them to fold the ovals in half. Children 4 years old will themselves add ovals, and even cut out a few of them. And for children of 5 years old, you need to give out colored rectangles, they themselves will cut the corners of the rectangles, thereby turning them into ovals, they themselves bend them in half and fold them into a caterpillar.

Be smart and think WHAT ELSE you can design from paper semicircles or semi-ovals. Surely you can make a frog, panda, giraffe, hippo, penguin from such half-discs of round or oval shape.
VOLUME application
From paper blades.
And here is another technology for convex paper applications. When the parts are glued together in advance in the BLADES, and then such a lobed paper craft is glued with their blades onto the application cardboard.
The blades are obtained if Bend 3-4 identical parts in half, and then the bent walls of adjacent parts are glued to each other.
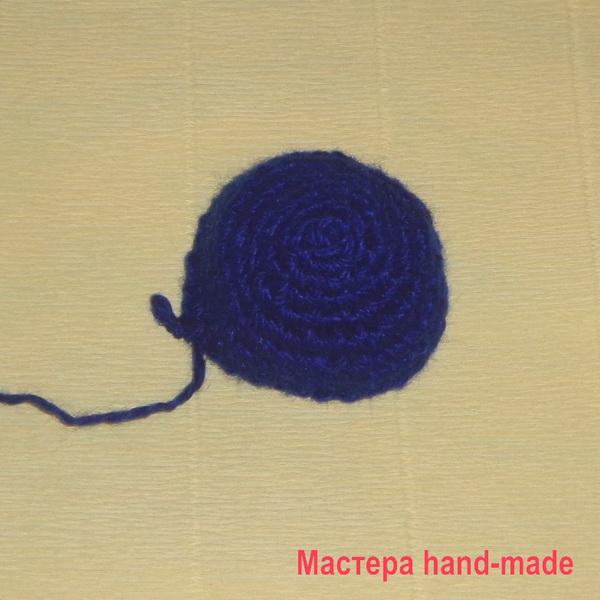
For example, the ladybug in the photo below consists of three paper circles. They cut out three circles, bent them in half. First, we glue the halves bent in half on the left and right. And then the third kruglyash lays a book on the protruding halves of the glued kruglyash.
Craft "Ladybug" is suitable for children 3 years old. And the article "Balloon" with a large number of blades is suitable for children 4-5 years old.

Any forms of paper can be turned into a blade part, the number of blades and the splendor of the part depend on how many parts you use in your bulk gluing.
In the same way, you can do paper crafts in bulk (in the form of objects) with your own hands - like these paper fruits in the photo below. Watermelon is suitable for crafts in the older group of kindergarten.


Origami
ON SPRINGS.
And here's another paperwork with a convex effect. Here, the volume of the application is transmitted due to the relief gluing of a strip of colored paper folded into three folds. This autumn applique is easy to do with your own hands - suitable for children of middle and older groups (5, 6 years old).
In the center of the upper fold, we cut a hollow and place the silhouette of an owl inside. So that the owl would hang at a distance from the back wall of the hollow, you need to stick a paper spring on the back of the owl. How to make a spring You will now understand, for example, the following paper craft with volumetric effect.

Here, below, we see the paper craft of the BEAR. The paws of a bear are also glued at a distance from the body. And this distance between the paws and the body is achieved by sticking paper springs. All in childhood did such spring-loaded worms. Below we see a master class where the process of creating such a paper spring and the whole craft as a whole is shown.

The BEAR craft is suitable for children 3 to 4 years old (if all the parts are already cut out and the springs are folded). Children 4 to 5 years old you can slowly cut the silhouettes yourself. Children 5-6 years old already able to fold the springs themselves (and lesson can be divided into 2 parts - in the first lesson we make springs and cut out some of the silhouettes - in the second lesson we cut and assemble everything together.
In the same way, you can do any crafts. Below we see that the crown of the tree is made according to this principle. But with the same success you can do bunch of balloons on a greeting card. Or bouquet of flowers from paper, where each flower will be at its convex level.
It is possible to isolate with a volume spring any details of paper crafts - bird wings, tiers of thorns at a hedgehog (photo below).

Or hares in the dense grass (spring crafts in the photo below).

You can make such paperwork too, using inside the stand-springs. It turns out a beautiful effect. And legs-stands for multilayer applications can be made not from paper springs but from purchased double-sided thick adhesive tape. Such a chubby tape is on sale - it has a thick foam tape, as it were, and it is sticky on both sides. It can be cut into stumps and glued between layers of crafts.

Of these springs, you can make not only applications but also independent paper crafts. Make a spring and beat it with other paper parts. For example, to attach an oval of the muzzle, round ears, paws at the bottom and a long strip-tail - and now it all starts to look like

But the paper penguins crafts based on the same spring. Or craft bugs. There is always unused black paper in the set of colored paper in the kindergarten - you don’t always know what to make of it - but here you are, black bugs, penguins and little black crow.


Origami
WITH A FAN.
A paper fan is often used in children's crafts as a way to quickly create the desired shape for the part. Most often, gluing is used as tail feathers for paper birds (or as wings).


Spreading fan blades can remind you of bat wings. Children's crafts for middle age (4-5 years).

A fan is similar to a lampshade of a table lamp - it means that it will make an excellent DIY lamp-lamp (craft for children from 3 years old)
The fan can become the basis for children's crafts in the form of fairy-tale characters - friends of penguins or polar bears (crafts for children aged 5-7 years).

If we fold the fan in half - and expand its blades into 2 semicircles - and glue the semicircles encountered with glue, then we get a ROUND FAN.
From this blank you can make a lot of paper children's crafts. The simplest and fastest are apples (add a stalk and leaf) or birds (add a wing, eye and beak).

Ready-made blanks for round fans are used in classes with children 3-4 years. And at the age of 5 years the child is already given the task to create such a round fan of colored paper.
Adding various details to the paper fan, we can get an image of any animal made of paper (black cat, or red, white bunny (as in the photo with children's crafts below).

You only need to teach children to make a fan with their own hands, to practice several times. Then teach them to bend the fan in half and unfold both halves in two semicircles - and glue these semicircles with glue-pencil. And then the children themselves will surprise you, they will throw up more and more ideas for crafts, I turn a round paper fan into a snowman, then into a mermaid bra, into a round red clown nose.
And if you make several round fans of slightly different diameters at once and string them on a wire, then we can get a voluminous spherical paper craft. A fan ball can become an apple, a pumpkin, a snowman, a sheep, a white rabbit and any other children's character.

Children's crafts
on a harmonica stand.
There is another original way to design a craft for children from paper material. Below we see the principle of creating such crafts. From cardboard we fold the usual accordion. And we use it as TIERS for sticker paper parts.
In the photo of the children's crafts below, we see how the accordion turned into a craft cake. Each row of accordion is a tier of cake with candles.
Note, the high side part of the crafts in the photo below (where the balloons are) is not necessary.

In the same way, by this principle, we can use the rows of accordions as rows of Christmas trees in the forest. And put a deer or a snowman or a bunny between them.
Rows of peas can be used as streets on which to place the house.
Or the rows of such a stand can be folded from blue paper and designed as SEA WAVES, and then it remains to stick dolphins or rows of boats on them. Or peeping sharks.

Origami
on a flat cardboard template.
And now we will see crafts for children, where all the elements are glued on a silhouette carved from thick cardboard.
For example, we take cardboard and draw a silhouette of a shark on it. Any child from 4 years old is already learning to cut with scissors - he cuts the silhouette himself with his own hands, slowly crooked, but he should already myself cut along the line holding the scissors in an immovable hand, and rotate the sheet of cardboard, as the cut line will rotate in silhouette ..
When the silhouette of a shark made of blue cardboard is cut out, we give the child a round blank of white paper - the child’s task is to cut it into teeth (just scribble triangles along the oblique, and then bend every tooth so that he protrudes into the general circle. And this mouth of paper remains to stick on the silhouette of a shark. And we get awesome crafts for children 4-7 years old. Sharks are great crafts for boys. Little brave men will be happy to tame a dangerous marine predator.

Application details do not have to be colored paper. For example, the scarf on the polar bear below is cut from the cover of colored paper (the cover was in a box). A carrot on a craft with a hare is a white cardboard, which was predominantly painted with gouache (painted yellow-orange-red stripes).

You can peep ideas for the same applications on the cardboard silhouette in children's cartoons, or see them on children's coloring.
Such paper crafts for children 5 years old can become the basis for a children's theater. If on the back of each craft stick long handle made of thin wooden slats (can be bought in the construction department of the store) - or the pen can be folded from a sheet of paper and wound tightly with tape for density.
Children having fled for a shrimochka and holding their characters on sticks can to play performances entertaining parents, grandparents with home reprises of famous fairy tales.

And you can cut round holes for children's fingers in such a craft - then you can already play the scenes of the TABLE THEATER. Here in the photo below we see a sheep and a hare made of paper with such slots for the fingers.


And your paper characters can have a special Paw Grip, and you can insert a candy or pencil and a small gift to someone in this grip.
By the way, here is a good idea - you can stick such a character on a postcard and give him a paw rolled up 100 dollar bill - get a gift card with money for the birthday of a friend.

Such crafts made of flat cardboard can be supplemented with elements of BEND (as on a bunny with a photo below), or elements of a COIL (as on a snail below). Or additional ANTIQUE elements (as with the cat below).

Children's crafts
with paper STRIPES.
Also, the application can be made voluminous if you use HINGES FROM PAPER STRIPES. Colored paper is cut into strips, and each strip smoothly bends and sticks together at its tips. Such curled stripes can be the petals of a lush aster or a modest chamomile.
Or such paper loops can serve plumage swan- left photo below. This craft is suitable for children from 4 years. They themselves glue already cut strips into loops and paste them in rows on the tail of the swan.

But the peacock (in the right photo above) is already crafts for older children. For grades 1-2 - because in a lesson in kindergarten, children in 25 minutes will not have time to make a peacock from beginning to end. But in 45 minutes of school lesson, children will just cope with this task.
Please note that the peacock is made of paper from strips of different lengths. The yellow bar is the shortest - it first bends into a loop. Then the green strip adheres to the loop with one edge and also bends to the place of gluing the yellow loop-strip. Then we do the same with the blue strip of a slightly longer length.
Thus, we get EIGHT THREE-COLORED HINGES for the peacock tail. They all stick together ribs to each other - in one bunch-bouquet. And at the joints of their gluing we fasten peacock spots. Then this tail of paper we fasten to the back cardboard silhouette of a peacock. Great creative craft.
Below we see how a flower crafts are created by the same principle. In the same way, we make the tail to our peacock with the photo above.

Or a paper craft for girls - SHOES-SANDALS - here the strips serve as straps to create a wicker toe of paper slaps.

And if you cut strips of the SAME LENGTH, then it is convenient to make a spherical wicker of them. Such a braid in the form of stripes crossed in a circle can serve as a shell for a turtle, a balloon, or the middle of a lush flower or a snowball from a snowman.

Or it can be a delicious apple, bitten on the side (left photo below). And inside such an apple you can stick a worm out of a paper spring (see above for a method with a spring).

If you glue the strips cross-on-cross in the center ... and poke holes at the ends with a hole punch ... and lift these ends with holes up ... and put them together on a string - we will get a pear-made article from paper (see the right photo above).
And if take NOT SEPARATE strips - and cut a sheet of paper into strips NOT CUTTING TO THE EDGE - like a long fringe. And then this long stripy fringe is decorated in the form of a paper craft-cap.

By a similar principle, beautiful crafts are made from paper in the form of cages with birds. Such a craft seems complicated at first glance. But in fact, everything is available for children from 4 years. And even a child at 3 years old will cope with the help of an adult who will show, then spread with glue and where to glue.

Below we see this cell in the blank (photo-master class). First, these are paper strips on a wide strip of the base. Then we wrap the base in a ring. And the strips sticking up are bent into the arch each relative to each other. Quick and easy craft. It remains only to make a bird out of paper and hang it on a rope under this paper roof.
That is, this craft is easy to do with your own hands for children even 3-4 years old.

And you can also make paper crafts for children BASED ON BASES. A ball of stripes is collected on a needle and thread. Since you won’t give a needle to children, you can go the other way and pre-punch holes in three places of each strip - along the center and at two edges.
The strips are folded crosswise into a central hole - a thread is threaded into it from a suspended bead from below. The large bead below prevents the strips from slipping off the thread. Next, a few more beads are strung on the thread (see carefully inside the sheep, they are visible in the photo). And then the same thread is threaded into all the holes at the ends of all the strips - SO THE BALL IS GOT. If anyone does not understand, there is a photo master class in

You can attach any details to such paper balls, turning them either into frogs or into hares (as in the photo of children's crafts below). With your own hands and your imagination, you can make a variety of animals.

These are the chickens and the chicken made by craftswoman Tatyana. What characters will you come up with? Such crafts from strips can be carried out in the 1st, 2nd, 4th grade of the school. And also for stubborn children of 5-6 years old, it is also suitable.

Origami
in the technique of quilling.
And paper strips can be wrapped in a tight roll-up. Then give this twist the shape of a petal or leaf and make paper applications of flowers with such twists. The technique is quite well known, called quilling. The technique is suitable for children from 5 years old, when the fingers are already dexterous enough to hold the twist on the rod-holder.
Below we see how the usual round twist is given different shapes (pinch it with the finger on the right sides) and the twist becomes drop-shaped or bowl-shaped, or triangular. And from such twisted modules we add a quilling application.
Below we see children's crafts from colored paper in this technique. You see, the paper consumption does not have to be large - the craft itself looks miniature and can decorate a handmade postcard. The child will be pleased to give his mother a handmade postcard.

Within the framework of a school or kindergarten, the time for practicing such crafts is limited - and we can only make a few such modules. The process is laborious for children's fingers and takes time. You can divide the craft into 2 classes - on the first we make modules, on the second we form the craft.

Children’s cupcake art is very popular with girls.
Cupcake and bird are very fast craft because it does not require a lot of twists. Such crafts can be done by children in grades 1 and 2 - without rushing, gently scrunching and gluing twisting tails.

But a teddy bear or a bunny is already a paper craft for children who have gotten their hands on simple quilling tasks. For grades 3, 4, 5 - this level of complexity of DIY crafts is just right.

By the same principle, you can make larger twisted crafts - if you take not a thin cut strip, but a folded sheet of paper. Thick addition of the sheet will allow you to get large twisted parts and from them you can make a large application - for example, such a penguin or an owl from paper.

And also large craft-twists are obtained from corrugated cardboard. Due to the ribbed relief, such a corton forms wide volumetric details and it is possible to obtain 3D paper toys from them. Craft for the senior group of kindergarten or for school (1,2,3,4 class).

Origami
based on CONE.
A paper cone is also a good base for ideas for children's crafts. We all made our own Christmas tree from a cone in kindergarten. And now we can already make any character out of paper in the form of a cone crafts.

So that the cone is not too wide and not too narrow - its spread (flat pattern) should make an angle of more than 90 degrees - usually this is 120 degrees (as in the photo below) - that is, a third of a full circle.


For a giraffe, the cone can be made thinner and sharper. Then we need a quarter of a friend (that is, not 120 degrees, but 90 degrees is enough).

Origami
folded in half.
But children's crafts that are made from a sheet of paper that is bent in half, and cut out the silhouette - in the end we got a two-sided craft with the same symmetrical sides.


And paper birds can also be made using the same technique. In the bird (in the photo below) we see that the wings are a fan of paper or napkin. And in the fold of the upper part of the bird, we make a cut and insert a fan there.

In animal crafts, an elephant’s ears can be inserted into such a slot. And also, for example, a mane of a lion from cardboard or thick paper.

Not only wings can be attached to such BENDING CRAFTS, but also a head - which will be perpendicular to the body. See the photo below with an example of a children's craft “Black Cat” made of paper.

The head of this cat is attached according to the same principle as the wings-fan of the bird above - ALSO IN THE CUT. If you look closely, you will see that the head has fold too, which divides the head into 2 planes (back and front).
THE REAR PLANE OF THE HEAD, continues with the ears, and THE FRONT PLANE OF THE HEAD contains glued eyes and a mustache of the cat.
A cut is made in the back of the cat (as in the bird above for wings) —and the REAR PLANE of the HEAD is inserted into this slot. And the front plane just hangs in front and is not inserted into the slot.
A very simple paper craft for older children (age 5-6 years). And for children 1-2 grade is also an excellent do-it-yourself job.
It is possible to provide for such a scheme of crafts tummy supplement - like these hares below. To do this, you just need to draw additional processes of paper in the abdomen, which then, after bending the silhouette, WRAP A ROLL and fasten with a stapler or glue.

You can slightly modify this principle of craftsmanship - leaving between the two halves-barrels an UPPER BACK SQUARE. That is, at the top of the part do not one fold, but two folds at a distance of 1-2 cm from each other - so we get the back.
These bears made of cardboard (or thick paper) have just such a back.

And these paper birds (in the photo below) also have a back. And thanks to this site, we were able to provide for the tail part (it became a natural extension of the dorsal part of the bird).

I specially drew a diagram of the birds - so that it becomes clear to you how to add a back-pad to your crafts. Here in the diagram below - the back area is highlighted with a purple dotted line. On these lines is the fold of our crafts.

And birds and bears according to this scheme can be drawn in advance on a template made of paper, then this template can be circled on a sheet of cardboard in advance by drawing internal fold lines) those that go along the back). And the task of the child is to embed the silhouette of the template and bend it along the internal lines. That is, the craft is available to children from 5 years old, and is suitable for middle and senior groups of kindergarten and for school classes of creativity and work.
Origami
SIMPLE ORIGAMI.
For young children, it is difficult to make multi-step origami crafts. Therefore, it is better to start with simple schemes, which are then supplemented with cut out elements, giving them a resemblance to a conceived character. So we get light crafts.
You yourself do it yourself you can experiment with a sheet of paper - fold it this way and that, and then think about what this folding sheet might look like ... but what if here ears, eyes, and nose .... wow, that seems like it could be a great MOUSE.

Here's another simple folding of paper on diagonal lines makes it possible to get a fold for the craft "Ladybug". Specks and a muzzle can be drawn with a marker or cut out of colored paper.

The simplest thing a small child can do is to fold a sheet of paper into two folds and get base blank for a character from paper, whose mouth opens, and therefore it is possible to make him not only a muzzle, but also a mouth with teeth and tongue.


Such a children's craft is suitable for classes on paper design in kindergarten. She needs double-sided colored cardboard or the same thick paper. It is good to buy office colored paper for such crafts - it has a higher density than standard children's colored paper.
Or children can make their own hands so light clamshell crafts. To do this, a sheet of paper (A4 format) is cut along the beveled diagonal. And then it folds into 2 folds (to make 3 parts). The wide side of the folded paper is glued to a sheet of colored cardboard and then decorated according to the design of the sketch.

Children's paper crafts.
dROP pattern.
If you roll the wide strip of paper together, we get teardrop-shaped twist.
On the basis of such a simple blank, you can also make a variety of designs of crafts - a whale from blue paper, a ladybug (stick to a drop of a wing).

It is convenient to make mice or a hedgehog from a paper template in the form of a drop.

Can i add on top to such teardrop-shaped parts round paper roll - to get a head. So more options for simple and easy crafts - bunny, duckling, swallow.

Turn on your imagination and multiply ideas.
And if you connect a whole series of strips together as CHAIN \u200b\u200bLINKS, you can get such a green crocodile from paper loops.

And here are some simple crafts based on a wide strip bent into a ring or scaphoid shape.
In the craft with the boat - we first do boat bottom holder - it’s just a small rectangle of paper, which has small bends on both sides. And then we glue the REAL BOATS FROM THE BLUE PAPER to these curved sides. Rectangle with sides in the center will not allow the sides of our boat to collapse to each other.

The item is suitable for children from 5 years old.
But the children's paper craft, where also the white sides of the paper strip imitate the body of a swan. Here, the form holder is a roll of white paper twisted into a long tube. Craft for children 5-6 years old.

Crafts Cards
from paper.
And of course, if you like to craft children's paper and cardboard crafts, then open cards are a suitable topic for children from 3 years old. Ideas of opening crafts can be very different. For example, an aquarium with a fish. Or Valentine crafts with spring birds.

You can make a simple children's craft in the form of a castle - the gates of which will open for boys knights and soldiers, and for girls beautiful princesses hidden inside the bastion from paper.

DIY cards can be a great DIY gift for March 8th. For example, here is a cup with tulips. The handle for the cup can be cut out as a separate piece and glued to the side of the cup.

Or you can make an apron craft with carved lace from paper (lace can be obtained from ready-made paper napkins, or cut a snowflake from paper, cut its lace edge and we get a border for the apron.
You can cut the silhouette of a jar on a craft - stick it with a thin layer of the file (on double-sided tape). And also stick a pocket of paper (the back wall of the craft) and in this transparent front pocket lay hearts.
Here is another technique VOLUME CARDS She is simple. Fold the sheet of paper in half. And on the fold edge we do 2 incisions scissors (any length and width). And then we simply push the place between these incisions with the FINGER into the postcard - and it is STRAINED out in the form of such a rectangular stand.
And now we stick any element to this stand. For example, a cupcake.
If you make three pairs of such cuts - push them with your finger inside the card, then you can stick a cupcake on each of them. And on top of the flags. Here is a simple children's craft and ready. Interesting and non-standard.

To get started, practice on a piece of a regular sheet - bend in half, cut two times and push the incised part inward. You will see that it is simple.
And you can show the children the same way. And then on such a stand (already pushed inside the postcard) you will stick any craft (butterfly, dinosaur, rocket).

Any original ideas can be realized in this three-dimensional postcard technique. That is, this is another field for children's fantasy paper crafts.
The longer you make pair cuts, the further the strip-stand inside your postcard will be bent. Here you can see it on the example of a handmade postcard in the photo below.

Craft openers may have a surprise in the form of a fan-folding bed. Under such a cot, you can arrange a peacock with a magnificent tail.
Of course, such a complex thread (as in the photo below) is difficult for a child. But for children, any idea can be simplified - even if the fan is not carved, and the peacock spots are simply cut separately and glued to the fan blades.

Or the clamshell inside the card can be in the form folding chain of symmetrical elements - butterflies, flowers (that is, the main thing is that there is a symmetry of the folds).
We cut out any identical details - butterflies, flowers, hearts. The main thing is that the left half and the right were like a mirror image of each other. And then these parts can be glued in halves to each other (not all the half should be glued with glue, but only the outer edges). And then we get a multi-colored accordion of details. And paste this accordion into a postcard. Also a beautiful craft - nocturnal butterflies, bright but against a dark sky.

These are the ideas I have collected and systematized - for your future paper crafts. I am sure that now you can not only repeat the crafts presented here with your children, but also CREATE YOUR OWN WORKS BY YOURSELF on each of the proposed METHODS.
After all, when you understand the method, and when you can see that it allows you to widely interpret yourself - by propagating the same technical idea in the video of a wide variety of crafts - then you just need to CONTINUE THE CHAIN \u200b\u200bOF IDEAS.
And I wish you the most original creative finds. And the children will be very happy to realize them in the most diligent and inspirational way.
Successful to you children's crafts.
Olga Klishevskaya, specially for the site
If did you like this article
And you want to thank our author for this painstaking work,
then you can send any amount convenient to you