About the enormous benefit of drawing for the development of me. Our parental task is to instill interest in him and provide regular classes with various drawing tools. One of the options for attracting a child to painting is coloring. To date, publishers offer a huge variety of colorings. I have already bought a lot of interesting items. But, to be honest, I’m not in a hurry to give them to my two-year-old Yana for tearing. For the first coloring, I picked up monosyllabic drawings from the Internet, adapted several spreads of the well-known Fiona Watt's drawings, and printed them on a printer. You can download them here:

Self-printing of coloring pages is not only more economical, but also convenient. I often demonstrate various painting techniques to Yana, while we are painting not one picture together, but each copy of it. Also, often we paint the same pictures in different colors, this makes it possible to compare different color schemes. For example, in the first photo of this post, I suggested colors for the top picture, and Yana picked the colors for the bottom picture herself. Moreover, to the question “which option does she like best”, she without hesitation showed the bottom picture with brown and gray-brown shades 😀.
 Top watercolor pictures, bottom left gouache, bottom right plasticine
 We color everything in a row (watercolor, gouache, crayons, felt-tip pens, plasticine), but the most attractive result is obtained using gouache.
 Watercolor giraffes and giraffes with felt pens
 To everyone who introduces children to creativity and has not yet bought Fix Price a stack of Clever’s creative albums, I recommend a quick visit. I introduce the case of the ignorant, the kalyakalki and the drawings of authorship by Fiona Watt Clever publishers are very interesting and popular for preschoolers from 3 years. They contain a variety of tasks for coloring and painting elements. I have long been eyeing the Big Kalyakalka from this series (in it 96 pages, and its price is about 325 rubles). It turned out thatin Fix Price, these albums are three times thinner - 32 pages, but the price is 7 times less - 43 rubles for each. As a result, buying three albums cost me about 129 rubles, and the total number of pages is the same as that of the Big Kalyakalka - 96 ! At the same time, the quality and format are exactly the same. Owners of the Big Kalyakalka does not make sense to buy small ones, as their contents partially overlap.
UPDATE 01/22/2017: I’ll get a little better, Clever’s albums are excellent, but Yana’s “didn’t go” even in three years. Most tasks are designed for 4-5 years. We postponed it for another year, since they seemed too complicated for Yana and she refused to draw with them.
Several photo albums from Fix Price: 


 The task is to draw hens grains and color them. Yana performed at 2 years old.
  The task is to draw the dogs a different coat. A poodle - curls, a dachshund - spots, a diver - wavy hair. Yana painted in 2 years. Given the size of the pictures, the complexity of the tasks can be compared with the copybooks to prepare your hands for the letter. They are usually designed for 5-6 years.
In conclusion
This is my first post about the practice of drawing kids, because after getting to know the ideas of free drawing, I tried to interfere minimally with Yana's drawing and the progress in drawing was very slow. Now I have optimized my big shifts in my approach. In the near future I will boast of our masterpieces and share tips.
Below is my list of Wishlist coloring pages for the smallest ones with thick color contours. As I purchase, I will add their reviews to this post.
If you liked the blog material, subscribe to or join the group
We started painting at about 1 year old. At first, Antoshka did this with finger paints in the bathroom. After a couple of months, the husband made an easel, and the son met with a brush and gouache.
Basically, the child draws everything he wants with the materials I want or that I give. Free drawing should be practiced as often as possible. But do not stop there.
In this article I will share the ideas of drawing with children 1 to 3 years old, I will talk about various painting techniques with paints, pencils and other materials, even shaving foam.
You can also download coloring for the smallest and templates for drawing with fingers.
I will not talk about the benefits of painting with children for a long time. I think that you know very well that it develops the child’s imagination, creativity, improves coordination of hand movements and fine motor skills of fingers.
How to draw with a child 1-3 years old
 In an article about applications, I talked about a book E.A. Yanushko. This author also has a book. "Drawing with young children" (Labyrinth). This is an excellent teaching aid for parents and teachers, and a CD with demonstration materials is also attached to it.
The book presents methodology of drawing classes with children 1 - 3 years old. I take many ideas from her.
Before you start drawing with your child, here are some simple tips from me:
- Show your child various drawing techniques (poking, brush strokes, stamping, etc.) gradually, starting with the simplest ones.
- I highly recommend buying or making an easel for drawing yourself. It is relevant as soon as the child learns to walk.
- Draw as often as possible.
- Use a variety of materials for drawing.
- Try to immediately teach the child to hold the brush and pencil correctly. But if the child stubbornly refuses to do this, do not insist.
- Give your child maximum freedom. Let the child draw what he wants and how he wants. Never demand that he draw as you want. Below I will talk about various drawing techniques with children, but if the child refuses to do something, do not insist.
Do not correct the child! Let him draw a purple sky and red grass. So what if cows don’t fly, and there are no fences on the rainbow. Your child’s mind is still free of cliches. He is a true creator.
The more different creative materials you use, the better.
You need to start with the easiest to learn (for example, finger paints), eventually reaching ordinary pencils.
We draw on:
- plain paper
- old wallpaper
- easel
- magnetic board
- plaster figures for coloring,
- wood, plywood,
- fabrics
- tiles in the bathroom and in the bath itself.
For drawing with children 1 - 3 years old, you can use the following materials:
- finger paint;
- gouache, watercolor (and, accordingly, brushes of different sizes);
- felt-tip pens (water-based and conventional);
- crayons (wax and ordinary);
- wax pencils;
- dry pastel;
- pencils (it is advisable to choose soft ones);
- gel and ball pens;
- foam rubber, sponges;
- cotton buds and cotton;
- stamps;
- semolina;
- shaving foam.
You will also need cup for water (preferably shedding) and palette for mixing colors.

As I said, with finger paints we began to draw somewhere in 1 year. And they did it in the bathroom. Then they switched to paper.
Finger paint safe and do not require the use of water. You can replace them with gouache.
The simplest thing you can do is draw dots with your fingers:
- grains for birds, peas;
- apples, berries, cones, balls on the Christmas tree;
- seeds for watermelon;
- raindrops, snow, traces of animals;
- spots of giraffe, ladybug, leopard.

You can draw points with your fingers using ready-made templates.
DOWNLOAD TEMPLATES for drawing with fingers in one file.

And of course, let the baby smear the paint all over the sheet with fingers, palms.
Paint and Pencil Techniques
All painting techniques involve the use of different materials depending on the age and capabilities of the child. We give the paints, crayons, felt-tip pens to the little one, and the older children give the pencils, etc.
I list all the techniques in increasing order of difficulty.
Free drawing
My son calls this painting "kalyaki-kalyaki."
We introduce the child to the materials for drawing and give him the opportunity to experiment. At the same time, there is no need to give any tasks to draw something concrete.

Practice free drawing as often as possible at any age of the child. It perfectly develops imagination.
Sheet painting
We give the child paints, crayons, etc. and suggest drawing:
- weed for a cow,
- some water for fish,
- sand, snow.
The kid needs to paint over the sheet, and not draw individual blades of grass, etc. The one-year-old will also cope with this task.
It’s also great to use paint rollers - simple or curly.
Element painting
We draw the base (small images of animals and various objects) and ask the child to hide them by painting:
- hide the mouse, bunny, fish, bug;
- hide the moon and stars, the sun, the typewriter.
With very young children it is interesting to do this with a sponge, with children from 2 years old it is useful to paint over elements with pencils.
Draw points
Pre-draw the basis for the drawing - a bird that the child will feed, a bush on which berries will grow, etc.
Invite your child to draw: grains, berries, snow, raindrops, bagel with poppy seeds, freckles, peas on the dress.
- Direct: sun rays, flower stems, carrot tops, fence, cage, track, rails, bugs feet, cactus needles, comb teeth.
- Wavy: waves of a boat, worms, legs of an octopus, tracks for cars, hair.
- Broken lines: slides, a fence, icicles, a road with turns, thorns of a hedgehog.

Draw circles, ovals
Balls, apples, sweets, Christmas decorations, beads, balloons, mountain ash, berries, bubbles, eggs, cones.
Spiral drawing
Invite the child to draw: a snail house, smoke, a flight of bees, curls, little sheep’s rings, threads.
We finish
Antoshka loves to play such a game: I say that one boy painted different figures, but did not finish, and I suggest my son draw. He does it with great pleasure. So we finish:
- geometric figures;
- i draw a road (dashed line) and Antoshka repairs it,
- any simple and understandable plot plot.

Drawing simple stories
This is the most difficult stage in mastering the drawing. Here, the child combines different drawing techniques on the instructions of an adult.
Alternately, invite the child to draw various elements that will eventually turn into something concrete. But give your child the maximum freedom that is possible.

The purpose of such drawing is to show the child how the finished image appears in stages.
The child can hold the sponge with his hands or with a regular clothespin.
Simple sponge painting:
- waves, sand, snowy landscape, grass, paths - by smearing;
- snow, leaves - poking;
- hide bugs, fish, etc. - by shading.

Draw the shape you want on the sponge - a triangle, a tree, or even letters. Cut out. Invite the child to dip the sponge in gouache and make an imprint on the paper.

The child uses a brush to apply shaving foam on the template. Thus, it is possible to cover a Christmas tree, a house with snow, make a snowdrift for a bear, etc.
Foam can also be applied to rubber toys. This is great fun for the kid.

I talked about decoy drawing in articles about, as well as about. There are two ways to draw with decoy:
1 way. You need to pour a little semolina onto the surface with the sides: a tray, a baking sheet, a cover from under a large shoe box. And then the child with a finger or brush draws simple images - waves, paths, circles, etc., makes fingerprints or various objects.
2 way. Print out the coloring for the little ones. Have the baby put glue on the image and sprinkle it with semolina. It will be rather coloring with decoy. But you can just give the child a brush with glue and let it randomly apply it on the sheet, and then pour semolina, shake it and see what pattern it turns out.

I paint semolina with gouache. Instead of decoy, you can use sand for children's creativity.
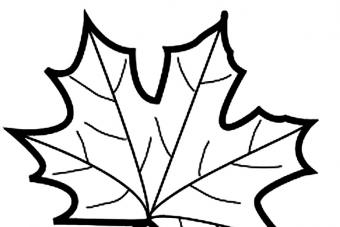
On the net, I have often come across such an opinion that children should not be given coloring books before school. Allegedly, they interfere with the creative development of the child. Some parents are simply afraid to give coloring to the child, while others have a real phobia.
I AM i don’t see anything bad in coloring. But rather, only benefit if you use them sparingly. And the main priority is to give free drawing, which I mentioned above.
Suggest to kids simple coloring, where 1 - 2 colors are used. From 1.5 years old, you can try coloring, involving the use of several colors. But all the same, the elements in them should be large. And they need to be painted, of course, with paints.

But it’s better to paint small images with pencils or felt-tip pens, because the child simply does not have enough patience for large ones.
At 1 - 2 years old, children are also interested water coloring (Labyrinth, My-shop).
There are ready-made ordinary coloring books for sale (Labyrinth, My-shop).
You can also DOWNLOAD COLORING for kids in one file.

Stencils
Cut out shapes that could be painted in one color. You can paint over both the figure itself and the background.
On sale there is a large selection of inexpensive stencils (Labyrinth, My-shop).
It may also be interesting for the child to circle and paint over various objects, his own hand.
All children with great pleasure draw with stamps. They can be made independently. For example, from sponges for washing dishes, vegetables. You can use improvised objects, toys as stamps.
And you can buy ready-made stamps or even whole sets for drawing (Labyrinth, My-shop).

I really hope that the article has been useful to you. Draw with the child and then he will also love this lesson. And which of the best ways to draw your kid?

