One of the earliest children's paper crafts is a frog. They learn to do it earlier than a cracker or a boat. Kids love to play with her, just learning to crawl. It's funny to watch a child trying to catch up with a jumping frog. Do not catch up - so frolic, but catch up and sleep - do not mind. Therefore, all the nannies just need to know how to make a frog out of paper that jumps.
Varieties of crafts
There are several ways to assemble frogs using the origami technique. The most common scheme:
Frog with eyes:

We will analyze in stages how to make a jumping frog.
Note! It is better to take paper rather than a copybook sheet. The smaller the frog, the higher it jumps.

- We fold a square sheet of paper diagonally, forming folds;
- We straighten and fold in half;
- We put the sides inward to the center, we get a double triangle;
- The sharp ends of the upper triangle are lifted to the top, smoothing the folds well;
- We bend to the sides these corners along the fold line;
- We bend inward the sharp ends, being guided by a fold along the edge of the workpiece;
- We turn inward the future frog legs and pull out the just curved ends;

- This is not shown in the photo, but if you bend the tips of the legs again, the frog will jump more fun;
- Turn the workpiece over and bend the corners of the upper triangle down the axis;
- We bend the same corners outward, forming hind legs;
- Fold the back of the workpiece “paws to paws”;
- Fold again, forming an accordion in the back, and returning the hind legs to normal position;

- We press a finger on the middle of the back with a sliding motion of the finger and catch the galloping frog.
Frog mouth
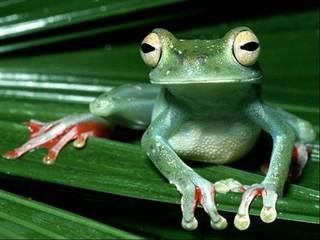
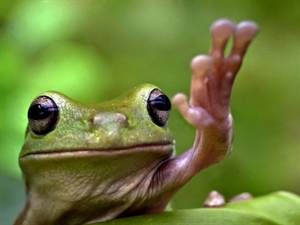
As you know, frogs not only jump well, but also croak very loudly. They call it singing.
A few photos of the singers:


How to make a frog mouth with your own hands, see the video at the end of the article.


The frog that opens its mouth:

On a square sheet of paper with the help of diagonal folds we find the middle.

We bend all 4 corners to the center.

Turn the workpiece over and bend the corners to the center again, ironing the bends well.

We bend three corners inside the workpiece, one outward.

We bend the side edges down under the workpiece.

It turns out like this layout:

Lower the upper triangle down, slightly squeezing from the sides.

In the pocket at the bottom of the layout we cut a neat hole into which we insert a strip of paper.

The strip of paper should be tight, for this you need to bend the sheet several times. We pass it into the slot at the bottom of the workpiece, drag it to the muzzle, raise the muzzle and fill the end of the strip into the hole. We smooth everything out, apply the folds.
Pull the strip - the mouth opens. Let go - it closes.
Another way to make a croaking frog.
From childhood, it is very important to capture the attention of a child and teach him how to make a variety of figures from paper: it can be animals, boats ...
In addition to the fact that this is a very interesting occupation, it turns out to be also useful - the constant work with fingers develops the child’s fine motor skills and, therefore, mental abilities!
It turns out that while working, the child stimulates the brain itself! It’s like a body massage! And for the kid to be interested, we adults need to take this process under control - then the kid will succeed, he will be pleased and proud of himself - we too!
If your baby is very fond of learning new things and creating all kinds of animals - commendable! We need to help and interest him! And if the toy from under his hands will also be “alive” - beauty! Let's make a “living” frog, which, though, will jump like a real frog! Before you begin, you need to carefully study the assembly diagram of the toy - origami. Practice yourself, and then do the same with your child.

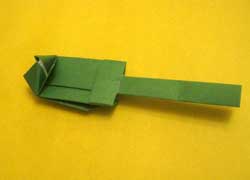
Origami jumping frog, scheme
A frog that jumps out of paper is going according to the scheme:
1. Prepare green, double-sided paper for use.
2. Cut a square out of it.
3. Bend the square in half and put the resulting rectangle in front of you.
4. We need to divide the rectangle into two equal squares. To do this, fold the rectangle in half again, and then expand it to its original position. Now we have a clear line dividing the rectangle in two.
5. We work with the upper short side of the rectangle. We bend both sides of the upper square diagonally, then lay them out again.
6. We bend the upper “visual” square in half and smooth the line, then again we bend it to its original position.
7. And now we carefully collect the pyramid from the lines received from the square.
8. And now let's move on to the second square. It needs to be doubled in the direction of the resulting pyramid.
9. We bend the two upper edges of the pyramid up to get the front legs of the frog.
10. Bend the lower sides to the center, and then bend again in half. Extend, we have marked the middle line.
11. Bend the corners to the center of the line, as shown in the diagram under No. 8.
12. We pull and straighten the workpiece, we should get something like the foundation of a “boat”.
13. Bend the corners down, and then at an angle up, diagram number 10.
14. And now we fold the lower part of the frog’s body with an accordion - this is our “hopping” mechanism and turn it over to the tummy.
Paper frogwho learned to jump, thanks to your efforts, is ready!
For the final design of the frog, draw with a marker, or just stick her eyes. And now, let your baby put his "Zhebetta" on the table and gently push her back - the frog will jump! That will be delight! MYSELF, do it yourself, baby SMOG could make this jumping miracle!
An origami frog is an entertainment familiar from childhood, when whole competitions were organized for the best jumping ability of this character.
And whoever forgot, let's refresh our memory and give the children the mastery of creation, so that they can play with a fun frog, incredibly jumping and funny.
How to make an origami frog?
First stage
For work you will need colored paper of a square shape.

At the first stage, you need to do cross folds. Therefore, fold the paper in half from corner to corner to form a triangle. Then double again, connecting the remaining two corners.


It will take one more fold, but now you need to fold the paper so that you get a rectangle, that is, connect one side to the opposite.

Redirect the resulting bend to the middle.

Fold the part, smoothing all the bends.

The result is a triangular-shaped part. Pull the right corner and connect it to the top.

Do the same with the left corner.

Now fold the right corner and the side of this resulting part, aligning them in the center.

Fold the left side. On this side we have finished so far.

Flip the triangular paper piece to the other side.

Point the right corner down, aligning it in the center.

Left should also be subjected to this procedure.

Here, bend one side to the right, equalizing it along the edge of the part.


And the second to the left.

The final stage
Flip the part to the other side. In order for the frog to jump, a fold must be made in its lower part. To do this, bend the bottom up first.

And then direct it to the other side, as if inside a frog. You can immediately make the desired fold, although it is much easier in stages, since the paper in this area is thick and you need to make a little effort for the necessary actions.

Origami frog is almost ready. It remains only to raise the tip in front of it and bend it to the side.

Then the second.


On the resulting protruding triangles, draw eyes or glue the moving ones, which will give the frog even more fun.

You can also attach a long tongue, but if serious competitions are planned, whose frog jumps farthest than all, it is better to do without it.

But there are a lot of ideas, you can’t realize everything.
So, at one time my child became interested in rockets, did not think that this could be interesting for a girl. They occupied it for about a month, and then gradually replaced by croaking amphibians (I do not know why, do not ask). I naturally had a question how to make a frog out of paper, as from the most affordable and budget material.
Let's start with origami, because this technique is familiar to us from childhood, well, or from school. She develops motor skills, logical thinking, attentiveness and accuracy.
But I propose to make not just frogs, but ones that will jump. To do this, you just need to fold the piece of paper correctly and push the back of the craft with your finger.
I offer you three step-by-step schemes that describe in great detail the whole process of work.

So for such beauties we will take a square two-sided segment. And by folding in half and diagonally, we find its middle.
Then bend the side parts marked with red dots inward to each other.

The edge marked with a blue dot needs to be turned out.
We also twist the left corner.
now look at the diagram, the red dot marks the corner of the already collapsed edge. So we turn it to the center. And we repeat the same actions with the neighboring one.


Here is a detailed diagram of this frog, maybe it will be easier for someone to repeat it.

Or another option.

Few people know that there is also a modular origami. The product is assembled from many identical blanks. 
Origami is usually done by schoolchildren. This technique is difficult for preschool children, therefore I propose to make applications and cards with them.
How to make paper crafts with children 4-5 years old
I will provide paper frog templates, descriptions and ideas. For example, here such a voluminous craft has a stand (base).

Similar can be done by this scheme. Cut the workpiece along dashed lines or along a contour. Bend the lower free edges and glue them. 
Of course, you can always find improvised materials that will give the toy a twist. For example, in this photo, a disposable plate is taken as the basis. They can be both from cardboard, and from food plastic. The remaining parts are cut out of paper and glued to the body.

Funny idea with the image of the contour of the palms. It will be interesting for the child to circle his hands. That's just you will need to help cut them out.

Remember the puppet theater? Where cardboard or fabric puppets are pulled by strings. If you print this blank, it remains only to align the hole in the trunk and limbs and tie them with thread or wire.

From round blanks you can make a lot of crafts.

Or such.

Head of a smiling frog we will decorate an ordinary glass.

Also for creativity use bushings from toilet paper. For example, a game was invented here: you need to catch the tip of a frog with its open mouth. Believe me, this will not work out right away.

Here are some more fun green quakes talking.

Or you can beat the bushings like this. Just stick long strips that will imitate the legs.

And in this embodiment, the craft can stand, inside you can make pencils or pens for storage.

Like here. So for a while you can replace the organizer and pencil holder.

I offer an interesting craft on a piece of water lily.

You can use this template.

I also liked the bookmark. We did completely different in childhood, so this option is not quite familiar. But you will definitely notice such a corner and immediately find the right part of the book.

Of course, you need to make such an assistant.
Again, the origami technique came to our aid. We take a square sheet and find its diagonals.

We fold the sheet in half and wrap the corner closest to you. And find the middle of the extreme triangles.

Wrap them inward.

And on the one hand we hide inside the edge. To make it more interesting, glue the eyes and tongue.

And such a princess can be made of felt.

This frog seemed very funny to me. A fervent smile and long limbs - harmonica give it a very fabulous look.

You do not know what else to do with your child. I'll give you an idea! Cut out the head of the quack and insert a balloon into the mouth. When you inflate it, the child will not see your face, but the frog.

Egg trays make such pretty croakers.

And here is the idea of \u200b\u200ba voluminous craft. With funny tummies that give frogs stability.

For the application, I propose to print and cut this blank.

I would like to show you an easy master class on creating crafts from bushings.
A hanging view of a pencil. It is very convenient when it hangs on the cabinet door.

This option is also interesting. Look - the strips are used the same width. This is an important nuance for obtaining volume.

These frogs move their paws.

This craft is not a shame to take to kindergarten. If there is a suitable topic))

Here's another cutout template. In addition to these details, PVA glue is also useful. It is considered the safest for children.

Make another heart-shaped wad.

In this craft, the torso made of strips of the same length became the highlight.

That's how kids can be entertained at their birthday parties. Such whistles are sold in holiday departments.

Do you want to show how you can beautifully draw a frog? Here are the steps for you. The only thing left is to repeat.
Such kids can come in handy when creating an applique or postcard.

And after all, you can make not only green quacks, but also yellow, blue or other bright colors. Children often go beyond the usual boundaries and give way to the imagination.
Step-by-step instructions for creating a finger frog that opens your mouth
And for a puppet theater, you can make such a toy on your fingers. The same origami technique is used. You can decorate the craft with eyes and a mouth. And also stick the crown.

See how you can make a frog that opens its mouth in this video.
If paws are glued to this triangular part, then the crook will become more realistic.
Master class on making light cards from a4 sheet
Postcards are often made from A4 sheets. Children are more comfortable creating them. It is not necessary to grind and applications turn out more accurate.

Let's make such a funny postcard.

We will need thick double-sided paper. fold the sheet in half in width. And we make an incision exactly in the middle.

Use a ruler to wrap the edges.

Expand the part and glue the resulting rhombus from the inside with green paper. Also stick the torso, legs and eyes.
Fix the entire workpiece on a red background.

And here is another very simple idea from the circles.

These are the blanks we need. I think it's better to use a compass. Make the diameter 1 centimeter smaller than each previous circle.

On the base we fix a large circle of the body and the middle part of the head.
First, glue the mouth.

We fix it on the head.

Draw the eyes.

We bend small details in half and make paws.

And here’s another secret idea.

Open, and inside you are already waiting)
I thank you for your attention. I know that these easy options will definitely be able to brighten up more than one family evening. And the child will remember this time for a long time and with gratitude.