In autumn the most best materials for creativity - those that nature itself gave us: acorns, leaves, twigs, needles, moss, grass, dried flowers... Everything that comes to hand while walking in the forest or park will be useful for making DIY crafts with children! So we dialed maple leaves, moss (when we went to buy cranberries), twirled it in our hands... Nothing comes to mind... We looked at it on the Internet, what can be made from maple leaves. We liked it most applique "Peacock". son 4 and a half years old, and he easily made the craft practically himself. I helped at difficult stages: cutting out the peacock figurine, aligning the leaf while gluing, securing the tuft on the head more firmly. And, of course, it suggested the sequence of actions. It is important for a child to see a model in front of him, so we put a smartphone with a picture in front of him.
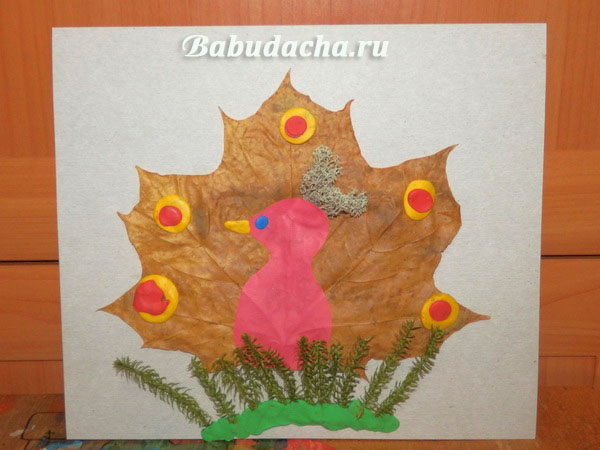
What can be made from maple leaves: “Peacock” applique
We did not make a detailed step-by-step master class, because the application is simple and understandable at first glance. Here we provide a sample picture, a list of materials and short description. And if you get creative and use natural materials at hand, you can end up with something incredible!
Materials: cardboard, colored paper, scissors, glue, plasticine, maple leaf, moss, grass.
Brief description of how to make the “Peacock” applique: We used a sheet of cardboard as a base. Then we rolled 4 small balls of plasticine and used them to stick a maple leaf to the cardboard (we tried it with PVA glue - it didn’t stick well). A peacock figurine was cut out of colored paper and glued to a sheet (with glue). Rolled from plasticine yellow balls larger ones and smaller red balls. They decorated the peacock's tail. Again, a nose and an eye were made from plasticine. Moss was used as a tuft. Our blades of grass were also swamp, forest, dense, like wire. We also secured them with plasticine.

One of our favorite riddles (trick riddle):
The tail is a fan, there is a crown on the head,
There is no bird more beautiful than...
(If you guessed who we are talking about, write in the comment 😉)
What other crafts can be made from maple leaves with children 4 - 5 years old?
Lots of options! We will definitely do something else and share the result with you. In the meantime, we suggest you look at what options for crafts made from dry maple leaves are presented in open Internet sources.
Olga Kulikova
Master class on making applique from autumn leaves "Peacock"
Has arrived autumn- the most wonderful time of the year and, unfortunately, the most fleeting. Exactly in the fall you start to notice how fast it goes time: just yesterday the trees were green, and through them the sun shone through the foliage, today leaves turned yellow and crumbled to the ground. And there is no better time to collect and use all the gifts autumn: leaves, seeds.
I offer you an option autumn leaves appliques"Peacock".
For this we need:
Cardboard for the background, the more contrast it will be with ours leaves, the more effective the composition will be;
Cardboard for making a bird body, or plasticine;
PVA glue or glue stick;
Scissors;
Dry leaves - rowan, maple, birch;
Sunflower seeds;
Inspiration.

1. Lay out the gold ones birch leaves in a semicircle:

2. From burgundy leaves rowan berries form the feathers of an open tail peacock:

As an option, we make a tail from maple sheet:

3. Cut out the body from cardboard peacock and glue it on composition:

Or we sculpt the body of a bird from plasticine:


We do the same actions with plasticine option: make a nose from a seed using plasticine of a different color - eyes:

5. Our PEACOCK is ready!

I'll be glad if mine master-the class will be useful to you in classes with children. Such a bright bird, easy to make, will definitely complement the collection of crafts of your children and pupils
Thank you all for your attention and inspiration!
Publications on the topic:
Dear friends, I want to offer you an idea for decorating a group for the autumn season. I called my craft “Autumn Lanterns”. For execution.
Master class on making applique “Scarlet Sails” with children in kindergarten Usually, when working with children, there are always colored covers left over.
Master class on making calla lily flowers applique. Almost all children love to make crafts, I suggest making these wonderful ones with them.
1. Materials and tools that will be required: - colored paper, -colored cardboard, - glue stick, - felt-tip pens, - stapler, - white napkins.
The bright holiday of Easter is approaching. And the guys and I decided to make an applique for this holiday, which we gave to our parents. For this.
In our second younger group As part of the Russian Matryoshka project, nesting dolls were made from various materials. These are matryoshka dolls in technology.
Children are easily captivated by something new and interesting. If your child is already bored with drawing or modeling, you can invite him to make crafts from bright autumn leaves. This process is extremely fascinating - amazing things are born from simple dried leaves with the help of glue, thread and other improvised devices. By taking up appliqué or making vases and bouquets, the child will not only be able to develop his creative skills and imagination, but also get to know the environment better. Collecting a herbarium for crafts together is an excellent opportunity to teach your child to distinguish between different tree species. So, what can you make from leaves?
Preparing leaves for crafts
To make any craft from leaves, you only need well-dried material; fresh leaves are not suitable. Preparing the leaves takes a long time, so you will have to be patient. In addition, the material needs to be dried correctly, here are the basic rules:
- If the evenness of the leaves is not important for the craft, they can be placed in a spacious container (for example, a large wicker basket) and leave in the fresh air. This will allow the leaves to dry quickly and allow air circulation to prevent mold from developing.
- To get perfectly smooth leaves, you need to place them between book pages or album sheets under a press. Carefully place the material between the sheets of books or albums. It will take at least 14 days for the material to completely dry and be ready for use.
- If you don't want to wait a long time, you can use a special herbarium press. To do this, fold a stack of leaves, alternating each layer with newsprint or scrap sheets. In a few days, the material for the crafts will be ready.

How to Skeleton Leaves
Leaf skeletons, due to their lightness and transparency, look very impressive as decoration. To achieve this effect, you need to resort to a special technique - skeletonization.
What you will need:
- any fresh leaves;
- soda;
- egg dye;
- small container - ladle or pan;
- Toothbrush;
- paper napkins.

How to make skeletonized leaves:
- Mix soda and water in proportions of 1 to 4 and place the leaves in the prepared solution so that they are completely hidden by water.
- Bring the mixture to a boil and leave to simmer for 30 minutes.
- Remove the pan from the stove and remove the leaves, carefully placing them on the table with the glossy side up.
- Remove excess moisture using napkins.
- Clean the pulp from the leaf with a brush (this must be done very carefully, the leaves are quite fragile).
- Rinse the skeleton under water and then paint it the desired color.
- Leave the painted skeletonized leaves to dry.
The resulting material is ready for use.

Bouquet of flowers from leaves
A bouquet is the simplest thing that can be made from leaves, and it is worth starting with it if the child has not previously done such crafts. To make a craft in the form of a home bouquet, it is not necessary to use real flowers, dry them, etc. The buds can be made from multi-colored leaves collected on a walk. Involve children in every step of the process, creating a real creative workshop.
What you will need to make the craft:
- maple leaves (fresh) with stems;
- spool of strong thread.
To make a bud from maple leaves, you will need to perform several steps:
- First take one sheet and fold it with the glossy side out.
- Roll the leaf into a tube.
- Fold the next sheet in half and wrap it around the tube.
- Continue wrapping the leaves around the bud until the flower is quite full.
- Wrap a thread around the base of the bud to prevent the flower from falling apart.
Using this method, you can make any number of flowers, which are then simply collected into a bouquet.


Topiaries can be made from the most different materials. You can often find crafts made from coffee, banknotes, sweets, hearts, etc. This version of topiary involves the use of maple leaves.
So, what is needed for topiary:
- pot;
- wooden stick for the trunk;
- a foam or foam ball as a base;
- gypsum;
- dye;
- hot glue;
- elements for decoration.
The procedure for creating an autumn topiary looks like this:
- The stick must be inserted into the pot and secured tightly with gypsum mortar. As a result, the structure will be strong and stable.
- Paint the pot and stick a color you like, such as gold to match the leaves.
- We attach a foam ball to the top of the stick - this is the future crown of the tree.
- Stick the required number of leaves into the ball. For decoration, you can use berry bunches, ribbons, beads, as well as artificial twigs and flowers. To make the leaf stems more durable, they must first be soaked in a hot solution of glycerin (1 to 2) and left in this form for 10 days in a dark, cool place .
- Next, we decorate the trunk and soil of the tree using dry moss, bark, and beads.


How to make a decorative autumn wreath
From bright autumn leaves you can weave beautiful wreath for decorating windows, doors, walls, etc. A wreath attached to the front door will delight not only you, but also your guests.
What you will need for the craft:
- flexible branches of any tree;
- dried leaves of different colors (contrasting combinations, for example, yellow and red, look best);
- bunches of red berries (rowan, viburnum, etc.);
- physalis;
- glue;
- spool of strong threads;
- decorative metallized threads;
- small bird figurines for bouquets.
How to weave a wreath:
- The branches will serve as a frame - make a round or oval shape.
- For strength, secure the structure with thread in several places.
- Wrap the frame tightly with gold thread, leaving small branches free.
- Glue the leaves to the branches.
- Attach the berry clusters using thread.
- Glue or wrap physalis with threads.
- Finally, attach the birds to the wreath.
A finished craft made from leaves in the form of a wreath can be hung anywhere in the house; it will delight you with its beauty for a long time and remind you of the most colorful time of the year.


Beautiful autumn leaves can be used not only for simple children’s crafts, but also for complete interior decoration. One such product is a fruit bowl.
To make such a vase you need:
- glue and brush;
- inflatable ball;
- petrolatum;
- scissors;
- maple leaves.
Step-by-step instructions:
- Inflate the balloon to the size you need.
- Lubricate the surface of the ball with Vaseline, this is necessary so that the leaves do not stick to it during the process and are easily separated from it.
- Fix the ball in a stationary state, this will make it more convenient for you to make your vase.
- Glue maple leaves to the ball, having first generously coated them with glue.
- To make the vase strong enough, you will need several layers of maple leaves.
- As soon as the last layer is completed, carefully coat the product with glue again and leave for 3 days.
- Burst or deflate the balloon and remove any remaining residue from the product.
The original interior decoration is ready.


Photo frame in autumn style
Children love decorating the walls of their room with their drawings and favorite photographs. A craft made from leaves in the form of a frame is perfect to complement the design of the room. Help your child decorate a frame with autumn leaves, where he will then place his favorite photo.
For the craft you need:
- thick cardboard;
- glue;
- leaves you like;
- pencil;
- scissors.
How to make a frame:
- Cut a square or rectangular frame of the desired size from cardboard. The center of the frame where the photo will be placed needs to be cut out a little smaller size photo.
- To wrap leaves around a frame, first soak them in hot water, so they will become softer and will not tear or break in the process.
- Glue the leaves onto the frame.
- Wait for the product to dry.
When the frame is ready, insert the photo into it, securing it with glue or tape.

Applications from autumn leaves
Appliques are one of the simplest types of crafts made from dried leaves. Using leaves different forms and sizes, you can create real paintings, which will then become a decoration for your home. You can make a whole series of panels united by a common theme. These can be animals, landscapes, etc. Next, several small master classes will be presented on making applications in the form of an owl, the Firebird, a fish and a lion.
Owl
To make an applique with an image of an owl, you will need:
- small leaves of brown tones (for this you can use oak, willow, birch);
- colored paper;
- a small twig of thuja;
- sheet of cardboard;
- a bunch of rowan berries;
- any tree branch;
- glue.
Before starting work, the leaves and berries must be dried. Once all the materials are ready, it’s time to move on to the most important thing:
- Cut out the outline of an owl from cardboard.
- Birch or oak leaves will represent the ears and paws of an owl; glue them in the right places.
- For feathers, use long, narrow willow leaves.
- Cut out eyes and beak from colored paper and glue them on.
- Glue your owl onto a tree branch, which will become a stand for the craft.
For additional decoration, you can use moss or thuja branches. You can also use rowan trees as owl paws. The product is ready.


Firebird
For the Firebird applique you will need:
- paper;
- leaves of linden, birch and rosehip;
- pumpkin seeds;
- thuja twigs.
And here's what the process itself looks like:
- A linden leaf is glued to the place where the bird's body will be.
- Birch leaf - head.
- Rosehip leaves are glued individually onto the tail.
- Additional decoration Whole sprigs of rose hips will serve as the tail.
- Glue birch leaves to the body, these will be the wings.
- From pumpkin seeds eyes are made, as well as decorations for the body and tail of the Firebird.
- The final stage is a tuft from a thuja twig or any other suitable plant.
The firebird is ready.

a lion
Children love different animals, so they will be especially interested in making one of their familiar animals.
What you will need for the lion cub:
- round linden leaves yellow color;
- black felt-tip pen;
- ash seeds;
- horse chestnut (nuts);
- glue;
- small pine branch;
- scissors;
- a sheet of yellow paper;
- sheet of orange cardboard.
Having collected all required material, it’s time to start making crafts:
- Draw a lion's head on yellow paper or print the image on a printer and cut it out along the outline.
- For the mane, use linden leaves, gluing them around the head.
- Draw a nose for the lion and glue a chestnut in its place.
- Pine needles will be used for the mustache.
- The ash seed will represent a tongue.
As soon as the craft dries, it will be completely ready.

Fish
What child doesn't know about the goldfish that grants wishes? Making crafts with your own hands will be very entertaining for your child.
To make a fish craft you will need:
- dry leaves of quince and linden, brown and yellow in color, respectively;
- glue;
- marker;
- ash seeds;
- acorns;
- paper scissors;
- sheet of blue paper.
How to do:
- Draw the outline of the fish on blue paper and cut it out.
- Make scales from linden leaves and glue them to the body of the fish.
- Use brown quince leaves to decorate the tail.
- Using acorn caps, draw the outline of the fish’s head.
Everything is real gold fish ready.

Every autumn, colorful leaves delight the eye as they fall to the ground. This beauty quickly fades in the rain, turning the leaves into a solid brown mass. However, there is a way to preserve the beauty and brightness of autumn leaves - dry them or skeletonize them and use them to make various things from children's crafts to interior decorations. This activity will appeal to both children and adults.
75 photos of leaf craft ideas


Autumn foliage is a wonderful material for creativity. Children are especially interested in making something out of it, and if your child is not very assiduous, then be sure to try making something out of foliage with him. He will definitely enthusiastically create an exciting toy, an animal from what he just ran around on. In our article we will present several master classes on making applications from leaves for kindergarten and schools.
Applications must be made by children of preschool age and older primary school, because this type of visual creativity develops motor skills, imagination and creative thinking in children. You and your children try to make these types of crafts from natural material autumn:
- Owl. To make such a craft, you just need to pick up some leaves different color and the appropriate shape, as well as a small branch of a vine, because the owl you will make will sit on it. Prepare dry glue and plasticine from the office. You will use glue to connect all the elements of the craft, and make eyes from plasticine.

- Autumn tree. Prepare any decorative cardboard to make the picture bright, take blue paper. From another office supply you will also need brown plasticine, a simple pencil to make a blank for wood, and dry glue. From natural materials, prepare as many dry leaves and rowan berries as possible.

- Butterfly. Just choose different leaves according to shape and color. Be sure to find thin brown leaves to make the body of the butterfly. As a last resort, yellow foliage can be painted with watercolors of the desired color.

When working with a child, it is very easy to come up with an application. You can invite him to make his favorite cartoon character or make a postcard for the person he loves very much and wants to show his feelings for him.
Applique carpet of leaves, details with photos

A carpet of leaves is very easy and simple to make. Any child preschool age will cope with such an application in 2 counts:
- First, ask your child to arrange the leaves on a sheet of paper so that there is practically no gap between them.
- Then let him smear each leaf with dry glue and glue it to the place where he intended.
- If some gaps still remain, tell your child that they can be filled in with a felt-tip pen.
You can use not only leaves in this application; flowers and fruits of autumn trees are also suitable.
You can make a carpet of leaves, but do not completely cover the paper sheet. Come up with some kind of pattern, draw it on paper so that the child can clearly see the contours. Let him glue the leaves that he likes to the places of the pattern. Of course, in creative process orient your child so that the picture ends up looking symmetrical.

Hedgehog from leaves applique, step by step

- To begin, draw a hedgehog without needles. You can use the template we have attached below.
- Paint with paints or cover this blank with colored paper. Clearly draw the nose, mouth and eyes of the hedgehog.
- Lubricate the hedgehog's body with PVA glue:

- Glue the leaves in a chaotic manner to the coated base. The main thing is that there is a resemblance to thorns:

Hedgehog template for applique

Leaf fish applique in detail with photo

- On colored cardboard, blue or of blue color(we choose this color if we want to show that the fish is swimming in the aquarium) glue 1 yellow leaf, which will represent the body of the fish:
- We make a fish tail from identical red leaves.
- We tear off small piece from the same red leaf to make a mouth for the fish:

- From the red leaf from which you will tear off part to create the mouth, tear off more pieces of fins. You can simply fold the rest and tear it in half.
- Make a fish eye out of colored paper. You need to make one circle white, and the second (it should be smaller in size compared to white) black.
- Under the finished fish, glue any dry grass or twigs that will act as seaweed:

Fish applique template

Peacock leaf applique, step by step with photo

- Take 5 identical yellow leaves and place them on cardboard of any color to form a semicircle. Immediately glue them with dry glue.
- Take the same number of red elongated leaves and glue them on top of the yellow ones in the same pattern - in a semicircle.
- Cut out the peacock's body from colored paper. For contrast, use bright blue paper.
- Draw eyes and glue a nose from yellow construction paper:

Peacock template for applique

Applique autumn bouquet of leaves, step by step

- On decorative cardboard, first glue a base of dark brown leaves that will represent a vase.
- Glue multi-colored leaves on top of it in a chaotic manner (the brighter these leaves are, the more beautiful the bouquet you will get).
You can combine leaves so that you get, for example, daisies. Also add green leaves to this applique to make the bouquet look lively and bright.
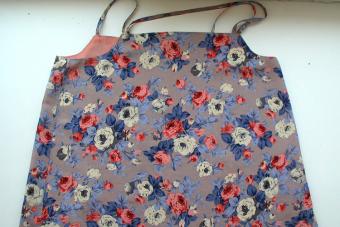
Applique vase with leaves

- On white cardboard or a piece of whatman paper, roughly estimate where your vase will be located.
- From decorative cardboard Pink colour white polka dots (you can choose any other color and print) cut out the vase using the template below.
- Glue the dried leaves on top of the vase. The arrangement of the leaves can be any.
Use PVA glue or dry glue to make this type of applique.
Vase template for appliques


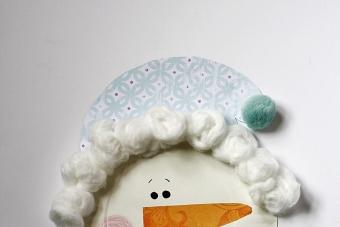
Applique portrait of autumn from leaves, step by step

- First, prepare everything you need to get started. You will need: a sheet of white paper with an image of a head, a herbarium, PVA glue, stationery scissors with pencils (you will need a simple pencil and multi-colored ones):

- Print out a face template (if you know how to draw, create it yourself):

- Coat the head with glue and then glue the leaves. They should be directed in the direction in which you want your hair to fall:

- Draw your face with pencils and glue on a nose from a strip of paper folded into a triangle:

Beautiful applications from leaves:
kindergarten


1 class


2nd grade


3rd grade


4th grade


Children's creativity made from natural materials is an opportunity for children to touch something beautiful; it is useful for mental development. Create applications with your child at home just like that on any topic. You can be sure that time spent with your child in this way will benefit both you and him.
Video: “Appliques from leaves”
Summer is ending, but why? Unfortunately, no one has an answer to this question. We have a guess, but we're not sure it's to everyone's liking. We think that summer is ending so that autumn can come. Like this. What's good about autumn? Someone has a birthday (but not everyone, so it’s not suitable), someone will fly to the sea, but what should the rest do? Admire the autumn forest and do crafts? Perhaps today we will do just that.
Beauty from dry leaves
The beauty of the autumn forest has been described by many Russian writers and poets, but even without this, every person knows perfectly well that it is in autumn that the forest receives the freshest rain, the trees are full of yellow, red, fiery flowers and are pleasing to the eye, and sometimes pine cones fall on your head. Collect those that have already fallen down, take them home, and let's start creating wonderful crafts from tree leaves. 
Leaf and flower decorations
Of course, this is what children primarily like to do. In schools they are asked to make collages, and everyone strives to put beautiful pictures on a piece of paper that, to some extent, reflect their mood. Someone loves bright colors, some people like to post pictures using flowers, and others can even use twigs and roots. The scope for imagination is huge. Look at the photos below - you can use leaves to make wall paintings, lamps, and even funny little animals.

Leaf applications
The most common applications are on a sheet of paper. There is nothing difficult in creating them - you just need PVA glue and a little patience. Place the leaves on the sheet and glue one at a time. To create a spectacular background, you can use watercolor and in some places paraffin, this will create the effect of scuffs and uneven coloring. Often such leaves are given to relatives or friends for their birthdays, because making a card from autumn leaves is as easy as shelling pears, and a pleasure for the person.

DIY autumn leaves crafts
What else can you make from autumn leaves? They can decorate a lampshade self made, or lamp body. Hanging it on a thread, you can make a wonderful decoration for the wall - you get a real magic branch on which the leaves dangle in weightlessness.

How to paint tree leaves
We want to help you surprise your guests. To do this, let's reveal one secret - you can give the leaves a different color in just a few minutes. For this we need a bunch of fresh leaves and regular table soda. We fill the leaves in a container with soda and add a little water, let them brew, and after the leaves have lost all their green background, you can paint them with ordinary children's paints. The result will be the effect of airy multi-colored leaves.

Spectacular decorative elements made from leaves

Garland of autumn leaves


Leaves on the front door

Pillow with a picture


Autumn garland of tree leaves

Modular paintings with autumn forest


Wall decoration with autumn leaves

Applique of autumn leaves


Wreath of autumn leaves


Bouquet of autumn leaves

We recommend reading
 Nail diseases: what they are and how to cure them
 The most fashionable and beautiful school hairstyles for girls for every day - step-by-step instructions in the photo Step-by-step guide for creating a variety of hairstyles
 Cardigan with a hood – what to wear with it and how to create stylish looks?
 Stories of Creepypasta Characters Jeff the Killer girl