The most popular spring flower is a tulip. You can make tulips from crepe paper, from corrugated paper, make origami - this craft will be very useful for a women's holiday or birthday. We offer a simple lesson on how to make a tulip out of paper.
Tulips from paper: master class
Crafts from paper like a tulip can be attributed to simple, but quite spectacular. For work, you need a piece of thick paper, scissors and a pencil. Now, let's take a look at step-by-step instructions on how to make tulips out of paper:
1. For work, prepare a sheet of paper measuring 20x28cm. Choose the color of your choice, preferably close to the real color of the tulip. There is only one requirement for paper - it must be strong enough.
2. Fold the triangle out of paper. A strip of paper that extends beyond the edges of the triangle should be cut off and set aside. We will use it a little later.
3. Now consider how to fold a tulip out of paper. First you need to expand the triangle, then fold it again, but in the other direction. The result should be a square with diagonals.

4. To fold the tulip bud out of paper, bend the folds properly again. Flip a sheet of paper so that its center is facing up.

5. Fold the paper in half. We turn one corner to the fold line. Thus, a new triangle was obtained. We are doing this procedure from a different angle.

6. Tulip and other similar paper crafts require constant contact with the material, folds should be clearly visible. Here is the result:

7. Connect the sides of the tulip and align them well.
8. The triangle is rotated with the base up.

9. The wings of the paper on top must be folded so that they meet in the corners.

10. Turn over the other side and do the same.

11. Turn one wing of the paper to the right. On the other hand, duplicate.
12. Carefully insert the end of one wing into the other.

13. On the other hand, we are doing the same. We iron everything well. At this stage, the workpiece is already beginning to resemble the head of a tulip, only slightly flattened.

14. Now we will consider how to make a volumetric tulip from paper from this blank. Hold the folded wings with your index finger and press down with your thumb.

15. Now an important point. There is a hole in the center of the paper, it should be struck sharply. Then the design will be filled with air, you can use a pencil.
Hello everyone, hello !! How is your mood ?! Today I have a very cheerful and sublime, and such that I want to surprise and please people close to me. And what could be better than a bright bunch of flowers !! Agree that anyone will be pleased to receive such a gift with or without.
But what if the flowers are not real, but made of paper ?? I think it will be very helpful. After all, there are so many ways to make such lovely bouquets that they cannot even be distinguished from real ones, but they will not fade and will delight your eyes for a long time.
And I want to devote today's topic to the creation of flowers from paper, but not all, namely tulips. After all, these beautiful buds are very popular and they are always presented on the first spring days, congratulated on March 8, or simply presented to girls, mothers and grandmothers.
In this collection you will find different ways of paper tulips, it will be interesting for both children and adults !!
We will begin, as always, with the simplest ways to make floral souvenirs. I note that for crafts you will need a minimum of materials, usually these are sheets of colored paper, in some cases scissors and glue.
Well, let's get to work. And let's try to make a very simple flower. The folding scheme is elementary, even preschool children will cope.
To make crafts, use double-sided colored paper.
Manufacturing process:
1. Take a diamond as a basis. Fold it in half to make a triangle. (Fig. 1)
Try to lay the corners evenly on each other, and make the bends clear and sharp.
2. Bend the right corner so that it crosses slightly through the center line. (fig. 2)

3. Now also, but on the right side, bend the left side. (Fig. 3) Bend the lower triangle back. (fig. 4)
4. In order to make a flower leg, take a green diamond. Fold it in half, unfold. Fold the right and left sides to the center line. (fig. 1)

5. Fold the workpiece in half again. (Fig. 2) Bend the lower part obliquely to the left side. (fig. 3) Glue the stem with the bud. (fig. 4) Your tulip is ready !!
Such work is best glued to colored cardboard, making a composition of several flowers.
Well, since we started talking about the application, then I will show you a couple of works in this topic.
- Cut 5 bud blanks and stick on top of each other in the middle, bending the petals up.

- Or put in a frame, you get the whole picture.

- Here is such an interesting cut-out option.

- Well, this is the most idle application, cut out the details and pasted.

- And here is an interesting idea of \u200b\u200btulips in a vase-mug. Inside you can write a congratulation, you get a spring card.

- Variant of volume application.

- Templates for your work, save and print.

- Awesome bouquets of corrugated paper. How to make such flowers, read a little below.


And now for you is another master class in making everyone's favorite flowers. Everything, as always, is brilliantly simple and beautiful. For work you will need red and green paper, glue.

Manufacturing process:
1. Make a square out of red paper, fold it diagonally and open. Now bend each corner to the center.

2. And bend the inner corners to the outer sides of the square.

3. Fold the blank in half so that all corners form an even row of petals.

4. Fold our product with a cone.

5. Now bend the corner of the base twice in one direction.

6. And bend the sides towards each other.

7. Glue the finished tulips with stems.

8. Make a stalk with a leaf on the model below:

This is what the finished craft looks like.

Now the most famous variant of making a tulip using the origami technique. In childhood, we all did this. I believe that this craft is very successful, because it is voluminous, it looks like it is alive.

Well, pick up colored paper rather and start folding according to the instructions.
Manufacturing process:
- From a sheet of A4 format, make a square.
- Fold the blank in half once.
- Now diagonally two times.
- You should get the workpiece so that the longitudinal bends go inward and meet each other.
- The result is a triangular figure with folds inside.
- Bend the corners of the top layer up.
- Turn the figure over and repeat step # 5.
- Slices should now meet in the middle.
- Bend the right corner to get a rhombus with a fold in the center.
- Turn the figure over, repeat step 6. All angles should face up.
- Bend the right corner to the center. And bend the left corner with an overlap so that it completely covers the right corner. Turn the product over and repeat step 8. Tuck one corner into another. Flip the shape over and repeat this step.
- Inflate the bud.
- Fold off the petals.
- Make a stalk and combine with a flower.

How lovely and romantic they are !! Do you agree with me ?!

By the way, you can still fold such a nice little basket. It turns out a great gift.

Easy and fast way to make a tulip from colored paper
Here is another great view of the souvenir. Any work can be done, the complexity is minimal. You will need green and red or yellow paper. First we make the stem, and then the bud itself. It’s better to also perform not a single version, but a massive one, so it looks much more impressive.

Manufacturing process:
- Stem
- Take a green sheet of paper and cut a square 21 to 21. Fold the bottom sides to the middle.
- Next, bend the upper sides to the middle.
- Now bend the lower sides to the middle again.
- Fold the resulting workpiece in half horizontally, then vertically.
- Extend the stem.

- Flower
- Take the red paper and cut out two 10 by 10 squares.
- Bend one of the squares diagonally, and bend the lower corners up. The bud turned out.
- In the same way, make a flower from the second square.

- Assembly
- Glue one flower on the other side of the stalk, and the second on the other side.
- Make some tulips to make a real bouquet and tie a satin ribbon.


I didn’t even think that from simple paper, you can do this !!
Video for beginners on how to make a tulip
Well, now a detailed video on our topic, as not everyone understands the scheme. Therefore, we look and repeat after the teacher, you will surely succeed, even if you are new to this business.
Red paper tulip from A4 paper
Did you notice that for some reason buds made in red are more popular ?! I wonder why ... Probably just like that !! 😀
In general, another option for the manufacture of our product is for you. I advise you to take paper denser or thin cardboard.
We need: green and red paper, scissors, a ruler, glue stick.
Manufacturing process:
- From red paper, make a square 12 by 12.
- Fold the resulting square in half, while pressing the side well. Flatten the workpiece and fold it on the other side, and then from one corner to another and the second corner. You should see the squares folds crosswise and diagonally.
- Using scissors, cut from four sides over the bend for more than half, but not to the end.
- Now glue the cut side over the second. Do this procedure with all cut areas. As a result, you should get a bud.
- Take A4 green paper and cut into three flat parts. We will need one such part.
- Twist the prepared paper into a narrow tube, starting from the wide part, and glue the end side. Cut one end of the stalk into several strips and bend them if necessary to trim.
- Glue the stem and bud with glue.
- These are the voluminous flowers obtained. Optionally, you can still make and stick a leaf.
Tulips from corrugated paper with sweets
We came to the most interesting. I think this collection will appeal to adults, although the guys can handle this kind of work. We will make real bouquets of corrugated paper, and even with sweets. I would definitely not refuse such a thing !!
- Flowers in a vase
You will need: candy, wire, corrugated or crepe paper, glue, a vase.
Manufacturing process:
- From paper we cut six ovals of the same size.
- Fingers stretch the edges in width.
- Then, with grinding movements, we make the basis for fastening.
- At the bottom of the petal should get a tube.
- Put the candy inside and glue all the petals. Pick up a bouquet.

- Lovely bouquet
You will need: corrugated paper, wire, candy, gift wrap, ribbon.
Manufacturing process:
- From corrugated paper you need to cut 6 strips 15 cm long and 4 cm wide.
- Fold each strip in half, and twist at the bend.
- Match the strips one to one.
- At the bottom, roll the petal into a tube.
- Glue the flowers on the wire, while stringing candy on it. Wrap the wire with green paper and put the bouquet in a gift box, tie a ribbon.

- Tulips from plastic spoons and corrugated paper.
You will need: glue, scissors, adhesive tape, plastic spoons, corrugated paper.

Manufacturing process:
- To make one flower you will need 5 plastic spoons.
- From red paper, cut out the rectangles and wrap the spoons.
- Fold the two blanks and secure with tape.
- Next, attach three more.
- Wrap the stalk with green corrugation.
- Make some flowers, cut and glue the leaves, and then collect the bouquet.

And here's another photo options for the design of work from the corrugation:


Origami flower folding patterns for kids
In the end, I prepared for you tulip folding patterns and patterns for cutting to the applique. Therefore, print and make cards, it will be very convenient to work on them.
- Classic tulip


- Interesting open flower

- Flowers in a vase

- Tulip with a stalk

- And again the traditional folding pattern

- The option that we did above

- Well, a couple of patterns for cutting


Today I put an end to it, but I promise to continue the floral theme. So come in, do not get lost. I wish everyone a spring mood, radiant sun and gifts !!
Tulip is traditionally associated with spring, femininity, beauty and fragility. This beautiful spring flower conquers with the exquisite simplicity of its forms and tenderness. A living bouquet, unfortunately, will not last long, but it can be found a more durable alternative. Origami from paper a tulip will delight you constantly, and will be an excellent decoration of the interior.
This craft is a wonderful gift for mom, grandmother, aunt or girlfriend for any occasion. It is doubly nice to receive a handmade gift, because you put a part of your soul in it and love for this person.
What is origami
This type of decorative art arose many years ago in ancient China. Translated into Russian, the word origami means "folded paper." The variety of figures that you can create is striking: men, animals, birds, fish, plants, flowers. Everything is limited only by your imagination!
There are many varieties of origami, differing in technique, ways and methods of creating figures:

Some craftsmen make beautiful products even from banknotes. Usually such figures (manigami) are presented for some kind of memorable event or celebration. It is believed that such a gift can attract good luck and prosperity.
This lesson does not lose popularity until now: millions of people around the world are fond of making a wide variety of paper figures.
Origami is not only an interesting pastime, but also a very useful hobby. It teaches perseverance and patience, develops logical thinking and the right artistic taste, relieves stress, makes you forget about problems and troubles. Making paper figures even sometimes enters into a rehabilitation course for people who have had various diseases, because it perfectly restores fine motor skills and sleight of hand.

In this article, we will look at how to make an origami tulip from paper with your own hands. Even a child can cope with such a task. It is simple, interesting, and requires virtually no financial costs.
Golden Origami Rules
- Paper selection. Thin sheets are easier to work with, especially for beginners.
- If you just started to learn the basics of this difficult art, then choose the easiest figurines for making. When you fill your hand and the technique will be worked out perfectly, you can proceed to more complex crafts.
- Carefully work out the folds with a ruler, finger or fingernail.
- Do not move away from the scheme, do the work in stages. Origami does not allow sloppiness and errors.
- Choose a convenient place for yourself.
- Do not hurry! Do everything thoughtfully and carefully.
What do you need for origami?
Before we tell you how to fold an origami paper tulip, check out the list of what you will need to work:
- Paper. For a tulip, sheets of two colors are needed. It is not necessary to take the classic combination (green for the stem and red sheets for the bud), you can take the paper that you like best: pink, yellow, blue, purple, blue. Bouquets of tulips of different colors look very beautiful.
- Ruler. It is convenient for her to iron the places of the bends, so they do not open, and the finished product will have a more accurate appearance.
- Scissors, pencil or pen.
Origami paper tulip: step by step instructions
This craft is considered one of the simplest and most popular. According to experts, in the scheme it is almost impossible to get confused.
We start creating a beautiful flower by making its bud:


Once the bud is ready, set it aside. You can start making the stem of our flower:
- Fold the sheet diagonally.
- Apply the sides to the resulting center line.
- After that, the two upper parts are bent to the center. And once again we bend the side parts to the middle.
- Turn the workpiece over. Fold in half so that the sharp tips coincide.
- We add the formed part in half lengthwise.
- Bend the lower part. To leaflet took a natural shape and become more beautiful, swipe it with scissors, pencil or pen. After that, the line will become more rounded.
It remains only to collect the craft! We insert the stem into the hole in the base of the bud - the tulip is ready! Making crafts took no more than 10 minutes.
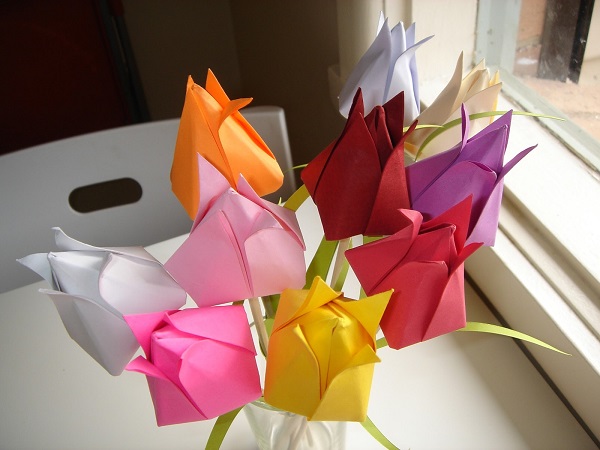
The result is a very beautiful flower that will delight you and your loved ones for a very long time. If you wish, you can create beautiful flower pots or vases for your flower garden and decorate them as your heart desires: beads, rhinestones or applications.

Origami tulip: modular technique
In addition to a simple, classic, manufacturing scheme of this spring flower, there are many others. For example, modular crafts look very unusual and beautiful. Such an activity is suitable for those who have already mastered the art of origami.
This technique involves the creation of figures from individual small parts (modules) that are inserted into each other in a certain way.
The details should be 1/32 of the size of an A4 sheet - this is 52.5x36.25 mm.
To add the module we need:
- Take a piece of rectangular shape and fold it along, then across and in half.
- Lateral parts attach to the center line of the fold.
- Bend the remaining lower parts up to get a fold line. Fold the sides of these parts with a corner and lift them up. 7
- Fold the blank in half. The module is ready!
For example, for a flower bud, you need to make 105 modules. You can choose any one color or combine several different shades.
The assembly begins in rows from the base of the bud and goes up. In general, the details support each other and prevent the figure from falling apart, however, glue is sometimes used, so the finished product will be more strong and durable.
Origami is a delicate and painstaking work. Even if something doesn’t work right the first time, don’t give up this interesting hobby. Try, improve your skills and technique, and you will succeed! Remember that real skill comes with experience.
Flowers are a wonderful gift, interior decoration, an occasion for a smile and good mood. But in order to please loved ones or decorate a room, it is not at all necessary to buy fresh flowers. Updating a bouquet in the house is a rather expensive pleasure, but there is such a simple solution as making a tulip out of paper. Hand-made paper flowers will bring even more comfort to the home atmosphere, and the process itself will present fascinating creative moments.
This kind of creativity makes you remember origami - the ancient art of creating various figures from paper. It originated many centuries ago in the country where paper was invented - Ancient China. It was widely used in Japan, hence the name: Origami in Japanese means “folded paper”. Once this was done only for religious purposes, preparing for various rites. Such a skill was considered a high-class indicator in society, since only representatives of the upper classes owned it. Nowadays, origami is used to decorate the interior of a house, to create interesting original details on a summer cottage or balcony. Folding paper figures is an exciting activity, which is a pleasure to devote your free time. It is especially useful to do this with children: it captivates and develops a child of any age, and allows you to have a good time with your family. Paper tulips in a vase First you need to determine the color of the tulip. Decorating it in its finished form will be inconvenient, so you should immediately take colored paper or paint a white sheet with pencils or paints before you start work. To create a bouquet, paper of different sizes and colors is perfect. Fold the sheet diagonally angle to corner. It turned out a triangle, which left a strip of paper below, which must be cut with scissors. Before us is an even square. Put the cut off strip aside and use it later. Then add the square diagonally to the other side. We get two equilateral triangles in one square. We flip the square with the convex center up, now fold it in half. Expand, fold in the same way in the other direction. Now we collect all sides (bends) together and press. Turning the triangle upside down, bend to the center of its edge. Turn over and bend the edges of the triangle in the same way on the other side. We got a small square, which we place for convenience on the table, directing one of the corners to ourselves. We bend half the sheet to the right on one side, turn it over. We do the same from the second side.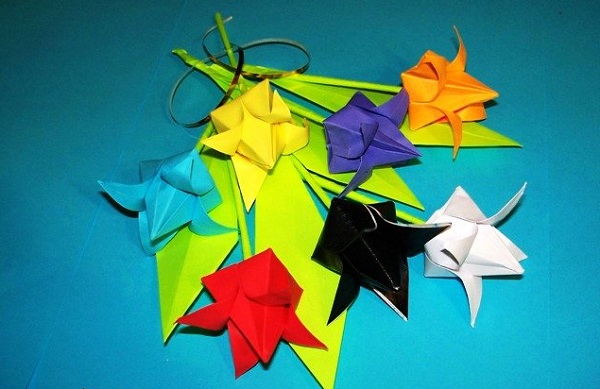

The scheme for creating the bud
Finally, we approach the formation of the bud itself. We bend corners towards each other in the center. With force, we press them and repeat the procedure from the second side. We got two pockets. Now our task is to open the tulip. Hold the base with your thumbs and gently push the index pockets apart. A hole appears in front of us through which you can straighten the bud with a pencil or simply blow it in if the paper is not very thick. The same pencil is used to shape the petals. They bend to the sides - for this, we simply wind each petal onto a pencil.

Tulip bud
The time has come to recall the piece of paper that was put off, which we cut off at the very beginning. From it will be made the stem of a tulip. If colored paper of red or pink color was used to form the bud, then a strip of the same size should be cut off from the green sheet for the stem. If the paper was painted before starting work, then this part is simply painted green.
The stalk is especially important to make of thick paper, because it holds the entire structure. Fold the strip three times, insert into the head of the bud. Beautiful voluminous tulip is ready!
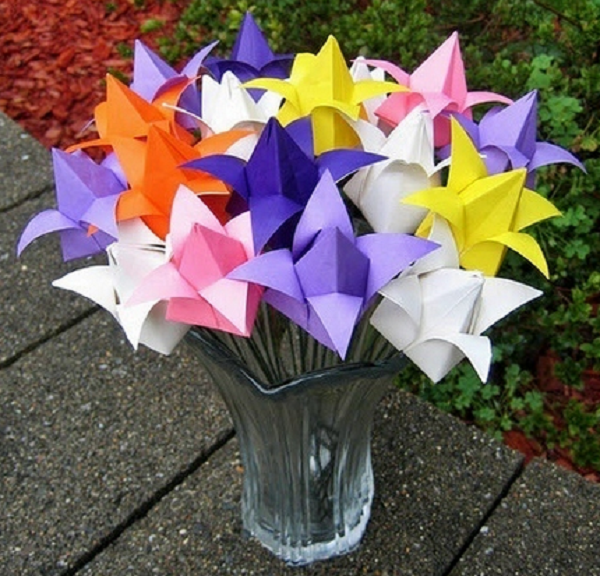
Bouquet of tulips on the window
How to make a tulip from paper in a simplified scheme
For creative play with younger children or for wall panels, there is an easier way to make a tulip out of paper. The process will take only a couple of minutes, the bud will turn out to be flat, but at the same time textured and original.
You should start with the same steps as in the manufacture of a more complex design. We make a square from a rectangular sheet of paper, folding it into a triangle and cutting off an extra strip of paper. The resulting triangle is folded in half, drawing a line from the middle of its base to the top. It is important to make all lines as clear and even as possible, this will allow the paper flower to look neat and beautiful.
We outline the middle of the line between the top and the base, conditionally divide it in half. We bend up the right corner of the triangle at this conditional point. So, the angle, similar to a tooth, is directed upwards. We do the same actions with the left corner of the triangle.
At the bottom there is a base in the form of an angle, which also needs to be bent and hidden inside the structure. The result was a beautiful flat flower that can be used to decorate the interior, either separately or in a composition on the wall. To do this, stick it on a sheet of paper or fabric, along with other parts of the planned collage and hang it in a frame on the wall.

Create a flat flower
How to make a stalk of paper for a tulip
The stalk of a paper flower can be made not only by folding a thin strip of paper, but by making it naturalistic and voluminous. You will need a sheet of green paper, from which we already make a familiar square, cutting off a strip from a rectangular sheet. Along the outlined folded line along the diagonal of the square, we bend its edges inward. You need to do this so that you get the wrong rhombus. The same figure is obtained when folding out of paper airplane. Next, add the rhombus along the very fold in the middle. The resulting irregular triangle is bent again: the short side is folded towards the long one, forming a leaf on the stem. Now it can be inserted into the base of the bud with the sharp side, and a full flower is ready.
There is a legend that tulips bring people happiness, or at least a good mood. Unfortunately, not at any time of the year we can find these flowers, but we can always make them with our own hands! All we need for this is inspiration, A4 size paper and scissors!
How to make tulips from paper with your own hands in stages?
For variety and beauty, let's take multi-colored paper, for example, pink for a bud and green for a stalk.
Step 1. In order to make a bud, we need a square sheet of paper. (see pic 1)
Step 2 It is necessary to bend the sheet diagonally so that the opposite corners combine. (see figure 2)
Step 3 Then, do the same, but with opposite corners. (see fig 3)
Step 4 Extend the sheet, you should get 2 lines that intersect in the center of the sheet. Then we fold it in half. (see pic 4)
Step 5 Now we bend inward, those 2 corners that were done in the 2nd and 3rd steps. (see fig. 5)
Step 6 Now bend the lower side corners to the top, turn over and do the same. (see fig. 6,7 and 8)
Step 7 Now, we bring the side corners on both sides so that they would protrude beyond the center line. (see fig. 9)
Step 8 The second fold should go inside the first corner. We do this on both sides. (see fig. 10.11)
Step 9 At the bottom of our bud, there is a hole through which we will inflate our tulip. (See Fig. 12)
Step 10 Now we bend corners from the top - these are our petals. (see fig. 13)
Step 11 Now the stalk. We take a sheet of paper and twist it into a tube, insert it into the hole at the bottom of the tulip. (see fig. 14)


