Ruffles and ruffles have always been considered an element of femininity, carelessness and coquetry.
Today we invite you to sew a simple knitted dress with ruffles.
The dress is a model of a loose straight silhouette without darts, with dropped sleeves and a semicircular neckline.
The length of this dress is approximately five to six centimeters above the knees, but you can change the length of the dress at your discretion. For a model of this cut, length options both below the knees and to the floor are quite suitable.
To sew a dress with ruffles, you will need 1.2 - 1.3 meters of knitted fabric. The fabric should be elastic, soft and drape well.
1. How to cut a knitted dress with ruffles
For straight cutting knitted dress You can use the base pattern for a dress in your size, slightly adjusting it to the presented model. Side chest darts on the front and back should be closed, and waist darts should be ignored.
Make increases along the side seams of 1.5-2 cm per side of the fit.
In order for the dress to turn out with a lowered sleeve, the shoulder line should be extended by 4-5 cm, and then smoothly draw the armhole.
For ruffles, cut out 3 strips 4 cm wide and 80-90 cm long.
For the belt you will need a strip of fabric 150 cm long and 9 cm wide.
To trim the neckline, you will need three strips of fabric 2.5 cm wide, cut on the bias, the length of two of them should be equal to the length of the sleeve cap, and the length of the third strip should be equal to the length of the neckline of the dress.

2. Sewing straight loose dress with ruffles on the chest
Since the ruffles need to be sewn onto the front before sewing the side and shoulder seams, we will deal with them first.
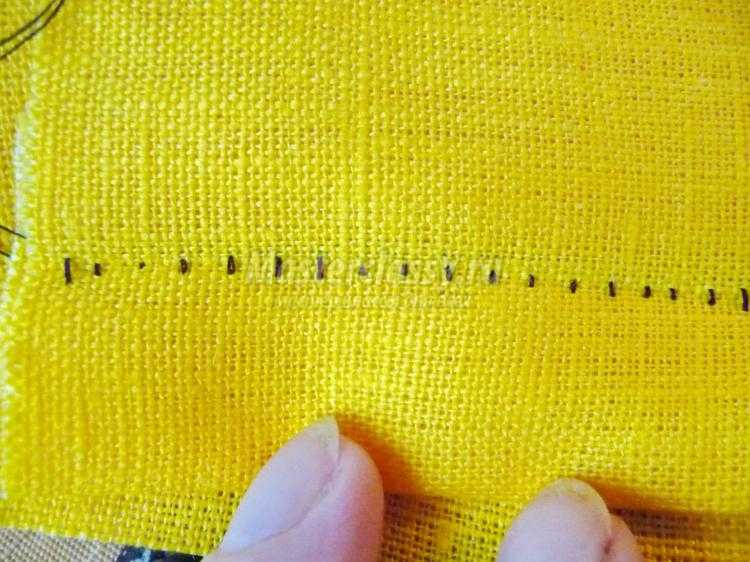
We set the required mode for processing the edge of the ruffle on the overlocker.

We sew the edges on both sides along the entire length of the ruffle.

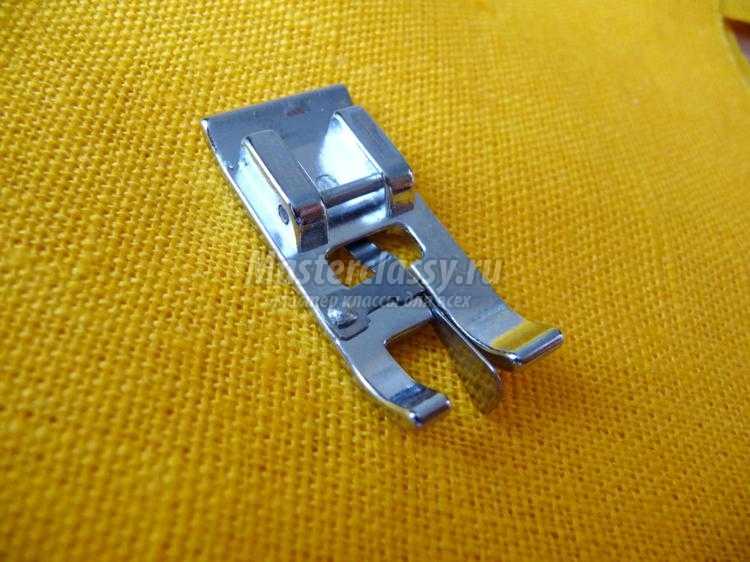
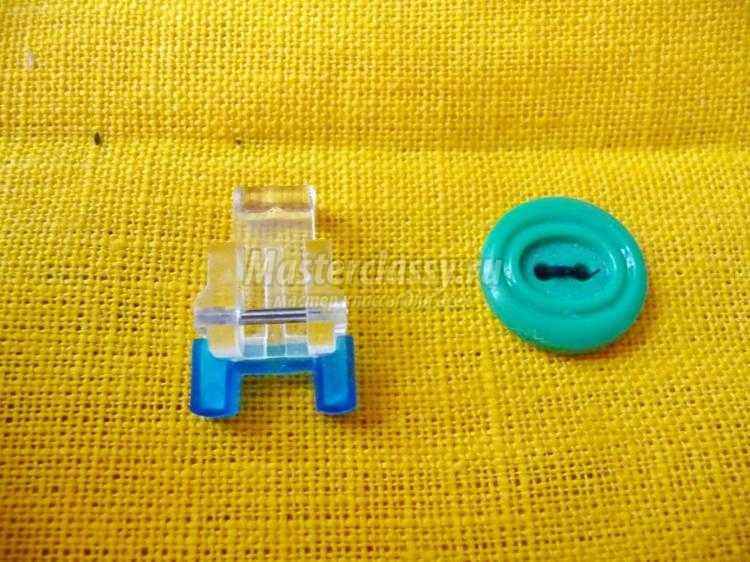
To form even and neat gathers on the ruffles, we install on sewing machine special foot.

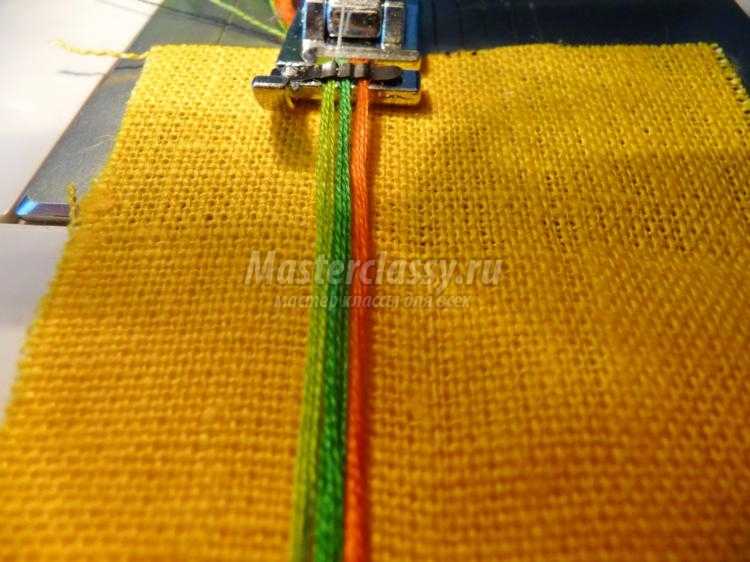
Set the required stitching mode and thread tension.

We sew a line on the ruffles, obtaining the necessary gathers on them.

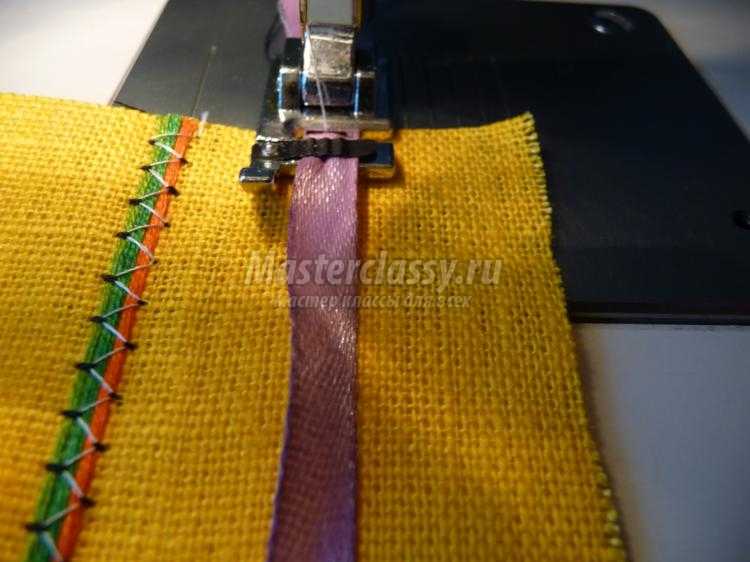
We pin the prepared ruffles onto the front of the dress.

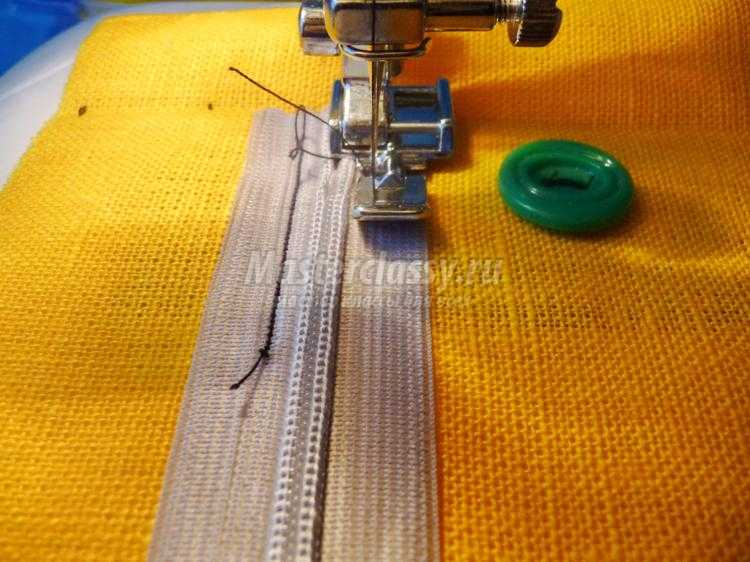
Our next task is to add ruffles to the front part of the dress. Set the straight stitch mode, stitch length and required thread tension.

Ruffle gathers create additional volume. In order to easily sew them to the dress, you can use a special foot for thick and distressed fabrics.

We lay even lines along the ruffles secured with pins.

We overlock the side and shoulder seams.

We use trim cut from leftover fabric to trim the neckline and sleeve piping of the dress. With more detailed master class for processing the neckline and armhole with trim can be found in

We do the final processing of the armholes and neckline.

We process the bottom of the dress using an overlocker, bend it by 1.5 - 2 cm and hem it using a sewing machine.
We stitch the strip intended for the waistband of the dress, turn it inside out and iron it.
Dress with ruffles on the chest - ready!


Knitted items are incredibly comfortable and practical.Thanks to this, they occupy one of the most honorable places among things in the wardrobe, especially at home.
It's no secret that sewing things from knitwear is much easier than sewing items from inelastic fabric. Simplified patterns, no darts, minimizing adjustments and fittings due to the elasticity of the fabric, simplifies the sewing process and makes it accessible even to novice dressmakers. The only problem that you may encounter when sewing knitwear is processing the edges of the product. If you finish the edges with a single straight stitch, they will turn under and look unsightly.
Ideally, the edges of knitted items are processed on special cover stitching machines, and although a double needle only imitates a flat seam, it can be a worthy option in solving the problem of processing the edge of a created item.
How to choose a double needle
If you look closely at the markings on a double knitting needle, you can see two numbers written on it, separated by a slash. For example: 2/90, 3/90 or 4/90 (see photo above). The first number indicates the distance between the two needles in millimeters, the second number of the needle. Accordingly, the larger the first number in the needle marking, the wider the distance between the lines.
The second number indicates the thickness of the needle (for example, 90 = 0.9 mm), the choice of this parameter will depend on the type and density of the fabric.
How to insert a twin needle into a sewing machine
The double needle is adapted for household sewing machines; it is inserted into a standard hole in the needle holder and fixed in it like a regular needle.
However, you should keep in mind that if your sewing machine is designed only for straight stitches, then you will not be able to sew on it with a double needle. Pay attention to the hole in the needle plate; if it is round, then the machine performs only straight stitches; if it is oblong, then it makes additional types of stitches. However, most sewing machines, which can do a zig-zag stitch, are suitable for sewing with a double needle, and more modern ones are even equipped with an additional pin for a second spool.

How to thread a twin needle
Two spools of thread must be inserted into different pins, but they must be passed through one thread guide.

When approaching the base of the needle, the threads are separated and inserted separately into the left and right holes of the needle eyes. The thread is wound behind, as when sewing with a regular needle.

Before you start sewing with a twin needle, you need to adjust the stitch type and stitch length.

A seam that imitates a flat one, from the wrong side, looks like a regular zig-zag stitch.

If your sewing machine has additional decorative stitches, you can experiment and try making them using a double needle.
A hem stitch made with a double needle looks like this.

Using a wavy decorative seam, you can decorate the edge of a jacket collar or the bottom of a skirt.

A strict combination of triangles is suitable for processing belts and cuffs.

The V-shaped seam can be used to decorate the edge of the collar or sleeve of a blouse. This pattern can be used to decorate various ruffles and flounces on things.

A diamond-shaped pattern will look good on vertical parts of clothing; it can be varied with beads or sequins.

You can also embroider various parts of clothing using double zig-zag.
Using a double needle, you can make gathers and voluminous puffs on fabric.


The fashion for ruffles, flounces and frills in clothing goes back to the distant Middle Ages. The abundance of these details on dresses emphasized the status, good taste and wealth of their owners.
As the fashion trends of recent years show, flounces and ruffles are popular in our time! Of course, it’s cute, feminine and very beautiful!
Today we are sewing an elegant summer dress with a straight silhouette with double flounce wings on the shoulders.
To sew such a dress you will need 1.1-1.2 meters of stretch-satin fabric and 3 meters of bias silk trim for processing the flounces.
Due to the fact that stretch fabric It is quite elastic, you can completely do without a zipper.
The cut details of the dress with flounces on the shoulders are as follows:
shelf - 1 child, back - 1 child, flounces - 4 children.

1. Close and sew down the darts on the front and back of the dress. Since the fabric has a stretch structure, it is better to use a knitting needle to stitch the details of the dress.

2. Sew using a sewing machine, and then process the side seams using an overlocker.

3. Stitch and finish the shoulder seams.

4. Attach bias tape along the outer contour of the flounce.

5. Attach the binding to the shuttlecock.

6. We process the inner part of the shuttlecock using an overlocker.

7. Alternately, we baste and attach the flounce wings to the dress.

8. We lay a decorative stitch along the front part of the shuttlecock.

We decorate the rest of the flounces on the dress in the same way.

9. We trim the neckline and sleeve armhole with trim made from the remaining fabric of the dress.
To make the binding, you will need to cut a strip of fabric 2.5 cm wide. The binding is cut on the bias, at an angle of 45 degrees.

10. We check the length of the dress, process the bottom of the dress using an overlocker.
We bend the bottom 3-3.5 cm inward and stitch it on a typewriter.

The charming dress with flounced wings is ready!Have a nice one summer days and a wonderful mood!


A dress with wings is ideal summer dress! Dresses with flounces and ruffles in the shoulders and sleeves have not gone out of fashion for several seasons in a row. This dress looks fashionable, it is practical and can emphasize the youth and carefree image of its owner. The presented model is a straight dress silhouette,
with flounce-shaped wings sewn into the seams that coincide with the chest darts and a zipper on the right side of the dress. The dress is designed semicircular inneckline front and back.
In order to sew a dress with flounced wings on the shoulders, you will need 1.1 m of thick cotton fabric 1.5 m wide, a hidden zipper and 4 meters of bias silk trim for the sleeves and neckline.
Side part of the shelf - 2 parts, centralpart of the shelf - 1 child. (expand),
side part of the back - 2 parts, central part backrests - 1 child. (unfold), cap sleeves -2 pieces.

How sew a dress with wings
1. We connect the shoulder seams of the central and side parts of the front and back, grind them down and process them using an overlocker.

2. To process a sleeve with bias tape, you need to unfold one of its edges, and aligning the unfolded edge of the tape with the edge of the sleeve, pin them together with pins.
3. Place a straight stitch along the fold line of the binding.

4. Fold the free edge of the binding inward, fasten it and put a neat stitch on the front side.

5. We make small notches along the sleeve stitching line.

6. We fasten the side and central parts of the dress, inserting the sleeves into the seam. In order to quickly and evenly distribute the length of the sleeve, divide it in half, align the middle of the sleeve with the shoulder seam and connect the front and back pieces from the middle to the bottom.
7. Stitch and finish the left side seam of the dress.

8. Side seams right side We process the front and back separately on the overlocker.

9. Sew the zipper into the right side seam of the dress.

10. Using a sewing machine, sew the seam before and after the zipper.

11. We process the neckline with bias tape, similar to the sleeve.
To prevent the edge of the neckline from puffing up, during processing you should stretch the binding a little and adjust the edge of the neckline.

12. We process it on an overlocker, bend it 3-3.5 cm and hem the bottom of the dress.
Today, it comes complete with any sewing machine. whole set paws And sometimes some people are perplexed by their purpose. But if you understand what each of them is for, then sewing will turn out to be more interesting for you, and some operations will be less routine.
In addition to the regular foot, the kit includes the following feet, or, if necessary, you can purchase the ones you need:
Teflon foot
Designed for sewing products from genuine leather, leatherette and coated fabrics. It doesn't stick when you sew vinyl, plastic, leather or faux leather. You can also use a Teflon foot for regular sewing or when making buttonholes on plastic or leather material.

Roller foot
Instead of a Teflon foot, you can use a roller foot, which moves the fabric forward using torque. The foot has a rotating roller that allows you to roll fabric of any structure under it, be it 100% leather, or felt, or corduroy. When sewing with this foot, the stitches are of uniform length. The foot is very good at going through any thickening on the fabric.

The fabric you choose will tell you which of these two feet you prefer. The roller foot also copes well with heavy materials, some types of raincoat and jacket fabrics.
Universal zipper foot
You can sew a zipper fastener using a regular foot designed for straight stitching or zigzag stitching. But it is possible to sew a zipper efficiently and neatly, with a stitch running next to the “teeth”, only using a special foot. It can be one-sided, two-sided and narrow. The main task is to help the needle make an even seam at the same distance from the edge of the zipper without turning the product.

Concealed zipper foot
But you can sew a hidden zipper only with the help of " secret foot", which has two grooves on the sole. A regular foot or even a zipper foot will not work for this. The foot has special grooves in which the teeth of the fastener are in a fixed position, which allows you to lay a straight stitch close to the fastener. As a result, a hidden "zipper" is easy , quickly and accurately attaches to the product.

Edge sewing foot
Sometimes it is very difficult to lay an even finishing stitch along the edge of a product. Using an edge sewing foot will make this task easy.

Blind hem foot
Designed for hemming the edges of dresses and trousers that require special care using a blind stitch. The blind stitch foot is suitable for discreet hemming of items made from thick and medium-weight materials. Now there is no need to hem the product manually.

Cord sewing foot
You can beautifully decorate a product with a cord using this foot. In this case, depending on the thickness of the cord, you can sew one, two or three cords at the same time. The foot has guides that lay the cord along the fabric, and the needle stitches evenly along its surface. The foot has special holes for cords, decorative threads and is intended for decorating products using various decorative stitches.

Foot for sewing on bead thread
Using this foot, you can carefully and quickly sew beads onto a product and decorate it.

Foot for sewing on braid (rubber bands, sequins)
The foot is used for sewing braid, ribbons, edging and other decorative elements, up to 5mm wide, can also be used for sewing underwear elastic. Perfect for decorating clothes with various elements.

Button sewing foot
The button sewing foot holds the button while it is sewn on.

Buttonhole foot
Loops can be made quickly and accurately only on a sewing machine that comes with a special foot.
A buttonhole on a sewing machine can be sewn in automatic, semi-automatic and manual mode. In order not to control the length of the loop, you need to install a button in the presser foot and do not forget to pull down the vertical lever for switching the speed of the machine down all the way.

Bias binding foot
The edging foot is used to finish edges with bias tape in one step. The snail on its foot wraps a strip of fabric and guides it in front of the needle. Can be used for zigzag, decorative stitches or regular straight stitches.

Gathering foot
This foot is used to make ruffles and flounces. The foot is a small double plate with a slot over the entire surface. The material for gathering is placed under the foot, and the fabric to which the gathering will be attached is placed in the slot. The foot can perform three functions at once: gather, process the edge and sew the flounce to another fabric.

Pintuck foot
Tucks are often used to decorate clothing and home textiles. The special tuck foot has grooves into which the fabric is pulled during sewing, resulting in a raised fold. Pintucks are formed when sewing with a double needle. There are feet for sewing two, three and five tucks, evenly spaced from each other. Before work, you need to select the stitch length and put a double needle on the machine. A double needle sews the tuck on both sides with parallel stitches.

Hemming foot
Despite the fact that processing the bottom of products with a hem seam with a closed cut is a rather simple sewing procedure, it still requires considerable effort. Marking, ironing, temporary hand stitching, etc. and so on. There is a way to get rid of this routine, use a special sewing machine foot - a foot for hemming the edges of products. (rolling foot, hem foot, hem hem foot, hem foot, hem foot, hem, hem foot, hem foot)

Knitting foot
A rubber pad attached to the foot tensions and holds the fabric under the needle, preventing it from sagging and getting caught between the teeth of the lower conveyor. And this is the main problem that arises when sewing thin fabrics and knitwear. The knitted foot does an excellent job with it, forming an even stitch without any extra effort.

Overlock foot
The special device of the overcasting foot includes the presence of an additional pin, which is used to sew along the edge of the fabric being overcast. When sewing, the fabric does not shrink or curl. When overcasting with special overlock stitches, the guides of the overlock foot will help you get an even, correct stitch along the edge of the fabric, and the material will feed smoothly without falling to the side. Without such an overlock foot, overcast the edges with a simple zigzag or some other specialized overlock stitch, be sure to leave a small allowance along the edge, which does not allow the fabric to tighten during overcasting. This allowance is then trimmed with scissors.

Of course, the modification of the feet depends on the model of the machine for which it is intended, and you need to choose based on this. One and the same foot may differ in color, material (plastic, iron, Teflon, etc.), additional elements (screws, springs, etc.). When choosing, be sure to read the instructions or consult with the seller, all this will help you in this difficult matter.
Good afternoon, dear needlewomen. Today we will look at using paws to sewing machines. If you like to sew, then this one Master Class for you. I bought sewing machine feet from a Chinese online store.
The paws are very good, but how do you know how to use them? I started looking for information and realized that this topic was poorly covered. But if you use such devices, you can easily and simply perform various operations. So I decided to figure it out myself and help people who are also looking for this information. So, let me begin.
Narrow edge lining foot. The paws can be different by 2 mm, 4 mm, 6 mm. The foot makes it possible to process the edge very smoothly and efficiently without markings. This foot is also called a snail. I’ll say right away that the paw is worthy. Cut the edge of the hem at an angle and tuck it into the snail. The fabric wraps itself very nicely.
The seam turns out very neat. The width of the seam depends on the foot. Wrapping fabric 2 mm by hand is not at all an easy task, but here any fabric, even if it frays a lot, folds up nicely. True, you need a warp, but you will be patient, and it will be your faithful assistant.
Using presser feet for sewing machines - master class


Using this foot, you can sew on various narrow cords by tucking them into the snail from below. Instead of top thread, it is better to use mono thread.


Assembly foot. A very necessary paw. Using this foot it is easy and simple to make frills and ruffles. Pay attention to how you place the fabric. The fabric that is being gathered lies as the bottom layer, and the top layer is tucked into the groove of the foot and will be sewn evenly along the top of the gather. The assembly is uniform.


Edge stitching foot. I liked this foot because the plate allows you to guide the edge of the fabric along the edge of the needle. The overlock stitch is made strictly along the edge, the thread runs along the plate and lies freely, which makes it possible to stitch knitted items, the seam will not burst when stretched. We use an overlock stitch, imitation overlock.


Foot for sewing elastic, ribbons, braid. I can say that the paw is simply decent. Using this foot it is easy to sew on an elastic band. I inserted it under the plate and it lays flat and does not jump to the sides. And if you tuck thick threads under the plate different colors and stitch, you will have a beautiful decorative braid. We use mono thread instead of upper thread. We use a zigzag stitch, or stitch zigzag.


Foot for sewing on appliques. The foot is transparent and the design is clearly visible through it, so it is used when it is important to sew accurately along the line. Used when sewing a zigzag stitch. The step distance is small, the stitching should be tight. For volume and beauty of the stitch, loosen the top thread, and then the stitch will emphasize the beauty of your work.


Blindstitch foot. Everything is easy and simple to use, but I didn’t really like the quality of the lining, dots are visible on the front side. There is a screw on the foot, with its help we adjust the hem to the lining, but I still have visible marks and I think I won’t hem it like that.


Darning foot. This foot is designed for darning. Lower the teeth for free movement of the fabric. Comfortable.

Foot for sewing on buttons. Set up a zigzag stitch. Select the stitch height equal to the distance between the button holes. Simple and fast.

Foot for sewing on zippers. The foot has two holders, left and right - this makes it possible to sew the zipper on both the left and the right, you don’t need to control anything, the foot rests on the zipper and the stitching lies very evenly, when sewing zippers in this way, the fabric will never get caught in the zipper, the zipper opens without difficulty . I've been using this foot for a long time and I love it.

Foot for sewing a hidden zipper. It’s a wonderful foot, it’s like an iron; at the bottom there is a recess just the width of the zipper itself. I also use this foot for sewing on cords; it lies in the recess and is easy to sew on.

Using presser feet for sewing machines. Photo

Foot for lining fabric. How I regret that I did not use this foot. The foot makes it possible to run the stitch evenly, the plate rests on the fabric and the stitch lies evenly, and there is a screw on the foot, and this makes it possible to shift the stitch, believe me, I sew like a pro and I won’t sew as perfectly as with this foot. If you sew a line and then move the screw, you can lay a second line right next to it. So great.


Solyanikova Tatyana Viktorovna
http://masterclassy.ru/shite/9162-ispolzovanie-lap...-klass-s-poshagovymi-foto.html
Sewing machine feet
June 14, 2013 - Irina AslanovaToday everyone knows what a sewing machine is. But not many people know about sewing machine feet and how many types of them exist now. Nevertheless, the paws not only expand the capabilities of the machine, but also make it easier to carry out many processes, and most importantly, make them of high quality. By paying due attention to this article, you will learn a lot of new things, and by using the presser feet in practice, you will get great pleasure when sewing a variety of products.
If you bought a sewing machine, you will immediately see the adapter (mechanism for attaching the presser feet) “AU-100” and the “ziz-zag” foot - “AU-107”. In addition, as a rule, there is an additional foot for zippers “AU-101” and for loops “AU-116”.

(Allows you to quickly change paws, which is very convenient and speeds up processes)

(Standard foot for operations on
zig-zag basis)

(Needed for lightning.
Can be located on both sides of the needle)

(Excellent help when making loops. Convenient when making robots on slats and collars)
Many machines also come with the AU-108 blind hem foot, the AU-115 quilt foot, and the AU-105 button foot.

(Use for operations that require more careful execution. For example: blind stitches, etc.)

(Use for straight parallel stitches that run at the same distance).

(Use for buttons, fasteners, hooks)
The instructions for the machine always contain descriptions of the work for all of the above paws.
Today's home sewing equipment market can offer 40 or more types of feet for different functions. Paws are divided into semantic groups:
Complete most workflows
Making decorative stitches
Performing work with highly complex fabrics.
Sets of presser feet
Main workflows:
There are many paws on the market that can sew in hidden zippers, available in both metal and plastic.

(Inserting a hidden zipper)
Due to the fact that there is a special groove at the base of the foot, sewing in a “secret” zipper is done almost in the blink of an eye. To make good straight stitches on delicate fabrics, you need to use a straight stitch foot

When processing edges, you need to take a 2mm hemming foot “AU-111”.

For thicker fabrics, you can take a set of hemming feet with different widths (6 mm, 16 mm, 22 mm) “AU-121.”
If you don’t have a screwdriver, you definitely need an “overlock” foot “AU-109”.
This foot has a stopper that does not pull the edge of the fabric when used. If the fabric needs additional processing of part of the cut, then you can use the foot with a knife on the side to process the edge “AU-125”,

Decorative works:
Edging products is a complex operation, but with a special foot it is greatly simplified.
You'll be sewing bias tape in just a few minutes using one stitch using the edging foot "AU-117" or a foot with a ruler "AU-114".


Very interesting is the device that lays folds “AU-122”. With it you have the opportunity to sew a decorative part to the product in one operation.

If you want to give your product a more personalized look, then use different types decorative finishing. For this purpose, you can use, for example, the beading foot “AU-130”,

foot for decorative cords AU-106 or braid AU-131,

Among those performing decorative operations, one should definitely mention the foot for embossed tucks (when used together with a double needle) AU-127, the foot for sewing appliques AU-110 and the foot for shirring AU-128