To make a homemade box a joy, even the simplest available materials will do. Find out how to sew it from fabric and cardboard, what techniques exist for this.
So, make your own box. What and how to make a box from? To do this you will need:
- an old shoe box, from which we will borrow durable cardboard with corrugation inside;
- designer thin (coated) cardboard;
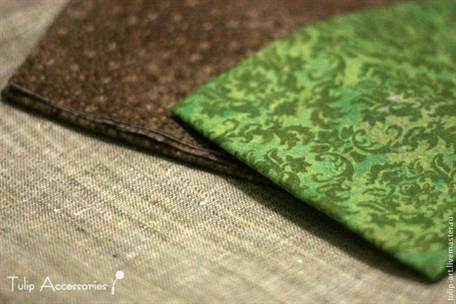
- natural or artificial fabric of several types and colors (calico, chintz, satin);

- fleece for internal placement;
- button and decor;
- rubber band;
- masking tape;
- silicate glue.
Check out step by step description how to make a box with your own hands:
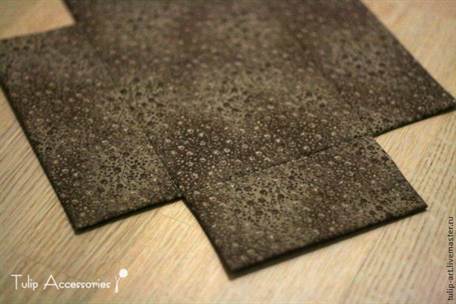
- Cut out the parts from corrugated cardboard.
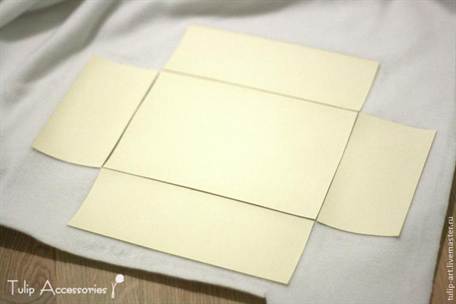
Cut out the same parts from coated cardboard.
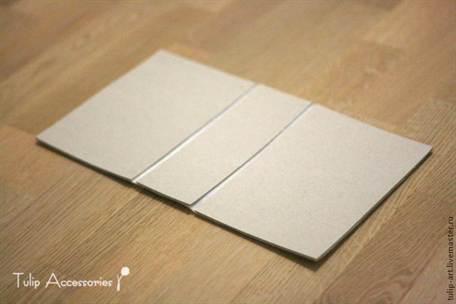
In the photo, parts made of coated cardboard are marked in light. Their sizes:
- No. 1, 2 pcs. 7 x 13 cm in size from two types of cardboard.
- No. 2, 2 pcs. 7 x 19 cm in size from two types of cardboard.
- No. 3 made of coated cardboard measuring 7 x 19 cm.
- No. 4 made of corrugated cardboard measuring 7 x 20 cm.
- No. 5 - 2 pcs. made of coated cardboard measuring 13 x 19 cm.
- No. 6 - 2 pcs. made of corrugated cardboard measuring 14 x 20 cm.

- How to make a lid out of cardboard?
Glue parts No. 4 and 6 from corrugated cardboard onto fleece. Position them so that #4 is in the middle of the fake.
Leave a distance of 0.5 cm between the parts. This will be the cover - carefully cut out the part from the fleece.

- Place the fleece cover on the decorative fabric.
Cut out a rectangle, 1.5 cm from the edge of the template.

- Fold the indents into the middle of the workpiece and glue it to the corrugated cardboard.

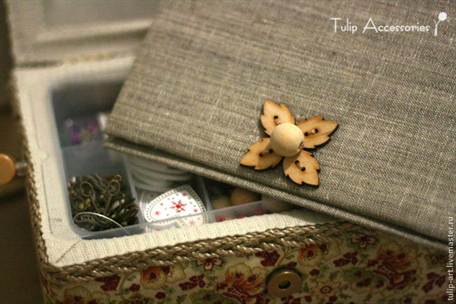
- Glue the decor to the outside of the lid and sew on a button.

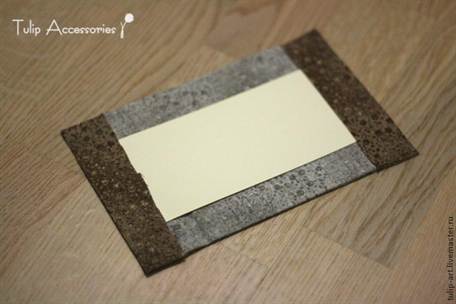
- On another piece of fleece, place parts No. 1 and 2 cut out of coated cardboard, which you place around part No. 5. Leave a distance of 3 mm between them. Glue them to the fabric.

- Tape the seams with masking tape.

- Cut out the workpiece.

- Place the blank on the fabric chosen for decoration inside. Cut by making a 1.5 cm indent.
Glue the edges of the indents to the cardboard base.

- Sew the workpiece along the folds (by hand or on a sewing machine).

- Fold the bottom piece so that the fabric is inside. Tape the folds with tape.

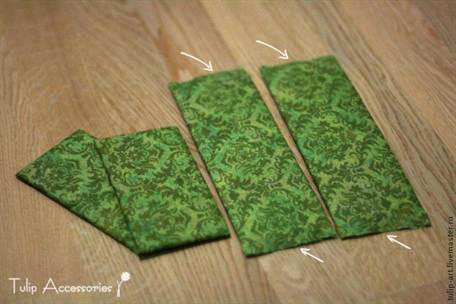
- Glue the remaining corrugated cardboard parts onto the fleece and cut out.

- Wrap each piece in fabric for the outside. At the same time, on long elements of the workpiece, do not bend or glue the fabric on the short sides.

- Glue the long pieces to the outside of the box.
Secure the top with binders. Glue the remaining fabric at the ends onto the body of the box.

- Glue two short strips onto the body. Dry the structure.

- Cover part No. 3 of coated cardboard with fabric for the inside. Do not glue the fabric on the long sides.

- Glue this part into the middle of the lid blank.

- Cover the last piece of coated cardboard with fabric for the outside.

- Glue to the lid, hiding the threads from the sewn button. Secure with binders.

- Glue the lid to the box. Place an elastic band between the bottom and the long part of the lid. Leave to dry.
The jewelry box is ready!

Having mastered the proposed technique, show your imagination and make boxes different sizes and shapes.
Such crafts are an excellent interior decoration and a convenient organizer.
Decorate the box with flowers or lace. It will be a wonderful gift for birthdays, weddings and other important events.
Making a cardboard box with your own hands is a very interesting and exciting activity. Manufacturing will require a little time and patience, but the result will exceed all expectations. Such boxes will decorate your home and add originality to the decor.


Let's start simple
Using the example of a master class, which shows the manufacturing process step by step, you can see how to make an original box.
In order to create such a box, we will need thick binding cardboard, thin cardboard, a couple of types of fabric, glue, fleece, decorative attributes, masking tape, a knife, scissors, a ruler, and clips.
From thick (darker) and thin (lighter) cardboard we cut out the parts: blanks seven by thirteen cm 4 parts, 4 parts seven by nineteen cm two pairs each, a light part seven by nineteen cm, a dark part 7 * 20 cm, a pair of parts light color 13*19 cm and two dark-colored blanks 14*20 cm. All blanks are shown in the following photo:

Take blanks numbered 4 and 6 and glue them onto the fabric.
Place the pieces on the fabric and cut out a rectangle, leaving a margin of about 1.5 cm.
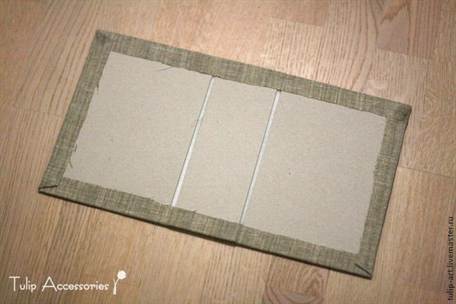
We glue the edges on the inside. We will use this technology more than once. The outer part is ready. You can decorate it using beads, sequins, and buttons.
Take blanks 1, 2, 5, place them on the fleece as needed, shown in the photo, and then glue them onto the fabric.
We strengthen the distance between the blanks with tape.

Cut out the fleece piece again. We secure the edges of the fabric on the inside.

Sew the fold lines.
Bend the sides of the box as shown in the photo.

We take the remaining parts and cut out exactly the same parts from fleece.

We cover the parts with fabric. We glue only the short sides.
We glue the blanks. First we glue the long parts to the box.

Now short.

Take blank number 3 and cover it with fleece on the short sides. The long ones remain open.
Glue the third blank onto the cover.

Cover the last piece of paper with fabric.

You can glue a lock bead onto the lid. And at the bottom there is a rubber band. You will get a beautiful lock.
We collect the box. Glue all the blanks with Moment glue.


Detailed diagrams
In this article we offer you five more ideas for creating cardboard boxes. Every step-by-step photo master class shows how to make this or that accessory.


In every girl's house there are things that should be kept in a box. These can be small accessories, jewelry and other small items. If you can’t buy a suitable box, you can make it yourself from cardboard.
Making a decorative element with your own hands is not very difficult, but it will require patience and time. The advantage of creating a box yourself is the ability to choose its shape, size and color to your liking. After all, the store does not always sell boxes that fully satisfy the needs of girls. The box may be small, of inappropriate shape, and on top of everything else, expensive. Therefore, homemade creativity will appeal to every craftswoman and lover of original things.
There are many ways to create a cardboard box at home. Therefore, you first need to decide on the shape, width and size of the box. You need to choose what cardboard it will be made from, because it can be soft cardboard, hard cardboard or another material that can be covered with cardboard. Schemes for making boxes differ from each other, so first it is better to familiarize yourself with several, and only then choose the most suitable method and scheme.

DIY cardboard box: an easy way
The first method is considered the easiest, but also somewhat unusual. After all, to create a box you will have to donate some book. You will have to choose a book that is no longer needed, or is simply gathering dust in the closet. Of course, this option may seem strange to some, but it still has its advantages.
In order to make a box, you need to take a thick book and cut out pages from it using a stationery knife. You need to cut it so that the edges of the page remain, and you can choose the depth of your box yourself. There is no need to cut out all the pages, as the box will lose its purpose.
After the pages are cut out, the remaining ones need to be glued together with liquid glue, leave the book until completely dry, and then glue it to the cover decorative elements, for example, flowers, rhinestones or ribbons. Once the box is ready, you can put your jewelry or small items in it.

DIY cardboard box: master class
There is also a way to create a box from cardboard or box. How to make a box from such material step by step, we will consider further.
For this process you will need a box of the required size or cardboard, from which you can make a box yourself. To learn how to make a box from a box, you can watch a video that will show you how to correctly make a drawing on cardboard and cut out a box from it.
All sides of the cardboard that are cut out must be folded together and glued together in the shape of a box. From the cardboard that remains, you need to create a box that will slide out of the box. It should be the same size as the box, but smaller in height. After the box is ready, it needs to be covered with paper, the color of which can be chosen as desired. The same paper can be used to cover the outside of the box; of course, the color can change depending on the wishes of the box’s creator.

Next, you need to take a flat piece of cardboard the same width and length as the box, and it also needs to be covered with colored paper. This cardboard will act as a partition between the boxes. You can choose the shape of your box and its contents, for example, you can make two compartments, one of which will be pulled out, and the second will simply be covered with the lid of the box.
In order to make a regular compartment in your box, you just need to glue another piece of cardboard, which will serve as the front wall. And at the very end you need to insert bottom part drawer and decorate the entire box with the desired decorative elements. To decorate the box, you can choose different flowers, hearts, bright paper products and shiny hairpins. You can put jewelry, accessories, paper products, and even money inside the box.

Box from a candy box
The easiest option for making a box is to use a candy box. Only the box must be solid, that is, the lid of the box must be connected to its bottom. This option for creating a box will take a minimum of time, and you won’t need a lot of material to decorate it.
You need to empty the box of sweets; it will be especially convenient if there is still a mold for sweets in the box, which usually has several compartments. So, the box needs to be covered with colored paper, you can choose any color, you can even combine several colors to make the box brighter. If you cover a box with one color, you need to take one large piece of paper so that it can cover both the lid and the bottom of the box. You can learn more about how to decorate a box with colored paper by watching a master class from professional craftswomen.
After the box is covered with colored paper, you need to let it dry and smooth the paper to remove any air bubbles. This can be done with glue, water and a brush. Next, you just need to insert the candy mold into the box, and you can put different decorations in it. The box can be decorated different colors, ribbons and other decorations.
Video on the topic of the article
A jewelry box is the most versatile and necessary item for women's household items. It is very convenient to store all your jewelry in a box, especially if you can make it yourself. A jewelry box made of cardboard looks very beautiful; it is not difficult to make it yourself from simple and affordable materials. You can also give a jewelry box made by yourself, and this will be the most memorable and dear gift to a person. Handmade products are always more valuable because they are exclusive. You will see below how to make a jewelry box with your own hands.
Materials you will need: binding cardboard (preferably choose 2mm thick), PVA glue, masking tape (4 millimeters wide), Moment-Crystal glue, regular Whatman paper, fabric (preferably cotton), tapes - 2 pieces of 15 cm each
Tools: knife, scissors, self-healing cutting mat. or an unnecessary piece of linoleum, a ruler, a synthetic glue brush, a pencil, a stack for smoothing surfaces and corners, a jar of glue
Start by assembling the base. To do this you must make a drawing.

We glue the walls from above to the bottom, not from the sides. Glue must be applied to the parts along the entire length. We apply a large number of We don’t skimp on glue so that the box is durable.

When applying the part, always level it, the glue dries slowly, so you have the opportunity to place the part straight.
First we glue the long wall, then two short ones, it is better to apply the glue on both sides so that you get a neat corner

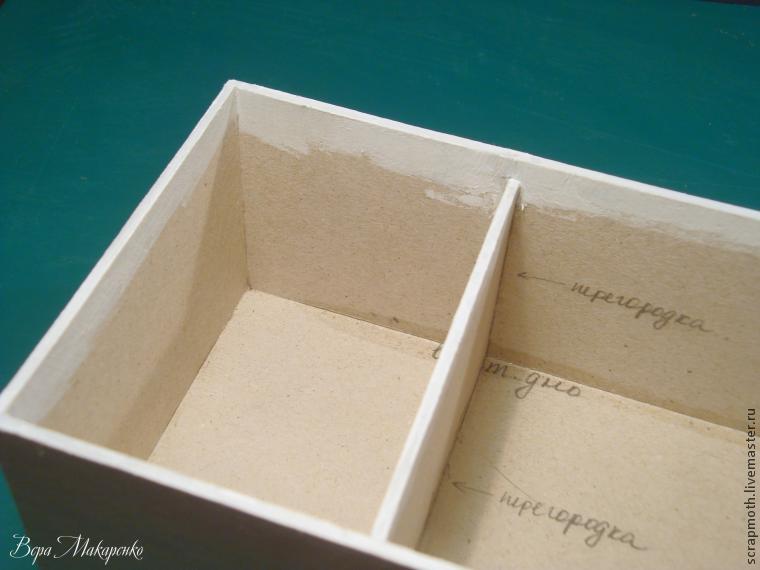
In order to glue a partition between two sections, mark in advance the place where it will stand.
Next, apply glue to the partition and insert it into the place where it will stand. Now you need to take white acrylic paints and paint all the upper sections of the parts so that the color of the fabric on the sides is not distorted.
 To reinforce all corners, take a piece of masking tape and apply it to all corners of your box and smooth it out well. It’s better to spread it out in a stack and then press it tightly.

 Next, you need to tape the inside of your box.
 Here again you need to use the stack, iron the tape from the glued edge towards the corner and along the depression.
 We strengthen all the joints inside.


Finally you have completed the cardboard base of your box. The next step is to decorate.
In order to decorate a box with fabric, you should know a few tips.
- The fabric completely covers the cardboard. There should be no gaps anywhere in the finished box.
- Avoid open cuts.
- Apply the glue in a thin, even layer so that it does not bleed through the fabric to the front side.
Glue the fabric to the cardboard with PVA glue.

Apply glue to the edge and the strip on the inside of the wall.
Apply a thin, even layer of glue to the paper piece.
Glue the paper piece to the wrong side of the fabric.
 Before you are going to glue the seam allowances to the back wall, you must make cuts on them and form the corners.
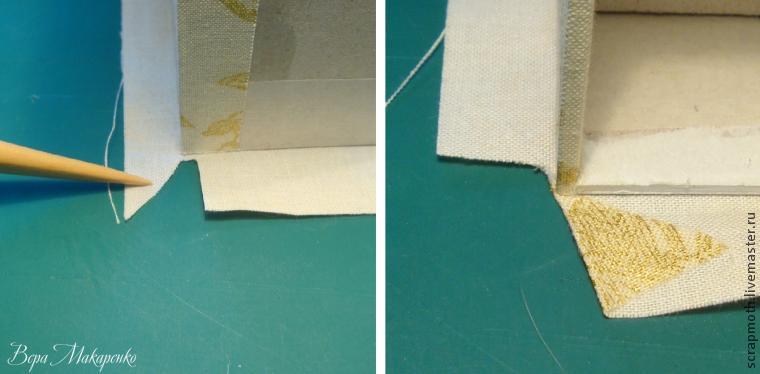 Fold the protruding seams and glue them.


Next we attach the allowances at the bottom.

After gluing, we get flat corners.


First, coat the bottom with glue and place our part there. Then we glue the allowances and corners. We smooth everything out with a stack.

Cover the cut of cardboard with a rectangle of fabric.


Now let's take on the cover for your box.
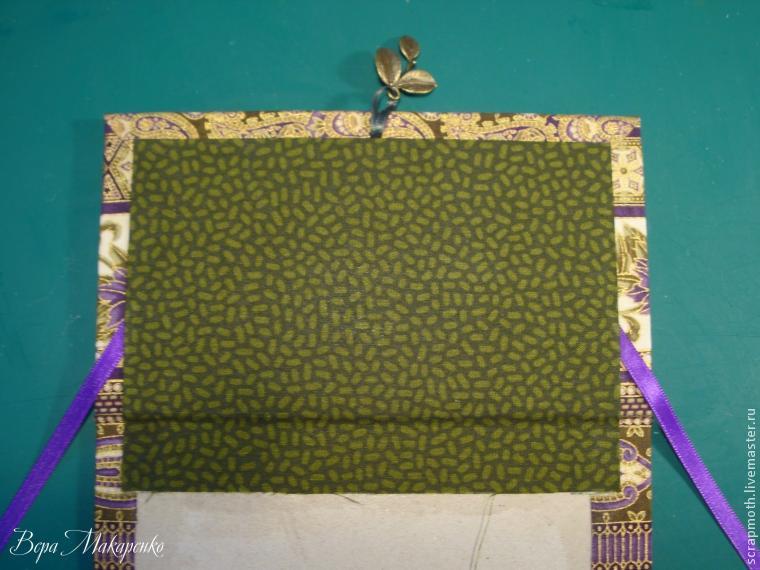
The cover should consist of three parts: bottom, cover and spine. The lid will have a layer of synthetic padding. The bottom and spine are lined with white paper. Here you need to first glue the paper to the cardboard, and only then the fabric. We coat the cover with glue and apply it to the padding polyester.

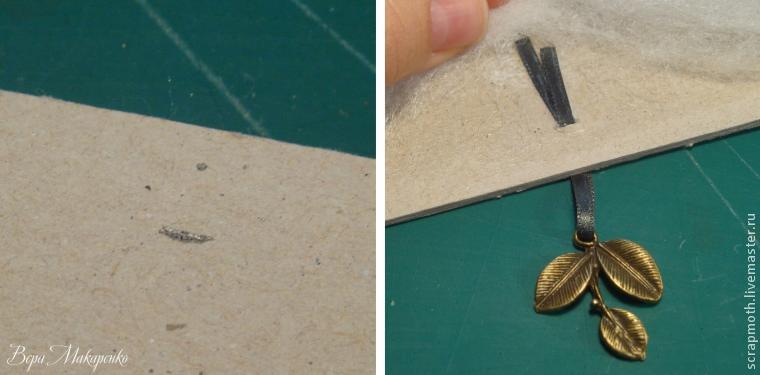
To decorate the lid with a pendant, make a small slit. Along the long side we mark the middle. On the short side - 1cm from the edge. We make a small slot, insert a ribbon there and glue the tails to the cover.
For the cover, cut out the fabric with 2 cm allowances on each side.

Place all three parts on the fabric, leaving a distance of 3-4 mm between them. We immediately glue the flat parts, the part with padding polyester is temporarily attached to the spine with pieces of masking tape so that it does not fidget. And glue the allowances along the long edge.

We make a cut for the pendant.

We make corners with minimal thickening, trim the fabric along the cardboard, not reaching the corner 2mm. After all four corners have been formed, glue the seam allowances on the short sides.
Now is the time to glue the stopper tapes. Thanks to them, the hinge will last much longer. And it’s more convenient to use a lid with stoppers.
Cut two ribbons 14 cm long and glue them symmetrically at an angle to the cover. They should be free at a distance of 1 cm from the edge. The rest is glued.

Now let's make the endpaper. To do this, cut out a piece from paper that is 2 cm shorter in length than the cover and 1 cm narrower in width. On three sides the allowance is 1.5 cm, on the fourth - 3 cm. This long allowance will then be hidden between the spine and the back wall.

Form the corners on the paper parts as follows: on the long side, cut off the excess fabric flush with the edge of the paper part. On the short side we make a broken line, as in the photo below. We glue the long side first, then the short one.

Glue the resulting part onto the endpaper. It will turn out like this:
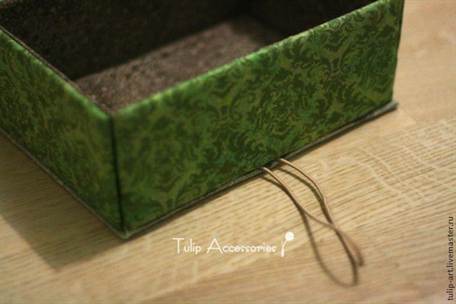
It's time to connect the main box of the box and the cover. To do this, coat the bottom with moment-crystal glue. We apply glue to the smaller part, i.e. on the bottom of the box, not on the lid. We do not reach the edge a little and carefully spread the glue so that it is distributed evenly.
Press the bottom of the box to the bottom of the lid. We align the back wall with the edge of the part; the three outer walls will have indentations of 7 mm. In general, cardboard sticks together quickly, the main delay is in the fabric allowances. You need to wait until it all sticks together and the bottom does not lag behind the box.
Then I glue the spine to the back wall. In the same way, you just won’t be able to crush it with books.
After this, you can glue the free ends of the stopper tapes to the box using PVA. This must be done symmetrically on both sides.

We will cover the inner walls of the box. To do this, cut out two long rectangles. For a deep compartment, this rectangle will be 5.2 cm in height, for a shallow one - 2.3 cm.
Glue the paper parts to the fabric, cut them out, and glue the seam allowances. Leave the seam allowance free on one narrow edge.

Carefully glue the part into place. We start from the end where we have a free allowance. We glue the part in stages onto each of the 4 walls. Carefully iron the corners with a stack. If you don't iron it, there will be rounded holes in the corners inside the box.

We make the joint near the front wall.

All that remains is to make rollers for the rings from rolls of white felt.
For your box you will need 6 pieces of felt, 20 cm long and 5.5 cm wide. Roll them into loose rolls and seal them with instant glue. Lay the rolls tightly together and glue them together.


So we have a magnificent handmade cardboard box. You can also show your imagination and design the box the way you want. Below is another DIY box idea in a video tutorial.
To store jewelry and small accessories, you don’t have to buy expensive boxes or organizers. It’s enough to simply make a jewelry box from cardboard with your own hands. Most houses have wrapping, small pieces lace, beads or beads and other materials that can be used to create an original box.
Required materials and tools
Components for manufacturing:
Cardboard box shape
Simple rectangular or square
A do-it-yourself cardboard box for handicrafts is formed from a box and paper straws. First you need to choose a suitable base for the box - for example, a shoe box. It is better to take a base for the bottom approximately the size of an A4 sheet or less, this will make the finishing process easier. 
To form the tubes you will need glue, knitting needles. For weaving, you can use tubes made from ordinary printing paper, waste press and magazines. The finished cardboard box can be painted acrylic paints or leave it as usual.
Use it advantageously colored paper for the printer: it has a wide color palette.
The process of creating a cardboard box with your own hands will not take much time. First, on the outside of the box you need to glue vertical tubes that serve as guides. You need to glue at intervals of 4-6 cm - it all depends on the size of the box. Then the tubes are bent onto the side edges, and then inward.
A compacted cardboard of suitable size is glued to the bottom, which will hide the place where the tubes are attached. Then the tubes are intertwined around the circumference of the base. The lid also folds.
Round box
For needlewomen, a round spool of tape left over is an expensive material. This base can be used in different types handicrafts: decoupage or scrapbooking, decorate with coffee beans, beads, beads, jewelry stones, stick on leather or fabric. To make a box from round cardboard do it yourself, it is recommended to use interlocking cardboard. 
First you need to attach the reel to the cardboard and draw three circles along the inner and two outer diameters. Circles with a smaller diameter are glued together; it is recommended to use Moment glue. Process the finished element sandpaper and glue it to a circle of large diameter, placing it in the central part.
As a result, a lid will be formed that will seal the box tightly.
If there is a need to sand the edges. The box layout is ready. You can decorate it to your taste with different beads and decorative stones using any needlework technique. The lid can be made slightly protruding: you need to enlarge one of the circles with a larger diameter. This will make the box easier to open.
Heart shaped box
This heart-shaped box is perfect as a wrapper for a Valentine's Day surprise. First of all, you need to cut out a heart-shaped element from cardboard - this is the bottom of the box, the dimensions of which will determine the parameters of the box as a whole. Then you need to cut a wide strip of cardboard with teeth on one side. Glue the strip to the bottom. Assemble the other side in the same way. 
You need to glue the two halves of the walls and secure them with paper clips, wait for the glue to dry. Decorate the inside and outside of the box with paper with different textures or patterns. Glue two pieces of fringe to the base - they will act as curtains on which the lid is held. Next, cut out the second heart, this will be the top cover. It needs to be glued to the curtains.
Decorated paper should be glued in the same way. Then you need to decorate the cardboard box in the shape of a heart to your taste. Alternatively, you can glue lace along the contour. Decorate the top with flowers, beads, ribbons, etc.
How to make a lid for a box

Decorate the box with fabric
To decorate a cardboard box with your own hands, you can use not only old press or wallpaper, but also decorate it with fabric. Using the covering it is possible to cover the box with fabric. Such a thing can serve as a separate gift, as well as as an organizer for storing small household items, for example: toys for children, home decor items, sewing supplies.
Materials and accessories that are indispensable for covering the box with fabric:
- Box. When choosing, you are allowed to apply the rules described above for working with press, magazines, and wallpaper.
- The fabric itself will be used to cover the box.
- Specialized glue, tape.
- Sharp scissors.
- You may need an awl, as well as a strong cord (you need to choose the color of the fabric).
In order to do everything accurately and get an excellent result, you need to follow the recommendations:

Soft box made of cardboard and fabric
You can make a box with your own hands from compacted cardboard and cover it with fabric. Make the lid using padding polyester - it will be soft. This box is perfect for storing jewelry and craft materials. The parameters of such a box are 18 cm by 9 cm. Also, you can enter your own size based on what you will use it for.
To create you need:
- thick paper,
- matter,
- filler,
- glue,
- stationery,
- paper tape.
Need to draw on thick paper circle of the required diameter and cut it out. For the sides, cut out rectangles. 
Instructions:
- Use tape and clamps to form a box.
- Cover the box.
- Cover the bottom of the box with fabric.
- To seal the side edges, cut out a rectangle from not very thick cardboard and cover it with fabric.
- Cut out a lid from cardboard and glue the side. Place the padding polyester on the lid and cover it with cloth.
- Use an additional piece of paper and fabric to cover the edge of the lid.
Pincushion box
To create a pincushion box you need:
- White fabric with polka dots.
- Satin ribbon.
- A roll of tape.
- Compacted cardboard.
- Glue gun or regular quality glue.
- Scrapbooking paper.
- Stationery.
- Fillers.
Instructions for making a cardboard pincushion box with your own hands:

The pincushion box is almost ready - all that remains is to decorate:
- Red satin ribbon glue on top, bottom and sides.
- Trace the spool on a white fabric with scarlet polka dots.
- Sew the fabric, leave half unsewn.
- Cut the parts so that the seam does not come apart.
- Turn right side out.
- Insert the cardboard circle into the fabric.
- Put some filler inside.
- Glue the bottom of the fabric with cardboard.
- Add more filler, fold the top of the fabric, and glue it to the cardboard.
In order to decorate the cover of the pincushion, make a bow from ribbon and glue it to the cover.
Master class on creating a box with drawers
You can make an excellent box with retractable drawers with your own hands from available resources, such as cardboard or matchboxes. Regular matchboxes will only hold tiny rings, but if you buy travel or fireplace matches, you can make a full-fledged box.
Required items to create a box:

Formation will take very little time:
- matchboxes, without a layer of sulfur, glued together;
- glue thick cardboard on the outside;
- surfaces that are visible to decorate with wallpaper or film;
- Secure decorative buttons onto fishing line or wire using an awl.
If desired, decorate with beads, drawings, bows.
Box in the shape of a doll sofa
Instructions for making a box in the form of a doll sofa:

Step-by-step instructions for an organizer box
To design an organizer box you must have:
- untreated wooden box;
- velvet fabric;
- high-quality glue;
- tassels.
Tools needed to create an organizer box:

Instructions:
- Treat with stain wooden box, everything that is not absorbed must be wiped off with a rag.
- Using a drill, you need to drill a hole in the center in order to fix the handle
- Cut two pieces of fabric slightly smaller than the bottom and lid of the box. Then you need to cut another piece half the size. Next you need to lay a short piece of fabric on a long one and stitch it to make a pocket. Secure the velvet fabric and organizer inside the lid and at the bottom of the box.
Box in the shape of a book with a hiding place
Instructions for making a hiding box:

Making a box in shabby chic style
Components for making a box:

You need to cut out a pattern from a decoupage napkin, then divide it into layers. Cover the entire area of the pre-made cardboard box with paint. Use a hairdryer to dry and leave until completely dry. Rub the candle on the box in places where there will be abrasions. Be sure to rub the corners with a candle. Cover the box with white acrylic primer and dry.
Rub the box with sandpaper to create a worn effect. Attach the decoupage pattern to the box and apply glue on top. Let it dry and paint the edges of the pattern with your own hands. Dry and varnish.
Ideas for decorating a homemade box
A do-it-yourself cardboard box can be easily decorated with anything; beads, old unnecessary jewelry, decorative stones, buttons, etc. will do. Use your imagination, you can see various options decorating online for inspiration. Don't be afraid to do something of your own, the main thing is that it is done from the heart.
Variations of creation beautiful box There are a lot of houses made from cardboard. Have you decided to do something interesting with your own hands? Choose the option you like and act.
Video: DIY cardboard box
How to make a cardboard box with your own hands, watch the video:
Master class on how to make a cardboard box with your own hands:


