Have you already sewed a robe for your child? And just want to sew?
Why am I talking about a dressing gown?
If you are new to sewing, then sewing homemade clothes for your child is an excellent opportunity to “brush up” your sewing skills. The simplest and most rewarding activity is to sew for the home :).
In general, it is useful to start sewing with the simplest things. Just working out stitches on a piece of fabric is not at all interesting, would you agree? And we, mothers with children, have no time for this.
Therefore, it would be good to sew in such a way that the sewn item can be used, and at the same time, it teaches sewing skills.
And in order to sew children bathrobe ik, you don’t need a lot of time, skill and experience in sewing. Everything is extremely simple there. This can be done by a mother with any sewing experience or even without it.
 Firstly, cutting out a dressing gown is very simple. Often the cut details are simple rectangles that need to be sewn together. Such a unique designer :).
It can be even simpler. The front and back pieces are one-piece with sleeves. And here you only need to sew 2 side seams, edge the edges and sew on the waistband.
There are many options, but they all have one feature and advantage - simplicity! But this does not diminish the beauty :)
The main thing in home clothes is freedom, convenience and comfort. And for this purpose, additional design lines, cutting parts, and the like are contraindicated :)
 Besides the fact that dressing gowns are easy to cut, they are no less easy to sew. There is no point in using parts and assemblies that are difficult to process. Such as: welt pockets, complex collars, and so on.
And the fabrics used for home clothing are inexpensive and very easy to process, mostly cotton: calico, flannel, satin, and so on. Even if it is knitwear, it is also not very difficult to process - cotton, not very stretchy. You just need to choose beautiful colors.
But what will not be superfluous on home clothes are some finishing and decorative details. After all, home clothes should also be beautiful :). For example: patch pockets decorated with applique or braid, ruffles, decorative edging...
And, just on home clothes, you can practice processing such finishing and decorative aspects. Weekend and, especially, elegant clothes require more careful handling. And you can learn this from home clothes, as they can easily “forgive” uneven stitches and other processing flaws :).
In schools during lessons labor education More and more often they require special clothing - a lab coat. And the requirement of teachers “to be sure to wear a robe or apron for the next lesson” is far from their whim, but the official requirement of SanPin (clause 4.2.2821-10), according to which “Students perform all work in workshops and home economics classrooms in special clothing - a robe, an apron, a beret or a headscarf.”
Such clothing should protect against contamination school uniform and ensure the safety of the schoolchild, so the robe should not hinder the child’s movements, and the sleeves should not dangle, like Pierrot’s from the well-known “Golden Key”. It is also very important that it is made from natural fabrics and is easy to wash. The question remains: should you sew a school robe yourself or buy it in a store?
The desire to save money forces many to sew a robe for a schoolchild themselves. But is this method really cheaper than buying a ready-made one? Let's figure it out!
We sew a robe for labor with our own hands
What is needed?
Firstly, good cutting and sewing skills. Even if a novice seamstress can handle an apron for work, experience will be required. Secondly, sewing machine, and a special foot for sewing buttonholes. Thirdly, material or money for its purchase (fabric, accessories, threads, needles, tracing paper or paper, centimeter, pencil, chalk). And, of course, the most valuable thing is free time.
We will sew a classic work robe for boys - blue, from thick diagonal cotton fabric with a density of 210 g/m2, with two pockets, set-in sleeves with cuffs with buttons, a turn-down collar and a tab for waist adjustment.

Instructions on how to sew a lab coat yourself
Step 1. Take measurements.
Step 2. Count the fabric consumption.
Step 3. Prepare equipment and materials.
Step 4. We purchase fabric, accessories, equipment and consumables.
Step 5. Make a drawing and pattern.
Step 6. Cutting out.
Step 7. Let's start sewing.
Step 8. Sew on the fittings.
Step 1. Take measurements
Armed with a measuring tape and a pencil, you need to take the following measurements:
- Child's growth (see Fig. “a”)
- Length from shoulder to knee (product length)
- Chest circumference, size “G” (see Fig. “b”),
- Hip circumference, size “B” (see Fig. “c”)
- Back width (see Fig. “d”)
- Sleeve length
If your boy is of average build and height, then you can use ready-made size charts, but then there is no guarantee that the robe will fit well.
How to take measurements is clearly shown in the figure below.

To determine the sleeve length (“P”), measure the child’s arm from shoulder to phalanx thumb. You also need a separate value called “Width” (“W”), to determine it you need to divide the “hip circumference” value by 2. And the value “Product Length” (“L”), which is equal to the length from the shoulder to the middle of the knee or a little lower. According to GOST requirements, the product must reach the knee.
Step 2. Calculate fabric consumption
For an average schoolchild of 12 years old, 158-164 cm tall and of average build, you will need to buy 2.5 meters of fabric, 80 cm wide. As well as 7-9 buttons. Accordingly, for taller or larger boys, about 3 meters of fabric will be required. There are no ready-made tables for the fabric consumption of children's work robes yet, but on the Internet you can find ready-made tables for the costs of work robes from sizes 44-46.
Step 3. Prepare equipment and materials
To sew the product, you will need a sewing machine equipped with a regular foot and a buttonhole foot. And also with a needle that can sew through thick fabric, otherwise there will be problems - a thin needle can get stuck, skip stitches or simply break. For cuffs, it is advisable to use a double needle, so it will be good if one is available.
In addition to the equipment, to sew a school robe for labor with your own hands you will need:
- Fabric, diagonal, density from 200 g/m2, 100% cotton, dark blue or black.
- Accessories.
- Consumables (needles, threads).
- Tracing paper, chalk and pins for constructing and attaching a pattern to the fabric.
- Scissors.
Step 4. We purchase materials
While every housewife has scissors, not everyone has tracing paper, much less a supply of the necessary fabric, so all the missing materials need to be purchased. You can buy fabric, buttons and other materials at a specialized handicraft store.
To sew a school robe yourself, it is better to use 100% cotton fabrics, a product made from them will be light, will not take up much space in a backpack, will allow the skin to breathe and will be easy to wash. It is advisable to choose blue or black fabric so that the product gets less dirty during use. Since we are sewing a blue robe, we opt for a dark blue Diagonal with a density of 210 g/m2 and a width of at least 80-85 cm.
To help you calculate your budget, here are some prices in Moscow for 2017.
- Fabric “Diagonal”, size 210-220 g/m2 - 220 rubles/1 meter (for a boy 12-13 years old you will need approximately 2.5-3 meters of fabric). The width of the roll, which is very important, should not be less than 80 cm. The cost of the fabric also depends on the country of origin and density. Calico calico according to GOST with a density of 140 g/m2 is also suitable - 200 rubles/1 meter, but the product in this case will turn out to be a little thinner than one sewn from diagonal.
- Accessories, black buttons - 100 RUR/9 pcs. (4-5 for the robe itself, 2 for the cuffs and 1-2 for the strap).
- Strong dark blue threads - 60 RUR.
- Needles - about 100 rubles/10 pcs. You will need one or two of medium thickness, but needles are not sold one at a time. Of course, you can most likely find a suitable needle at home.
- Tracing paper - about 80 rubles.
Step 5. Making a drawing
Having purchased the fabric and all the necessary accessories, you can begin to build a drawing
A pattern for a work robe, like other patterns, is created on tracing paper or other special paper. A sample drawing is presented below this text (see Fig. 1). After construction, cut out the pattern, sign every detail and measurement, and fasten it so as not to lose it.

Pattern of a school robe for labor
The sleeves on the children's work robe are set-in and long. When making a pattern for this part, we match the shoulder seams of the fronts and mark the chest line and the center of the armhole on a separate piece of tracing paper. Then we re-cut the armhole sections. You need to remember an important thing: the edge must be equal to the perimeter of the armhole of the base.
Along the chest line, measure the upper part of the arm +5.5 cm, while shifting the center two cm towards the back. Draw the edge of the sleeve, passing 1.5 cm above the upper marked lines. Slowly and smoothly draws a pencil along the armhole sections to the center along the back and front, rounding to the base at the chest line. Then we measure the length of the sleeve and measure the wrist +5.5 cm. We draw the sections of the sleeve.

Sleeve pattern
Step 6. Let's start cutting
To sew a work robe, a pattern from tracing paper is applied to the fabric and traced with chalk. Typically, natural fabrics are overlocked, but you can simply turn the seams under. We also make seam allowances for the finished drawing; in the case of overlock processing, it is enough to add 0.7 cm; in the case of hems, 1.5 cm is needed; and to process the cuts at the bottom, we make an allowance of 5 cm. Then we carefully cut out all the parts.
You need to cut:
- 1 back piece measuring W*L.
- 1 piece right shelf by adding 8 cm to 1/3 of the width.
- 1 piece of the left shelf, adding 8 cm to 2/3 of the width.
- 2 sleeve parts corresponding to the length of the arm, with a width of 30 cm.
- 2 rectangular pocket pieces (depending on the size of the robe).
- 2 cuff parts 16*6 cm.
- 1 collar piece 40*6 cm.
- 1 piece of belt-strap 13*120 cm.
Step 7. Let's start sewing
Sew the main part and sleeves
To sew a work robe yourself, you need to place the details of the shelves on the back part, aligning the edges of the cut. Using a 1 cm allowance, we sew the shoulder seams. Fold the sleeve piece in half and apply the middle part to the shoulder seam. We attach, making a seam 1 cm wide. We iron the allowances to the sleeve and lay a decorative stitch on the front side. Then we sew from the bottom of the sleeve to the armpits, and move on to the side seams, connecting the parts of the product.
Making cuffs
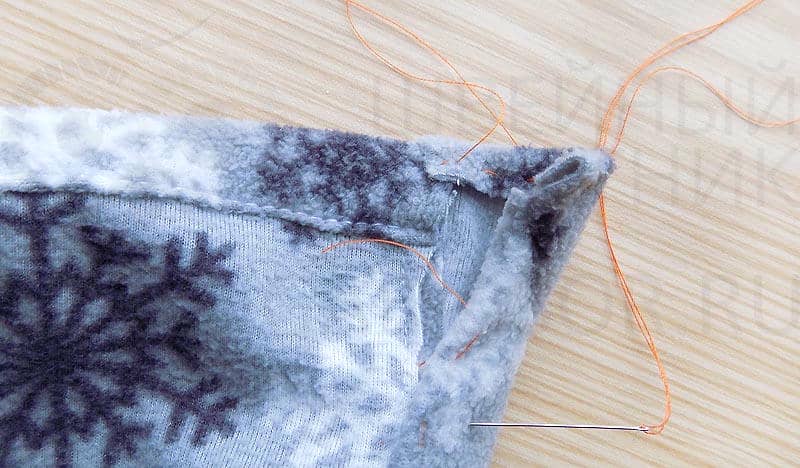
Let's start sewing the cuffs. The lower edge of the sleeve must be gathered, reducing the width to 16 cm. We fold the cuff parts in half lengthwise, and, connecting them to the sleeve, attach them so that 2-3 centimeters remain free.

Sew the collar
Let's start sewing the collar, which is a rather complex process that will be carried out in two stages. We apply the collar with the front side to the wrong side of the robe and sew it. Having turned the seam up, bend the collar along its length and sew it from the wrong side, not forgetting to make a small hem.

Making pockets
Place 2 pockets just above hip level. We make pockets rectangular shape, bending the cuts inward. Then we sew them to the shelves.

We make a strap
Fold the strip of fabric prepared for the belt in half and stitch it. Having unscrewed the resulting “hose”, make a neat stitch on the front side. You can also sew on a button to adjust the waist.

Sew the details
Next, all that remains is to sew a whole work robe from all the parts. First, we connect the shoulder seams of the base and the edgings, then we sew the collar to the neckline and connect the edges with the edgings along the edges. Next, we connect the school robe along the side seams and process the sections. We turn up the bottom of the sleeves and hem and adjust it. We sew a tab into the side seams.
Sew on buttons
To make a fastener, the edges of the shelves need to be folded 3-4 cm and stitched from the inside out. Mark the location for the buttons and loops at equal distances from each other. The first loop and button should be located at the beginning turn-down collar. We make slits for the buttonholes and sew them on the machine, having previously changed the presser foot. Then we sew on the buttons. The same is done with the cuffs.
That's all - your DIY labor robe is ready! Now you know how to sew a work robe yourself.
Is it really economical?
For a boy 12-13 years old, fabric worth about 550 rubles will be required. Accessories, threads and consumables worth about 200 rubles. It’s good to have a sewing machine at home, equipped with a set of special feet. Otherwise, you will have to buy a buttonhole foot, which costs about 250 rubles more. And this does not take into account the purchase of tracing paper and crayons.
As for time costs, for non-professionals it will take at least two hours just to take measurements and cut, and you also need to find fabric, purchase and sew the product itself - this can take more than one day.
In total, to sew a school robe yourself, you will have to spend at least 800 rubles on fabric and the necessary accessories. And if you add the time spent here, the product will turn out “golden”.
Of course, you can save on all points, for example on fabric, and buy thin chintz instead of a thick diagonal, but then the robe will be less wear-resistant and may lose its appearance after the first wash.
Is the game worth the candle? Conclusions.
So is it worth sewing a work robe yourself or not? It’s worth sewing a work robe yourself only if you want to make some exclusive model, you have all the materials for sewing in your house, or you just LOVE to sew. But, if you are driven only by the desire to save money, think several times whether it is worth it, since you will not feel significant savings. And drawing up patterns, cutting, purchasing materials and sewing the product requires a lot of your free time, not to mention the fact that there will also be cash expenses.
What if you buy it? Briefly about robes"Trudovichok"
If you prefer to buy ready product, then we offer to purchase our factory smocks for labor, fine art and chemistry.
Natural quality material
Our work smocks are made from dense 100% cotton fabric, most often from diagonal or high-density calico. Colors Dark blue, Black, White. 
Stylish and comfortable model
The models have 3 pockets, of which 2 patch pockets and 1 chest pocket, in which you can put your phone during a lesson. There is a neat loop so that you can hang the robe on a hook.

Repair kit with each product
New in every product model range 2017 there is a repair kit with 2 buttons and a piece of fabric. Thanks to this, if you lose a button, you can always sew on the same one, but a new one, and also alter the strap and make a robe “at the waist” if the boy is thin. If a hole forms, you can always patch it with a piece of fabric. To receive a robe with a repair kit, be sure to tell the manager about this when confirming your order.

Labor gown “Trudovichok” model 2017
Everything for work in one place
In addition to the work robe, our store offers
- Headwear (hats, berets, bandanas).
- Aprons for work with sleeves.
- Protective glasses.
- Children's size gloves.
- Jigsaws with files.
- Metal rulers.
- Plywood.
- Oilcloth aprons for cooking in different colors.
Therefore, you don’t have to waste time running around different stores; now everything can be purchased in one place.

House robe and jacket
Size 46 (168-92-98) – 48 (168-96-102)
To sew a robe you will need:
Robe 1:
Cotton plush 2.40 m wide 170 cm. Silk lining fabric (polyester) 2.70 m wide 140 cm, non-woven fabric.
Home jacket 2:
Printed silk fabric (polyester) 2.60 m wide 140 cm, 4 buttons.
Cutting the model:
A Shelf - two parts
B Back - one piece with fold
IN Sleeve - two parts
G Hood - two parts (robe 1)
Let's make all the seam and hem allowances.

Procedure for sewing models
Robe1:
Along the front sections of the shelves and the hood, on the reverse side we iron strips of thin non-woven fabric 7 cm wide. We sew down the shoulder sections. We make the middle seam of the hood and sew the hood into the neck.
We sew the sleeves into the open armholes, press the seam allowances towards the front and back and sew them from the front side close to the seam. Using a single stitch, we sew down the side sections and sew the seams of the sleeves. We reinforce the patch pockets on the wrong side with non-woven fabric and sew them cleanly with interlining.
We sew the pockets along the top at a distance of 0.5 cm and sew them to the shelves at the same distance from the edges. Sew down the lining details. We fold the lining with the robe right sides together and sew down the side sections, the front sections of the hood, the bottom sections along the hem line in sections 7 cm long and the bottom sections of the sleeves.
We turn the product inside out, we sweep out the edges and use a machine to hem the bottom of the product and the lining 2 cm wide. We sew the robe with the lining along the seam line where the hood is sewn in. We sew off the shelves and the hood along the front edges, laying 7 lines with a large stitch at intervals of 0.5 cm.
We sew the bottom of the sleeves in the same way. We strengthen the tie belt on the wrong side with non-woven fabric on the width of the fabric, grind it cleanly and sew it off.

Home jacket 2:
We turn the top allowance of each pocket to the wrong side and, tucking the cut, sew it down, we sweep the allowances on the remaining sides to the wrong side, we sew the pockets to the shelves at the edge and at a distance of 0.75 cm. We make shoulder seams. We sew the sleeves into the armholes, iron the seam allowances towards the shelves and back and sew them off from the front side, laying two lines at a time. Using a single stitch, we sew down the side sections and sew the seams of the sleeves. Using a machine, we hem the bottom and sleeves with a width of 2 cm. We reinforce the neck and side strips on the wrong side with non-woven fabric and grind them down. Sweep the allowances along the internal cut onto the wrong side, place the strip with the front side appropriately on the wrong side of the product and grind it. We cut the seam allowances in the curved areas in several places and turn the strip to the front side. We sew the bar along the inner edge, laying two lines, and sew along the outer edge twice with the same interval. According to the markings, we make loops in the longitudinal direction. We fold the tie belt in half lengthwise, grind it cleanly and sew it off.
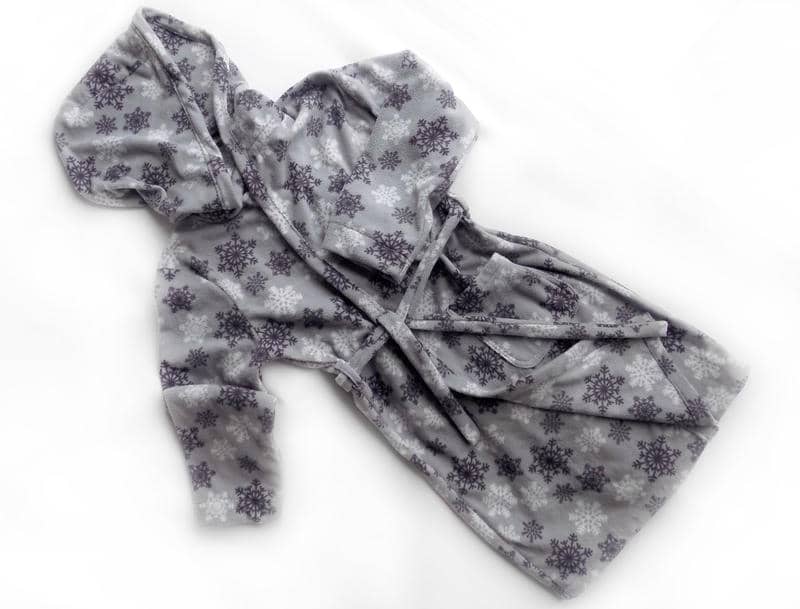
As promised, I’m showing the cut of a children’s robe with set-in sleeves, a wraparound design, and a hood.
Fold the fabric in half, placing the edge towards you.
Align the bottom, mark up the length of the robe + hem allowance for the bottom. We put a mark, Now from this mark down we put the length to the waist, we put a mark. Draw the top line and the waist line, parallel to the bottom line.
We retreat from the edge by the width of the edge, mark a line perpendicular to the bottom line. This is the half skid line. We mark the width of the half-skid from it. For children's dressing gowns, 8-10 cm will be enough. Draw a line in the middle of the shelf, parallel to the half-skid line.
From the line of the middle of the shelf, mark the width of the front. Since this is a robe, you can add more to the looseness of the fit, 3-4 cm. Front width = 1/4 hip circumference + 3-4 cm (as you like). Draw a line for the side seam parallel to the line in the middle of the front.
We measure the same distance from the side seam for the back, put a mark and draw a line for the middle of the back.
We apply the base of the back to the line of the middle of the back, outline it. We apply the shelf to the line of the middle of the shelf. Outline the shelf.
From the top point of the shoulder seam we draw a new cut of the front neckline, it ends 2-3 cm above the waist line, on the half-skid line.

The side seam can not be cut, but made one-piece.
If you want to fit the robe a little, you can design it in the form of a dart on the side seam. The length of the dart below the waist is 10-12 cm.
We move the fabric along the middle line of the back. We cut out the shelf and back.
In this photo, a marker marks the length of the neck cut for the length of the lower cut of the hood.
If we made the robe with a straight side seam, that is, wider than the base, then the sleeve must be added to the width, only at the top, not across the entire width.
The wider the scent, the higher the neckline.
Don't forget about seam allowances.
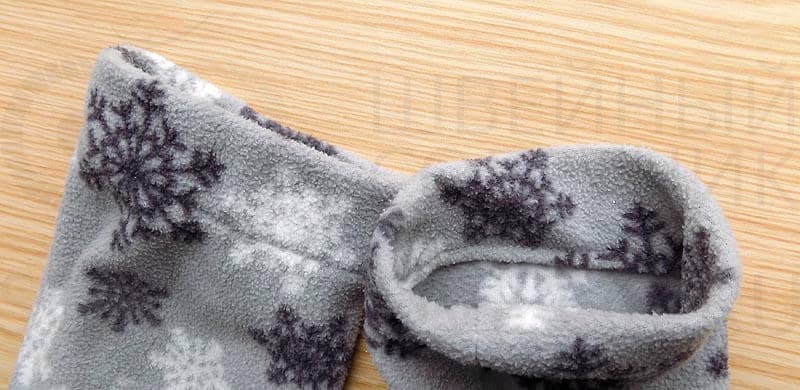
These are the robes I got, according to this pattern.


Good luck to all!!! Waiting for questions.
Everyone needs a robe with a hood! We suggest you sew a robe with a wide hood, a belt and a patch pocket. Our master class will tell you how to build a simple pattern and will show you how to sew a robe with a hood with your own hands.
Robe with a hood: choosing fabric
How to sew a robe with a hood with your own hands? This robe fits freely on the figure, so its cutting and sewing does not require darts or raised seams.Please pay Special attention choice of fabric! Soft and warm fabric will the best option: Cotton terry fabrics, flannel, velvet cotton jersey or cozy fleece. You can also use this pattern to sew a lightweight summer robe made of fine knitwear or silk. To accurately calculate the amount of fabric, construct all the pattern pieces and lay them out, taking into account allowances, on a flat surface. Measure the required size, taking into account the width of the fabric.
Depending on the type of fabric, select the method for processing seam allowances. The easiest way is to use an overlocker. Also, if the fabric is thin enough, you can finish the seam allowances with a double French seam, and if the fabric is too thick, you can use silky bias tape.
Our robe is tied with a belt, its length on average is equal to double the waist circumference plus 20-30 cm. We made one patch pocket on the robe, and you can add another one symmetrically or sew a robe without pockets.
So, let's sew a robe with a hood with your own hands!
Take the following measurements
- Robe length
- The length of the sleeve
- Hip girth
- Bust
- Waist circumference
Front and back
You'll need a T-shirt or other piece of clothing that fits loosely. Copy the neckline and armhole, as well as the shoulder line, onto a piece of paper, first for the back, then for the front.

Place the desired length of the robe down from the top of the shoulder. The width of the front and back below the lower point of the armhole should be 1-2 cm greater than 1/4 of the chest circumference. Compare the circumferences of the chest, waist and hips. If the waist and hip circumferences are larger than the chest circumference, expand the width of the back and front by the required number of centimeters.

Add 7-10 cm in the center of the front and draw a new one vertical line.
Sleeve
Measure the length of the armhole on the robe pattern. Calculate the height of the edging OO1 by dividing the length of the armhole by 3 and minus 5 cm, as well as the length of the auxiliary lines OP and OP1: half the length of the armhole according to the pattern.
From point O, set the height of the edge down and place point O1. Through O1 draw a horizontal line PP1.
From point O to the left and right, set aside the length of the auxiliary line of the sleeve edge OP and OP1. Divide the OP in half and set aside 1.5 cm from the division point upward. Divide OP1 into 3 equal parts and set it up from the first division point 1 cm down from the third division point - 0.5 cm. Draw a smooth line for the sleeve hem.
From point O, move the length of the sleeve down.
Hood
To create a hood pattern, take the following measurements:
- Head circumference
- Head height from shoulder to crown
Place point A in the lower left corner and draw a horizontal line from it to the right and a vertical line up.
Set aside 4 cm from point A and place point A1. To the right of A1, set aside 1 cm and place point A2.
Using the robe pattern, measure the length of the back and front neckline and add the resulting values.
From point A2, set aside the resulting amount + 3 cm in a straight line to a horizontal line from point A and place point C1.
From point A2, set aside the length of the back neck +1.5 cm and place point D. From it, set off the length of the dart at a right angle - 10 cm.
From point D on both sides, set aside 1.5 cm and connect these points with the height of the dart.
Smoothly bend section A2C1 upward.
From point A1, set the height of the head up according to the measurement + 3-5 cm (the more, the longer the edge of the hood will be) and place point B.
From point B, set aside 1/3 of the head circumference to the right according to the measurement + 4-9 cm (the more, the wider the hood will be).
From point C downwards, set aside 1-2 cm and through this point form the upper edge of the hood, as shown in the diagram.
Also connect this point to point C1 with a smooth concave line.
Uncover
The allowance for the bottom of the robe and sleeves is 3-4 cm, for the remaining seams - 1 cm.
- Front part - 2 pieces, mirrored
- Back part - 1 piece with a fold in the center or 2 mirrored
- Hood - 2 pieces, mirrored
- Belt - a strip 6 cm wide and the required length
- Free-form pocket with 3 cm top allowance
- The facing of the robe is 3 cm wide and a length equal to double the length of the front plus double the length of the hood plus 5 cm. If it is not possible to cut out a single facing, sew several strips into one.
- Two belt loops 4x6 cm
Progress
Fold the waistband piece in half lengthwise, right sides facing in. Sew along all sides, leaving an opening of about 5cm along the long side of the waistband. Turn the entire belt through the hole.


Fold the top edge of the pocket 5 mm, then 2 cm to the wrong side and baste. Stitch.
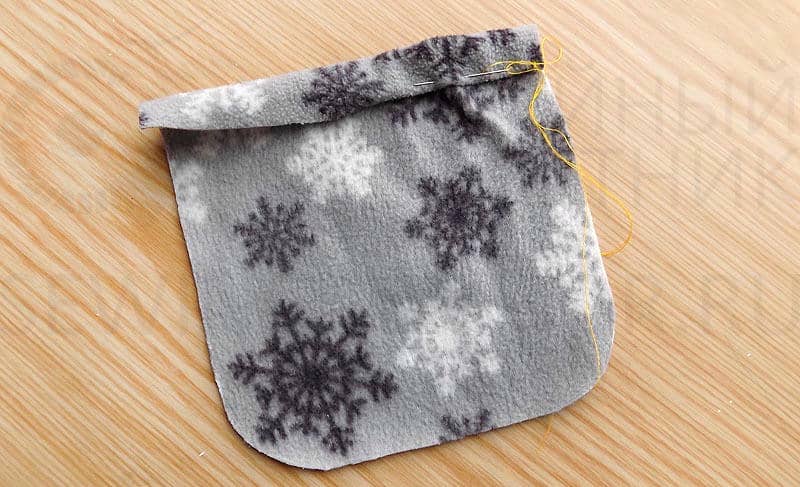
Fold the edges of the pocket 5 mm inward and baste. Baste onto the front half at the desired height.
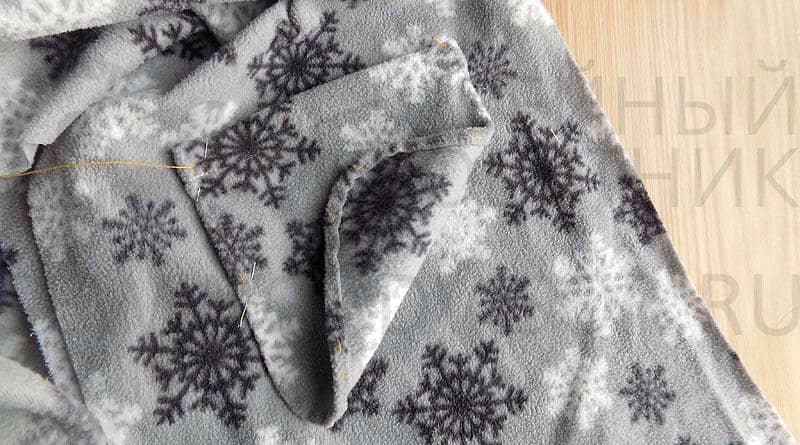

Sew the hood, placing the pieces right sides together. Process the allowances.

Sew the shoulder seams, placing the back and front pieces right sides together. Process the allowances.

Sew the hood to the neck line. Wrap the seam allowance with bias tape from a matching fabric or scrap of the main fabric and baste. Stitch.

Sew the sleeves into the armholes, matching the top of the sleeve cap and the shoulder seam. Process the allowances

Sew the side seam of the robe and the side seam of the sleeve, aligning the armhole points. Process the allowances.

Fold the bottom of the robe twice and stitch. Sew the facing along the entire edge of the front halves of the robe and hood. Fold the edge of the facing, covering the folded bottom of the robe, and baste.
Fold the edge along the entire length of the facing, fold it in half and baste the seam allowances onto the edge.


Fold the belt loop pieces inward toward the middle and in half again. Sew the belt loops to the side seams at waist level, folding the edges at the top and bottom.