Beautiful embroidery “looks” only if it is correctly framed. Unfortunately, many needlewomen confine themselves to embroidering a pattern or drawing they like ... and put off their work in a distant drawer, explaining that the services of a baguette workshop are too expensive. Indeed, few can afford to turn to masters. But embroidery in an inexpensive frame with a mat can be done with your own hands - quite quickly and at a low cost. This method may be suitable for you.
So, to issue an embroidery in a frame with a mat, you will need:
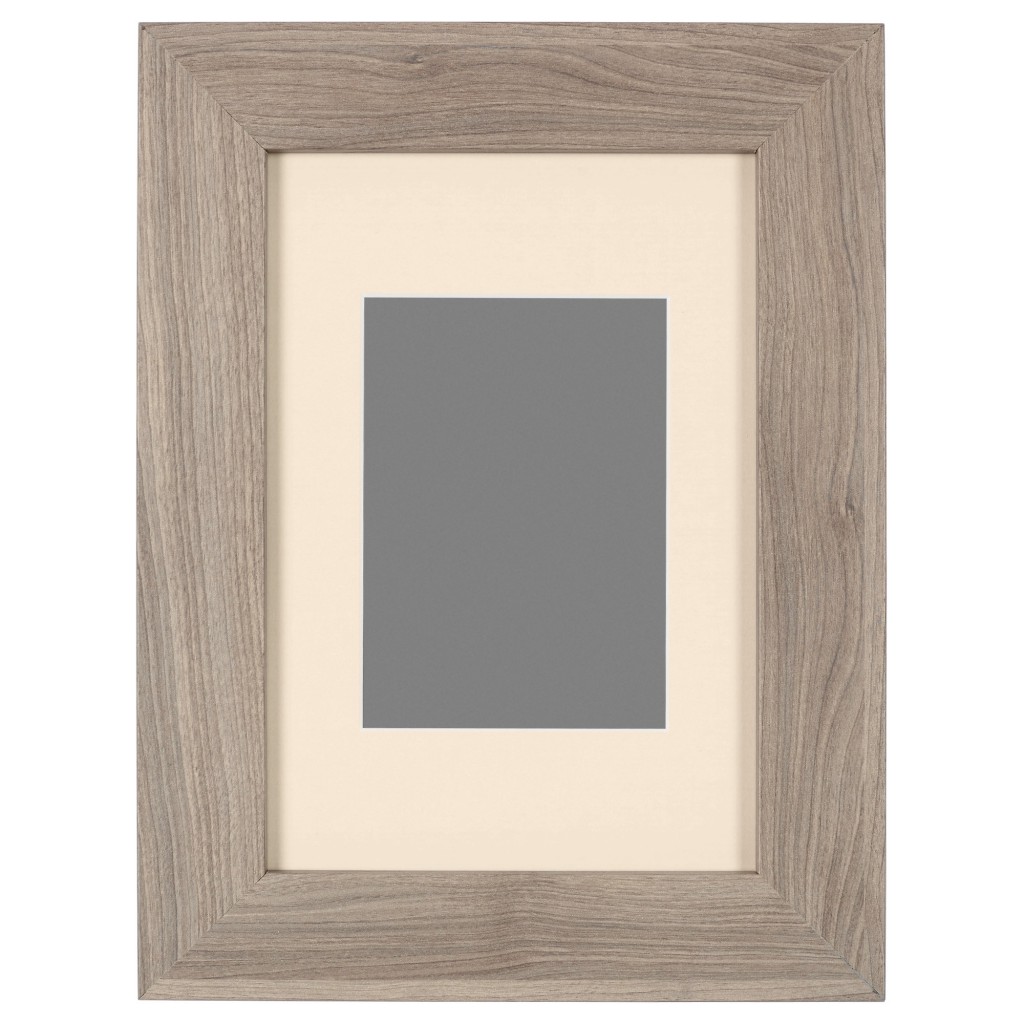
ready-made photo frame, suitable in size to the design of the embroidered motif;
velvet paper for a passe-partout;
strong thread;
breadboard knife;
a simple pencil;

How to make your own embroidery: master class
Prepare the embroidery. To do this, carefully steam it with the iron on the wrong side.
Disassemble the photo frame into its components: glass, base, leaflet with a picture - it will also be useful to us, as a sample of the required size. I had a simple untreated wooden frame, so I pre-painted it twice with yellow acrylic paint: it is assumed that this measure will allow the frame to live longer than wooden unprocessed products live under ordinary conditions.
We leave the base in front of us, put embroidery on it, estimating its most advantageous position, and thread the thread into the needle.


We grab the embroidery corner with a needle and, throwing the thread to the wrong side, pick up the corner of the canvas from the opposite side with the needle.


This procedure takes a lot of threads, so when it comes time to change the thread - make a few tacks and thread a new thread. Thus, picking up the edge of the canvas on one side and the other, go to the end of the row. It is necessary to flash with tension, but make sure that the picture does not distort, and the canvas does not go in a wave. If you steamed the embroidery well, then you won’t have to pull the fabric hard.


Then we stretch the fabric to the base perpendicular to the first firmware.


This was the most time-consuming part of the job.
Now take a leaflet with a picture from our photo frame and put it on our embroidery. If your fabric, like mine, is damaged on the top and bottom by stamps that are not suitable for prying eyes, on this sheet with a pencil you will outline the acceptable borders of the window in the mat.

Align this window with a ruler and cut it. It is better to spend a minute creating a sample than to redo the entire mat.


Everything suited me, so I put the sample mat on the wrong side of the velvet paper and drew the rectangle I needed — drew it — cut it into a ruler using a breadboard knife, and cut out a rectangle of the same size from thick cardboard — it’s useful to us close the threads of the tension of the embroidered motif on the base.

Using a passepartout sample, I marked with dots the corners of the window that would need to be cut, and connected them with a pencil under the ruler, with some pressure. I decided to make the rounded edges of the mat so that the edges of the slices would not shine. Therefore, we only draw a frame with a pencil!

We will cut through the window using a breadboard knife and a ruler. We attach the ruler diagonally and cut the window across the passepartout crosswise.

We bend the edges inward, and cut off the excess.

Now you know how to embroider the frame with the mat, and now it's time to put the whole structure together: put the glass in the frame, then put the mat (we iron the folds well, but carefully so as not to damage the pile of velvet paper), fixed on top basis of embroidery, and then - a sheet of cardboard, which will close the thread of tension.

As you can see, embroidery design is quite simple, but, as practice shows, the embroidered portrait of Princess Jasmine can be a wonderful gift for a five-year-old girl who is passionate about Disney princesses.


Eva Kashio specially for the site
A few weeks, maybe months, and your embroidery is ready. But embroidering the plot is half the battle, as embroidery design is also of great importance. From how you select the frame for embroidery, the mat, how to design your work, it will depend on what impression the embroidery will leave.
Baguette workshop services are not cheap. But you can create a decent decoration for your embroidery yourself. In this article, we will look at several ways to design your own embroidery and do it professionally and accurately.
Let's start with the very basics - how to correctly insert embroidery in a frame.
How to gently stretch embroidery on a stretcher
First you need to determine the center of embroidery and the substrate. Draw the center vertical and horizontal lines on the subframe. Define these lines on the embroidery in the same way. Now align these two centers and secure with the pins on the front side. This technology will help to avoid distortion of the canvas when pulling on the substrate.
Check if you are happy with how the embroidery is arranged, if there are any distortions. Only after that (combining and fixing the centers) cut off the excess canvas, leaving around the entire perimeter 3-4 cm. Process the edges of the canvas:

Starting from the center, moving to the outer corners, pull the canvas onto the subframe and secure it with pins, sticking them all the way to the end into the subframe at a distance of about one centimeter. To avoid wrinkles, wrinkles on the canvas, when securing with a pin, select the canvas thread as a guide, and make sure that it is strictly perpendicular to you.
After fixing the canvas around the entire perimeter of the subframe, carefully tuck and sew the corner folds of the canvas:


Glue the edges of the canvas around the perimeter to the subframe on double-sided adhesive tape.

This method of fixing the canvas on the substrate will avoid the appearance of distortions, wrinkles on the embroidery, which over time often occur on the loose canvas.
Passepartout for embroidery
Now we will consider two options for creating a textile passe-partout for embroidery.
Option One:
Iron the canvas with the embroidery on the wrong side:

Decide what width your embroidery will be in relation to the embroidery itself. On the wrong side of the canvas, mark its width:


Around the resulting contour of the passe-partout draw another rectangle about 4 cm wide.

Cut the corners of a large rectangle. Here's what you should get:


Make a copy of the wrong side of the canvas - this will be the pattern for the mat:

Put the tracing paper on the copy and reshoot the outline of the embroidery itself and the outer edge:

Place the resulting pattern on the fabric for the mat:

Trim the fabric along the outer edge and cut along the outline of the embroidery inside:


Place the resulting mat on the front side of the canvas:

Secure the fabric with pins:

Sew the fabric and canvas gently around the embroidery:

Here's what the inside looks like:

Place the subframe on the wrong side:


Wrap the edges of the fabric on a stretcher and sew each corner of the bevel:

Fix the edges of the fabric on the subframe using double-sided adhesive tape:

Insert into the frame:


Yes, the process is long and rather laborious, but it allows you to achieve maximum accuracy in the design of the work. And the result, no doubt, is worth it.
Option Two:
This method of manufacturing a passe-partout from fabric is particularly suitable for monochrome embroidery.
As a basis for a passe-partout you can use a dense cardboard, a frame from a chipboard or plastic.

Glue the inside of the fabric and one side of the cardboard with glue. Move the cardboard onto the fabric. Be sure to position it in the center of the piece of fabric, leaving equal parts on each side. Press the cardboard firmly against the fabric. Check the front of the fabric to make sure all air bubbles exit:

Carefully trim the corners of the fabric, leaving a small allowance at the corners of the cardboard a few millimeters:


Glue the edges of the fabric and cardboard with glue. Pull the fabric over the cardboard starting from the area near the corner. Iron the fabric with your hand with force so that no air bubbles remain:

Cut the inside of the fabric diagonally in the shape of the letter X, starting at the corners. Cut a rectangle, leaving 2-3 cm of fabric on each side:


We glue both surfaces with glue, and pull the fabric onto the cardboard, starting from the corners. It is worth paying attention to the external corners - coat them additionally with glue and smooth with a finger:


Leave the finished mat for drying completely:

This method of creating a passe-partout involves a wide variety of color solutions, you just need to decide on the fabric pattern.

Video - “How to make an embroidery in a passe-partout”
Video - “Self-made embroidery in a frame with a mat”
The hoop is like a frame for embroidery
 Using a hoop as a frame for embroidery is not a new idea, but rather has already become a classic. And this is understandable, because the finished work thus acquires an original and very attractive look.
But using the hoop as a frame requires compliance with its subtleties. In order for the embroidery to be properly framed, it is necessary to correctly attach the canvas to the hoop. You can’t just insert the embroidery into the hoop, tighten it harder, and trim the excess canvas along the edge of the hoop. And that's why:
- over time, the canvas tension in the hoop weakens, and if the edge is cut close to the hoop, then pulling up the embroidery will no longer work;
- embroidery in a hoop, unlike an embroidered picture in a frame under glass, periodically requires washing; insert the embroidery back into the hoop with such an edge vryatli will work.
Consider several ways to fix the embroidery in the hoop.
Option One:
This method involves fixing the canvas in the hoop "not tightly", if necessary, embroidery can be easily removed from the hoop at any time.

Trim the excess canvas around the hoop, leaving a strip slightly smaller than the hoop radius (for example, if the hoop diameter is 10cm, you need to leave about 4cm):

Having retreated about 1 cm from the edge of the canvas, we sew in a circle with a seam “forward needle”. Do not over tighten the knot:


Here's what you should get:

Now grasp both ends of the thread and pull the fabric evenly:

If you do everything carefully, the frills will converge in the center and will be flat (they will not be bristling):

We tie a knot at the end, and everything is ready:

Option Two:
This method no longer involves removing embroidery from the hoop, but at the same time allows you to achieve maximum accuracy when embroidering.
Additionally, you will need a piece of cotton fabric that matches the size of the embroidery.

We place additional fabric on the inner hoop, put a canvas with embroidery on top, and fix everything on top with the outer hoop:

Fine-tune all the folds on both fabrics, align the embroidery, and finally tighten the hoop:

We trim the inner lining fabric flush with the inner hoop. Decide if there is a need to trim the canvas itself - it should be wide enough to cover the hoop width:

Coat the inner hoop with glue:

Along the entire perimeter we press the canvas to the hoop:

Here is the result:


Hoop decor
If you use a hoop as a frame for embroidery, then like any other frame they can also be decorated. And here the same thing, a lot of ideas, here are a few of them:
Braid decor


In this case, the braid is simply glued on the wrong side along the edge of the hoop:

Ribbon Decor:


Cloth Decor:
This method is not only original, but also practical, - the fabric that wraps the hoop protects the canvas from damage when stretching the embroidery. In addition, the canvas retains tension longer and does not sag over time.


Crochet hoop:


In the variant proposed above, an outer hoop is tied. But there is another original way, in which, on the contrary, the inner hoop is tied:


We hope that the ideas and workshops on embroidery design turned out to be useful to you. Share your comments and ideas.
We wish you creative success!
Embroidery is the oldest art of all time. It came to us from a distant era of the primitive culture of people. Nowadays, there are many types of embroidery, whether cross-stitch or stitch, also embroider with ribbons and beads. The embroidery process itself is simple, especially since now kits are sold in stores, in which there are ready-made color schemes, and even threads with needles. However, despite the fact that everything is described in such sets, right up to how to align the embroidery or fix the thread without a knot, there is no main thing - how to insert the finished work into the frame.
Any master will want to hang his work on his wall or give it to someone. But most often, embroiderers do not know how to beautifully frame their work.
This article presents several ways to design work.

How to insert embroidery in a frame: preparatory stage
If the work got dirty during the embroidery process, it needs to be washed in soap and water, because it will be practically impossible to do this after framed. Next, put the non-woven from the inside and iron the picture. Thus, the work will be neat and durable. It is also worth paying attention that the color of the non-woven fabric should match the color of the product. You can also use thick cardboard as a substrate.
The frame needs to be purchased to fit the size of the product itself and it is desirable that it be with glass. Over time, the threads can lose their brightness, and the work will need to be washed often, and glass will protect the product well from dust.
In terms of tone and design, the frame should be in harmony with the work itself, but this is a personal matter. It can be classic, painted in wood or gold. Although in specialized stores you can find a huge selection of frames or baguettes.
Also in the work you can use the mat. This is a small frame in the center of which a hole is cut to the size of the embroidery. For passe partout you can use plain cardboard, thick paper or plain wallpaper. She focuses the attention of the viewer on the product. If we talk about color, then the mat must be suitable for the base color of the product itself or for the color of the frame.

Now let's look at the most famous ways to insert embroidery into a frame. When all the preparatory work is done, the product is washed and ironed, the frame is prepared, you can proceed to the main part of the work.
Stretching and securing embroidery with push pins
Plywood or chipboard is taken as the basis and, tightly pulling the embroidery, fix it with buttons. This option is not very good, because over time, the embroidery can simply “parted” and sag on the buttons.
Stitching embroidery with threads
This design method is the most common. For work, you also need a sheet of plywood or particleboard. It is necessary to pull the product onto the sheet, leaving the free edges of the canvas about 1-2 cm around the perimeter to fix the product.
Secure the embroidery with pins so that it does not slip. On the back of the substrate, the left and right edges must be sewn with large stitches. We carry out the same manipulations with the upper and lower edges. When working, be sure to look at the embroidery on the front side.
But this method of pulling is not good enough, because even when fixing the embroidery, at the end of the work it can still shift.

The method of stretching embroidery using double-sided tape
For work, double-sided or window tape is required.
The design is universal in that the whole process is carried out on the front side, and this provides the opportunity to see all the shortcomings. The embroidery can be attached to the tape several times - it will still hold it tight. When working with window tape, you just need to replace the tape if you can’t immediately attach it.
This method is very easy for beginners, as all the flaws in the work are visible, no markup is required. You can use pieces of adhesive tape repeatedly, only you need to ensure that it is under the passport. Double-sided tape is glued under the passport from the front side around the perimeter. At the end, the embroidery is pulled and pasted. The work is ready!

Making the product using the “stitching” method
This method is actually not easy. It will take man's power. Having taken a particleboard sheet or plywood in size, it is necessary to drill small holes around the perimeter at a distance of 1 cm or use an awl. A thread through these holes needs to “stitch” the embroidery.
First you need to fix the corners of the work so that the embroidery does not slip. The product must be stitched “forward with a needle”. In the future, such work will be firmly fixed and will last a long time.
As practice has shown, this method is the fastest and most reliable. After the embroidery is fixed, it remains to collect the work - put the glass and the frame down, and embroidery itself on the substrate and clamp this structure on the sides with metal clips.
After all the work done, the finished decorated product can be placed on the wall or surprise relatives and friends with a gift. But it doesn’t matter at all, because such a long and laborious work will please everyone!
Video on the topic of the article
Embroidery - The oldest type of needlework. But it’s not enough to embroider the picture itself, it’s still necessary to make it become an excellent decoration for the home.
Making embroidery in a frame with your own hands is no less interesting than the process of creating a handmade picture.
Features of the frame for embroidery
The general style of housing is one of the most important factors that should be followed in such situations. A few other important recommendations will not be superfluous.
- The thematic focus must be taken into account. In wooden frames, still lifes, animals, historical plots look perfect. Plastic products must be made for marine images. Additionally, you can decorate with shells. A cardboard frame is a good addition to children's drawings.
- You should not forget about the shape of the product. It depends on the embroidery directly. It is good if the silhouette will completely repeat the composition. The shape of the frame is allowed round, square, rectangular, oval.
- It is important to choose the right size of the frame during design. An indent of more than two centimeters is a good solution for small compositions. The edges of the image should not touch the frame.
- The color scheme should match the shades prevailing in the image itself.

Passepartout
You need to pull the embroidery on the mat with your own hands before placing it in the frame. It is enough to use a simple cardboard and cut it to fit the picture. Face down lay the embroidery on a flat surface. The base of cardboard is placed in the center.
Bend the edges of the embroidery with your own hands to the base. We tighten the opposite edges of the fabric so that the material lies flat on the surface of the base. It remains to place the product inside the frame. From the inside, we cover everything with a plywood sheet. Small cloves will help secure the entire structure. Accuracy and care are required, otherwise the mat may be damaged.

Sometimes cardboard is left visible. For the whole composition, it becomes the background. In this case, use colored cardboard. The silhouette of the size of the picture is cut out with our own hands in the middle of the cardboard base. On top of the embroidery itself, we lay the resulting cardboard frame.

Mandatory nuances
The paintings in the frame are located strictly in the center, avoid distortions in any direction.
A good option would be to use glass to decorate the frame with your own hands. It protects the product from dust, dirt. Glass will help preserve the richness of colors from fading.

It is important to leave a small distance between the picture and the glass so that the embroidered image does not deform.

Glue wood frame, chipboard
The joining of curly profiles in the "mustache" is one of the most important stages that need to be done carefully.
- The edges of the part are cut with their own hands at an angle of 45 degrees.
- It is necessary to use special clamps, then the product will become more durable.

There are several ways to glue wooden frames.
- Corner connection with clamps. The method is not without certain drawbacks. Not always and not everyone has the right tool.
- The second option is not widespread. Apply a tape of rubber in order to connect the parts. The tape itself is tied with a loop. Some skills are required to successfully complete these steps. It is important to observe the accuracy of the angle when filing the ends.

Detailed description
Thick plywood or chipboard - An ideal option that will help to make and design a flat area without deviations in size and geometry. We use self-tapping screws to fix the supporting bars, they are fixed along the edges.
Relative to each other, the bars are located at an angle of 90 degrees. A square made of metal will help to achieve maximum accuracy in operation.

Next, take the prepared parts, saw off the ends. We apply glue on them corresponding to the workpiece, most often it is PVA carpentry glue. By connecting the corners of the frame, we tighten the structure with clamps. The corners of the frames should tighten tightly, without shifting in different directions, watch the horizontal structure. Clamps are removed after the glue has completely dried, it usually takes about a day.

Rubber band and rope
We create a base with four bars, they play the role of the base. In the previous case, we only needed two such details.
A ribbon of rubber from the inside will pull together the corners of the frame. Use of a rope or rope is allowed.

Pulling the corners with one bolt is a classic option. On 4 rails we install thrust angles. Creating the construction itself for pulling together is the most difficult moment. This design can be used later, when other frames will be created.

Skirting frame
It is easy to do without expensive materials and special skills if you need to draw up such an option.
For work you will need:
- Ruler with marker.
- Substance with coloring effect.
- Miter box.
- Stationery knife.
- Adhesive solution. Without it, all the details cannot be glued together. A great option is the material with which the ceiling tiles are glued.
- Skirting board. Polystyrene or foam.

It is necessary to carefully measure the embroidery itself to make a frame that is perfect in size. The ruler and marker will help to put the necessary sizes on work surfaces. It is necessary to put all the parts together before you start gluing. The ends are cut at an angle of 45 degrees, the miter box provides maximum accuracy.

What other options are available?
Appealing to a baguette workshop is the most affordable way, but not at cost. It is better to ask in advance how the workers pull the embroidery on the substrate. A stretch from the inside out with threads is the most reliable option. The embroidery is placed on a substrate in a suitable color. The edges are bent to the back. The fabric is pulled evenly, due to which the product is durable. The design is luxurious.
Most often, workshops prefer to fix the fabric with double-sided tape, since the method described above is quite expensive and time-consuming. From the point of view of tissue safety, the option is not the worst. The main thing is to choose a high-quality adhesive tape that leaves no residue.

In good workshops they offer to cover the embroideries with glass. But pictures embroidered with beads are not worth closing. Then the attractive and juicy appearance will be lost. Passepartout should have the same tone as the whole embroidery. Sometimes they make double passepartout to emphasize certain details.
The color of the baguette should be combined not only with the picture, but also with the surrounding interior.

You can purchase ready-made frames. Actual for those who want to follow the path of least resistance. You can be puzzled by the choice of passepartout in stores, if necessary.
Video gallery
Embroidery is a fascinating and, most often, not difficult task. In every picture, from the smallest to a large-scale work of art, a man puts a piece of his soul, so each work is valuable in its own way. However, to decorate your house with a finished picture or give it to someone else, just finishing the embroidery is not enough. Need a frame, but not everyone knows how to design it. From this article you will learn how to insert your own made embroidery into a frame with your own hands quickly and easily.
How to insert embroidery in a frame with preparation in a master class
1) Before you insert the picture into the frame, you need to iron it with the iron from the wrong side.
2) If there is dirt on the fabric, it is worth washing the work with baby soap in cool water.
3) Then you need to choose the fabric for the substrate. You can take ordinary cardboard. If you wish, you can glue the embroidery using adhesive non-woven, choosing a color that matches the main color of the embroidery. It is glued with an iron (you need to put it under the embroidery and iron it).
What should be the perfect frame for your work?
In order for the picture to look organically, it is necessary to take into account the subject of the work. Wooden frames are well suited for still lifes, animal images, historical plots. For sea scenes, a plastic frame is more suitable, you can decorate it with shells.
The shape of the frame is just as important. Frames that repeat the silhouettes of images look good. In addition, the frames can be square, rectangular, round or oval.
Then you need to choose the size. In any case, the frame should not be in contact with the edges of the image. For small compositions, a large indent (more than 2 cm) will be appropriate.
The color must match the shades of the image or you can choose the classic version, for example, in the tone of natural wood or gold.
It is advisable to use a frame with glass, so the picture will be much easier to care for, and the colors of the threads will not fade over time. The main thing is that there is an indent between the glass and the canvas. The exceptions are paintings embroidered with beads and glass beads; they will not look under glass.
Passepartout is not an obligatory element, but in many cases it can be used to focus attention on the picture and smooth out the imperfections in the color, shape and size of the frame if you have not found a perfect one. The tone of the mat should be slightly lighter than the frame or as close as possible to the main tone of the embroidery.
How can I stretch the embroidery:- The embroidery can be stretched and fixed with the usual buttons on a piece of plywood or chipboard.
- You can stretch the embroidery with glue. Glue can only be applied along the contour of the embroidery! Otherwise, you can just ruin the job.
- You can stretch the embroidery using threads. A minimum of 2-3 cm of matter should remain behind. The embroidery does not need to be too stretched, and it is also important to monitor the displacements by turning to the front side.
- You can fix the embroidery with double-sided tape. This is the easiest way and it is convenient in that you can redo the mount several times without damaging anything.
- Double-sided tape can fix the work on the reverse side.
- You can fix the embroidery with a stitch. In a piece of plywood or chipboard, you first need to drill or stitch holes at a distance of about 1 cm. Next, stitch it with a “needle forward” seam.
We make a frame for embroidery from the hoop quickly and simply
An ordinary hoop can be turned into an original frame in the Provence style.

- embroidery
- regular round or oval plastic hoop
- scissors
- thread and needle
- pins
- fabric or canvas
We embroider the embroidery frame, placing an additional thin fabric (you can also without it).
Cut the fabric or canvas 1.5-2 cm from the edge of the hoop. Along the edge of the fabric, we pass the seam forward with a needle and tighten the seam. We mask the wrapped fabric from the inside, sewing a piece of fabric in size and form of work with a hidden seam. We decorate the frame with beads or rhinestones at will (we glue the “moment” or PVA glue).
How to make embroidery in a baguette with your own hands?
This design may seem complicated and expensive, but it is not.

- embroidery
- photo Frame
- transparent adhesive moment (or double-sided tape)
- ruler and pencil
- paper
- scissors
- floral felt or fabric
The photo frame needs to be disassembled and glued on the cardboard embroidery with glue or tape (only the border of the canvas is glued). To get the mats, we cut out the frame from the paper to fit the size of the embroidery. Next, we cut out frames from felt or fabric 1.5-2 cm larger than paper. We glue them, bend the indentation under the paper. Glue on the base with embroidery.

It is better to use felt in several layers, as it is thin, and multi-layering favorably emphasizes the volume.
It is possible to make a passport simply from bright cardboard or velvet paper.
Put glass on top and insert into the frame. The frame can be varnished or beaded.
Video on the topic of the article
For those who want to learn new original ideas for designing work, we present a selection of video master classes: